Ledger Guide
Learn how to view, filter, and manage the Ledger in CA Cloud Desk—track client-wise transactions, add invoices or receipts, and share or download ledger details. Use the Video Tutorial link in the left sidebar to jump to the video, or download the PDF guide below.
Overview
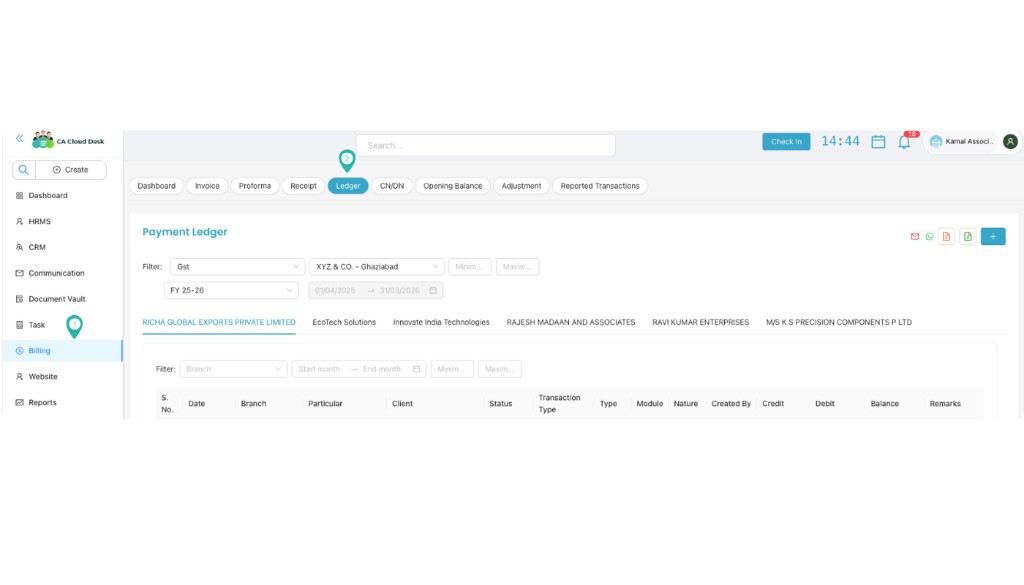
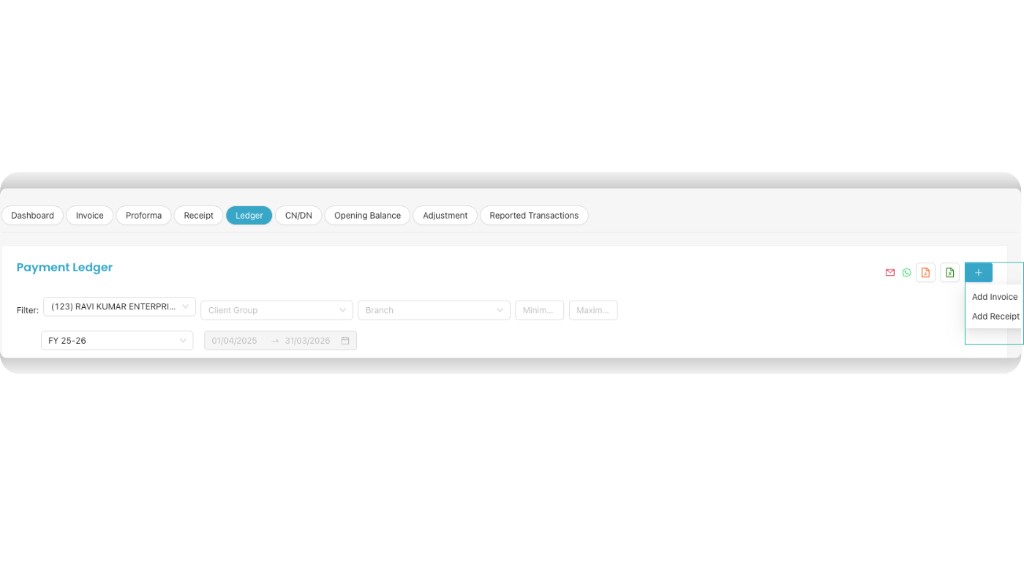
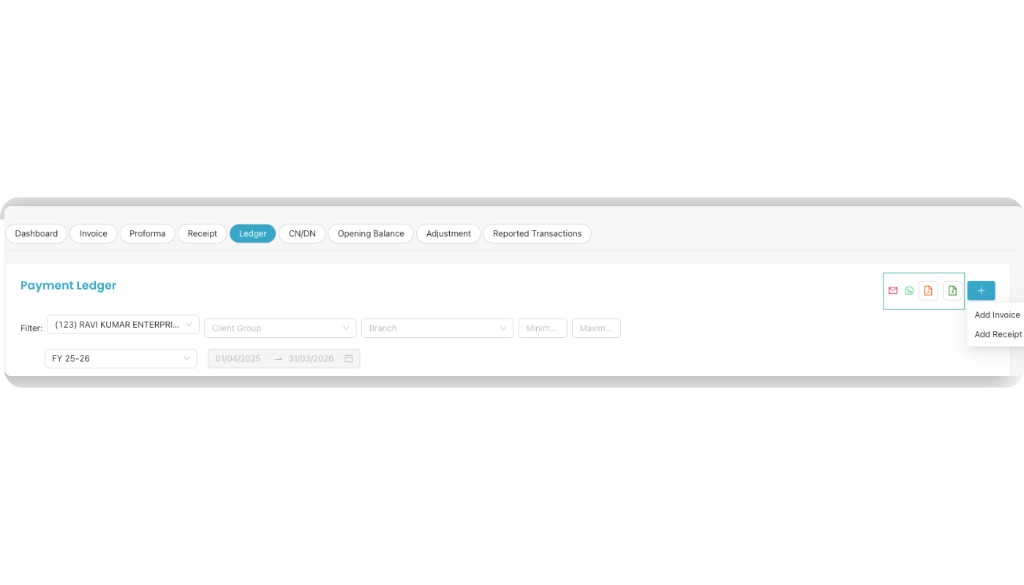
The Ledger in CA Cloud Desk lets you view and analyze all billing transactions in one place. You can filter by client, branch, financial year, date range, and amount. From the Ledger screen, you can quickly add new invoices or receipts, and share or download ledger details via Email, WhatsApp, PDF, or Excel.
1 Open Billing Module
From the CA CloudDesk left navigation menu, go to BILLING and select Ledger to start the process.
2 Filter Ledger Details
You can view and analyze ledger details using the following filters:
Client
- View ledger for a specific client.
Client Group
- Filter ledger by client group.
Branch
- View branch-wise ledger records.
Amount Range (Min / Max)
- Filter transactions based on amount.
Financial Year
- Select the required financial year.
Date Range
- View ledger entries between specific dates.
3 Add Invoice or Receipt
Click on the ➕ (Plus) icon to directly add a new Invoice or create a Receipt from the Ledger screen.
4 Share & Download Ledger
You can share ledger details via Email or WhatsApp and also download the ledger in PDF or Excel format for reporting and record-keeping.
Video Tutorial
Watch the video below for a step-by-step walkthrough of the Ledger in CA Cloud Desk.
src (e.g. from YouTube or Vimeo).Download PDF guide for offline reference.