Customer Document
Use the Customer Document module to give your clients access to specific documents and folders. You can grant access per document or folder, or use Master Access so the client sees everything. Clients can also share their own documents with you.
Overview
After you log in to CA Cloud Desk, you manage client document access from Document Vault → Customer Document. There you choose a customer, pick which documents or folders they can see, and turn on Client Access (or Master Access) so they appear on the client’s portal. Clients open Documents in their portal to view and download what you shared; they can also upload and share their own files with you.
Open Customer Document
- Log in to CA Cloud Desk.
- From the dashboard, select Document Vault from the left panel.
- On the Document Vault screen, select Customer Document from the options shown.
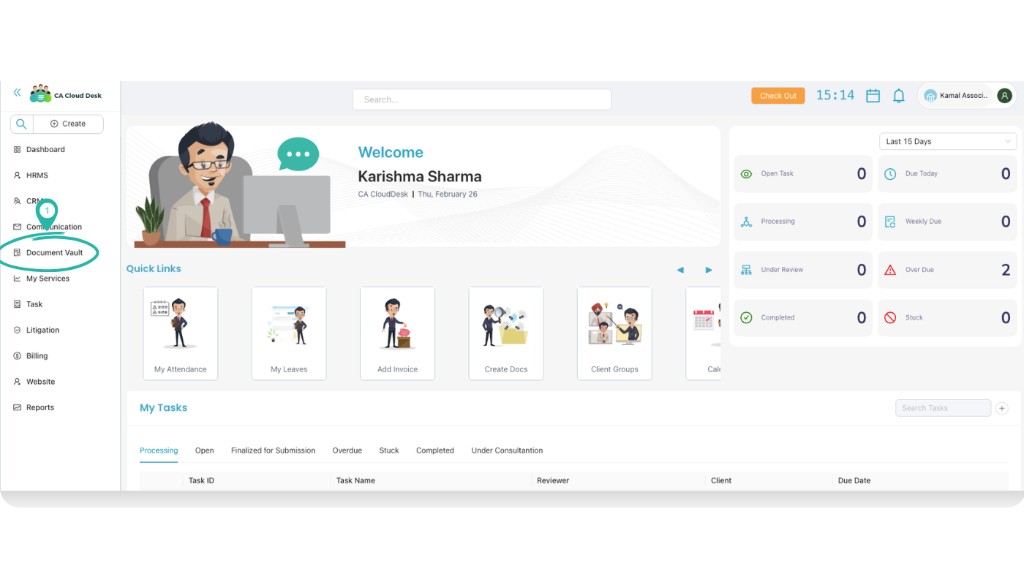
Dashboard — select Document Vault from the left panel.
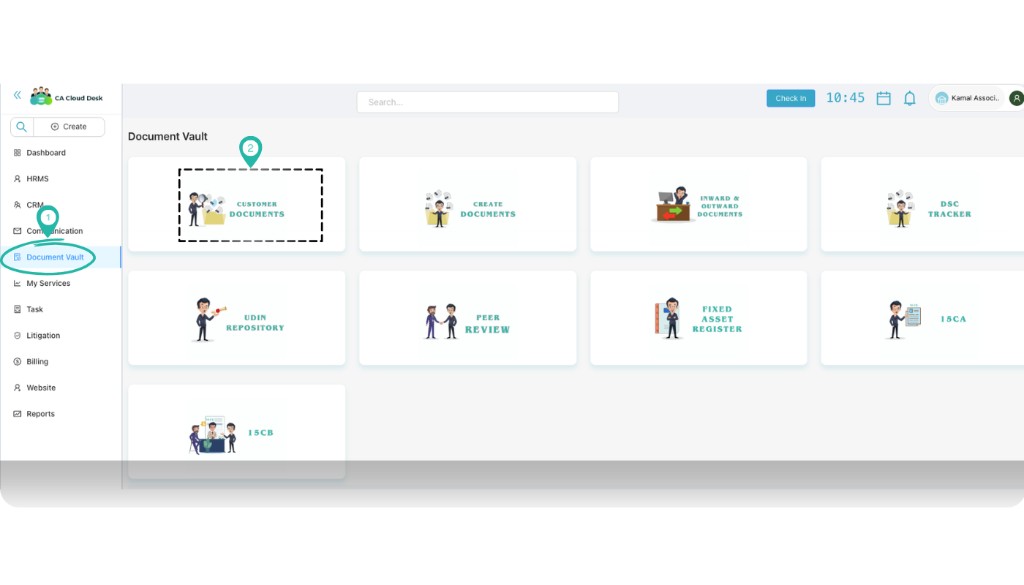
Document Vault — select Customer Document (CUSTOMER DOCUMENTS card).
Select Customer and Document
On the Customer Document screen you choose which client to manage and which items to share.
- Select the customer you want to give access to. Use the Customer dropdown and pick the client (e.g. by name or ID).
- Use Search Document to find a specific file or folder, or scroll the list to see all documents and folders for that customer.
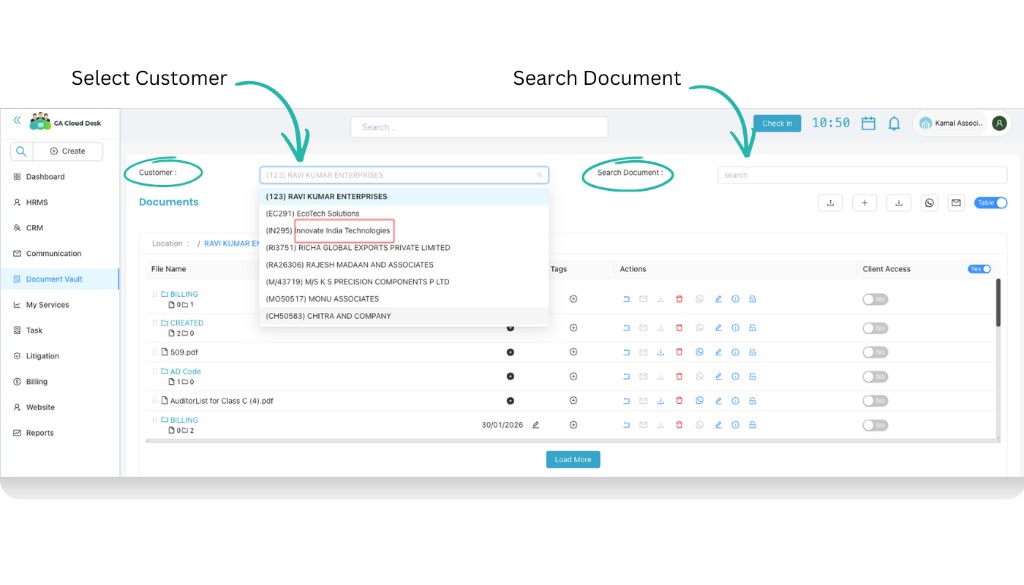
Select a customer from the dropdown and use Search Document to find the document or folder.
Grant Client Access
For each document or folder you want the client to see, turn on access using the Client Access column.
- In the document list, find the Client Access column.
- For the document or folder you want to share, set the toggle to Yes. That gives the client access to that item.
- A confirmation message will appear: Access granted (or similar, e.g. “BILLING Access Granted” for a folder).
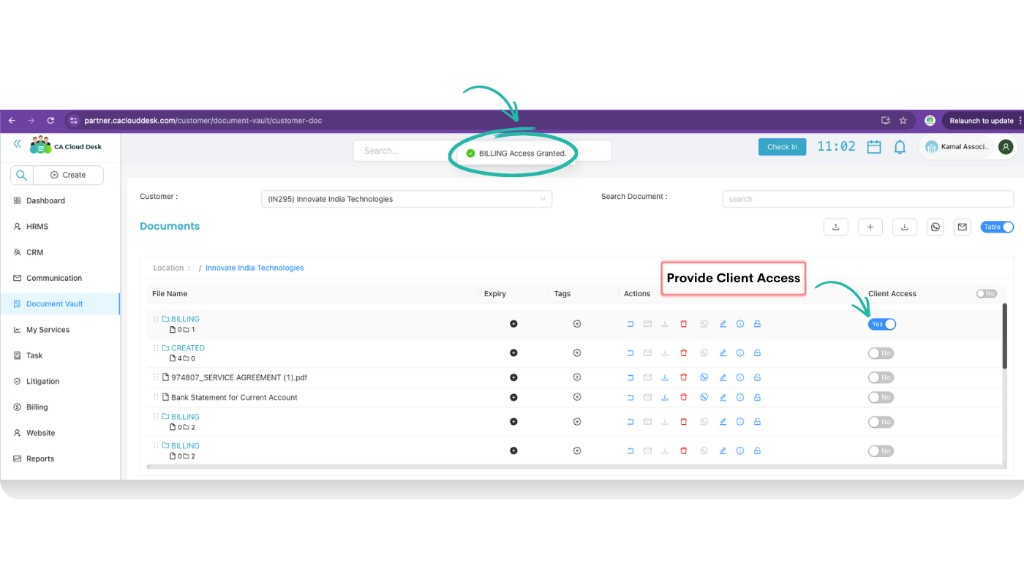
Use the Client Access toggle (Yes) to grant access; the “Access granted” message confirms it.
What the Customer Sees
Once you have granted access, the client can view the shared items in their own portal.
- The client logs in to their customer portal (e.g. customer.caclouddesk.com).
- In the left panel they click Documents (or “My Documents”).
- The shared documents and folders (e.g. the BILLING folder) appear on their Documents screen. They can open folders and download files from there.
Customer portal — click Documents in the left panel to open My Documents.
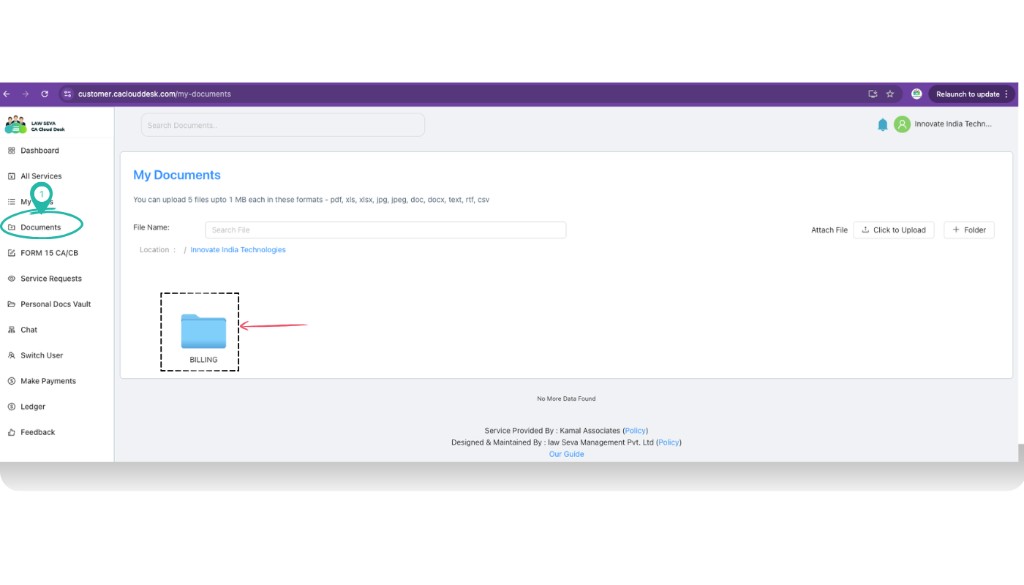
Shared folders (e.g. BILLING) appear on the client’s Documents screen.
Master Access
If you want the client to see all documents and folders for that customer, use Master Access instead of turning on each item one by one.
- On the Customer Document screen, after selecting the customer, find the Provide master Access option (usually above or beside the document list).
- Set the Master Access toggle to Yes.
- You will see a confirmation such as Master Access Granted for [Customer Name]. From then on, all documents and folders for that customer are visible to the client on their Customer Portal.
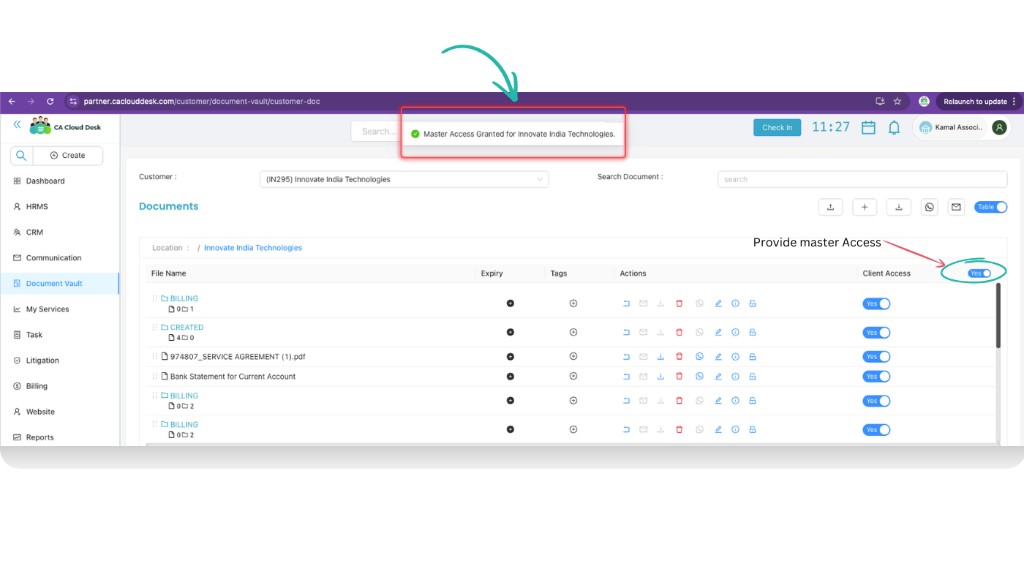
Turn on “Provide master Access” to give the client access to all documents and folders.
Customer Sharing (Vice Versa)
The process works both ways: clients can also share their documents and folders with you.
From their My Documents screen in the customer portal, the client can:
- Attach File — upload a file to share with you.
- Click to Upload — choose files to upload.
- + Folder — create a folder and add files to it.
Files and folders they upload or create there are available for you to view and manage from your side (e.g. in Document Vault / Customer Document for that customer).
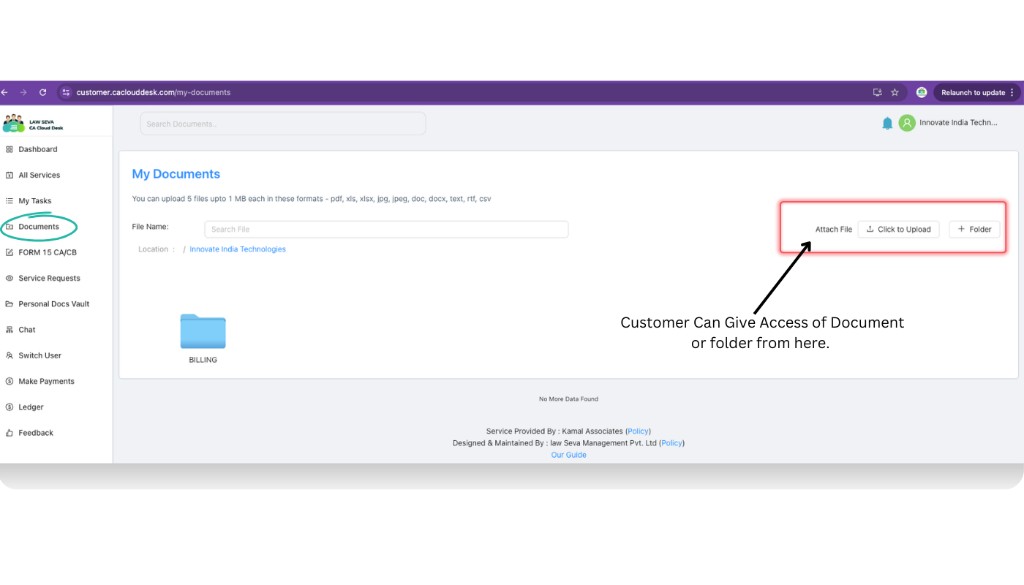
Customers can share documents and folders with you using Attach File, Click to Upload, and + Folder.