Add Notice (Litigation)
Use the Add Notice screen to record new cases and notices, capture hearing dates, court details, and assign work steps so that your team and clients stay updated.
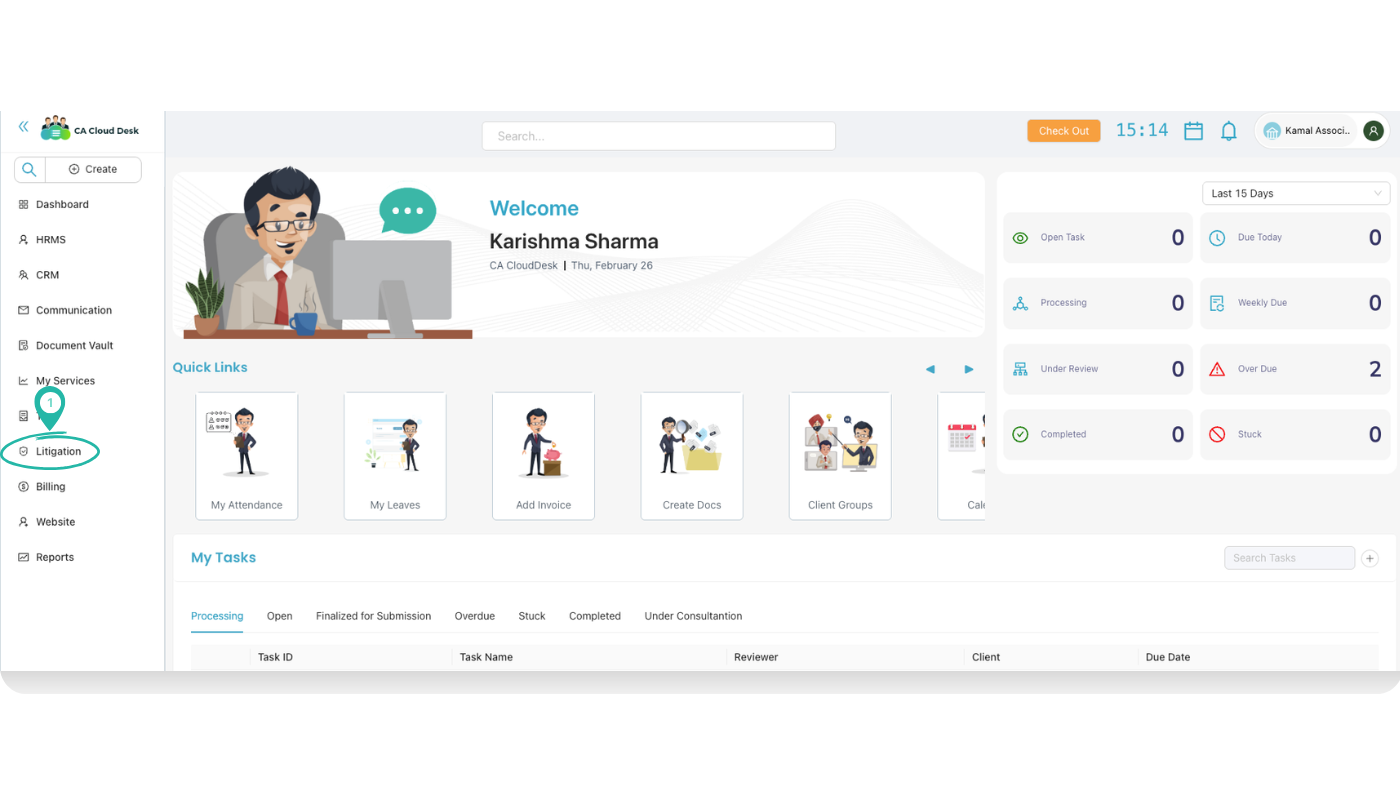
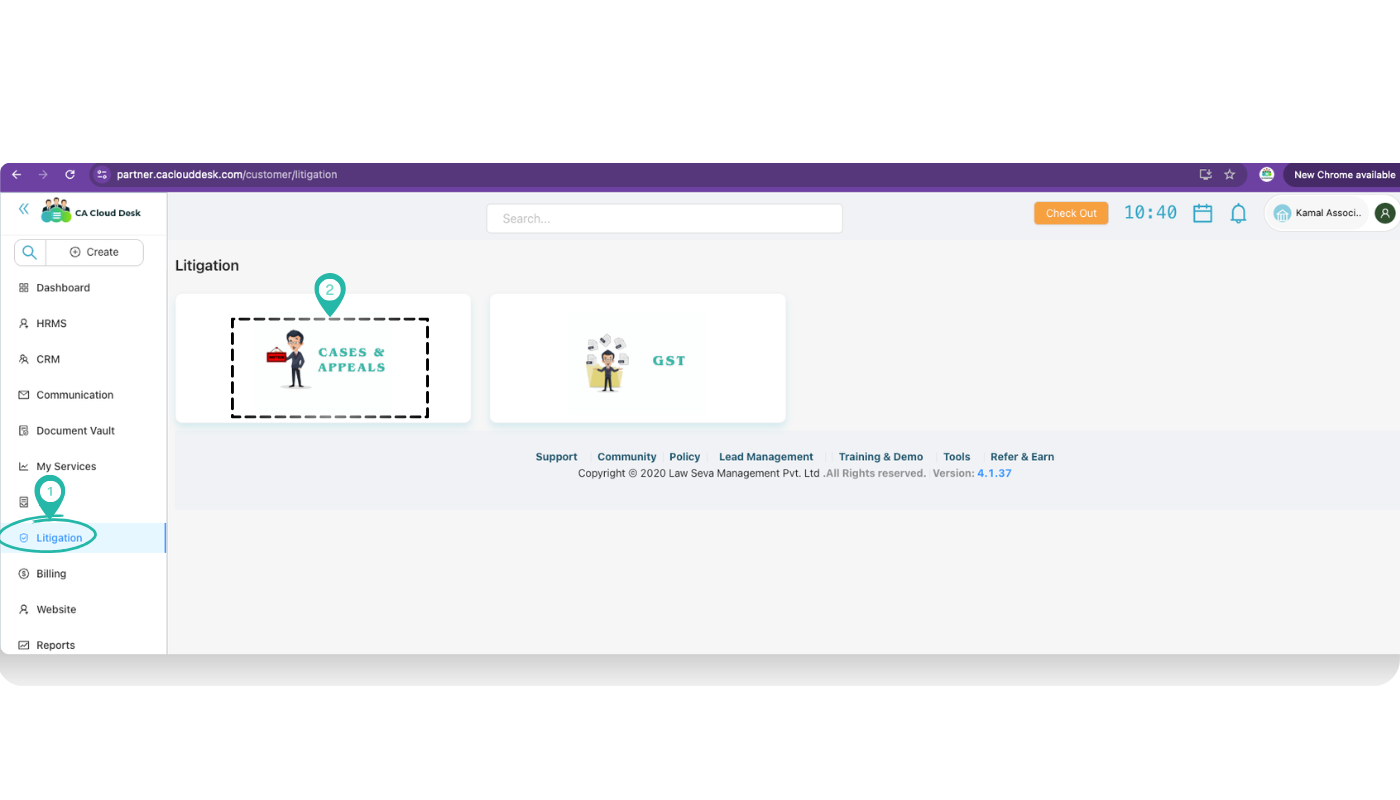
Path
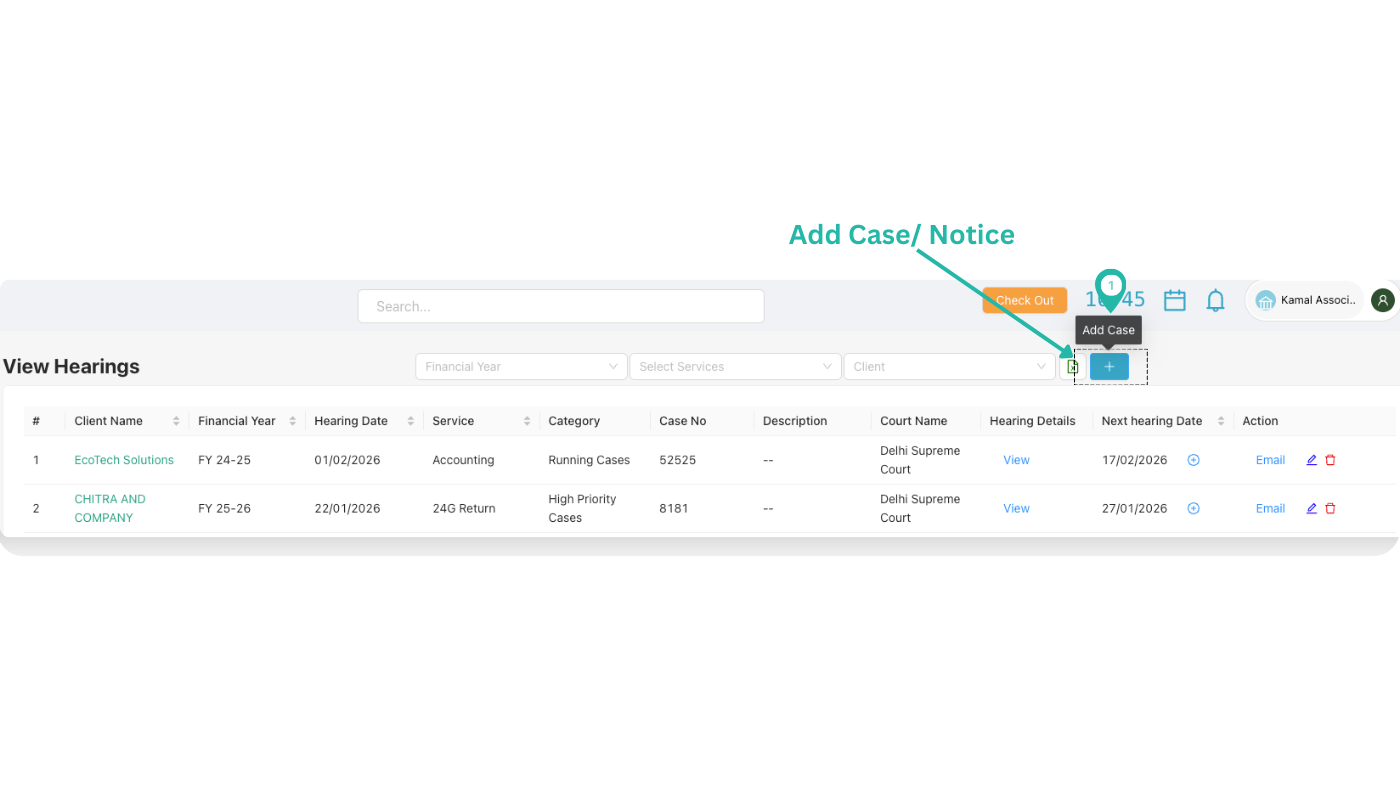
Log in to your CA CloudDesk Partner Desk account. From the left panel, click Litigation, then choose the Cases & Appeals tile. On the hearings list, use the + icon to add a new case or notice.
Add Notice screen at a glance
The Add Case / Notice form is divided into: basic case details, hearing dates and status, Case Matter, Work List, and Attachments. Fill the form from top to bottom and click Save.

Step 1 — Open Add Case / Notice
Start from the View Hearings page
On the View Hearings list, click the green + button on the top-right of the table. This opens the Add Case / Notice form.
Step 2 — Fill basic case and hearing details
Enter top‑section details
Fill the main fields so the notice is correctly linked to the client and hearing schedule.
Step 3 — Case Matter and Work List
Describe the case matter
In the Case Matter section, record the key points, sections involved, or brief facts of the notice or case. This helps anyone in the team understand the matter quickly.
Plan the Work List
Use the Work List section to break the matter into actionable stages.
- Follow Sequentially (Yes / No) — select Yes if stages must be completed one after another; select No if they can be done in any order.
- Add Stages — create individual stages (for example: Draft Reply, Get Client Documents, File Response, Prepare for Hearing).
Step 4 — Attach documents and save
Upload supporting documents
In the Attachments section, click to Upload Document. Add scanned notices, orders, replies, or any related files you want to keep with this matter.
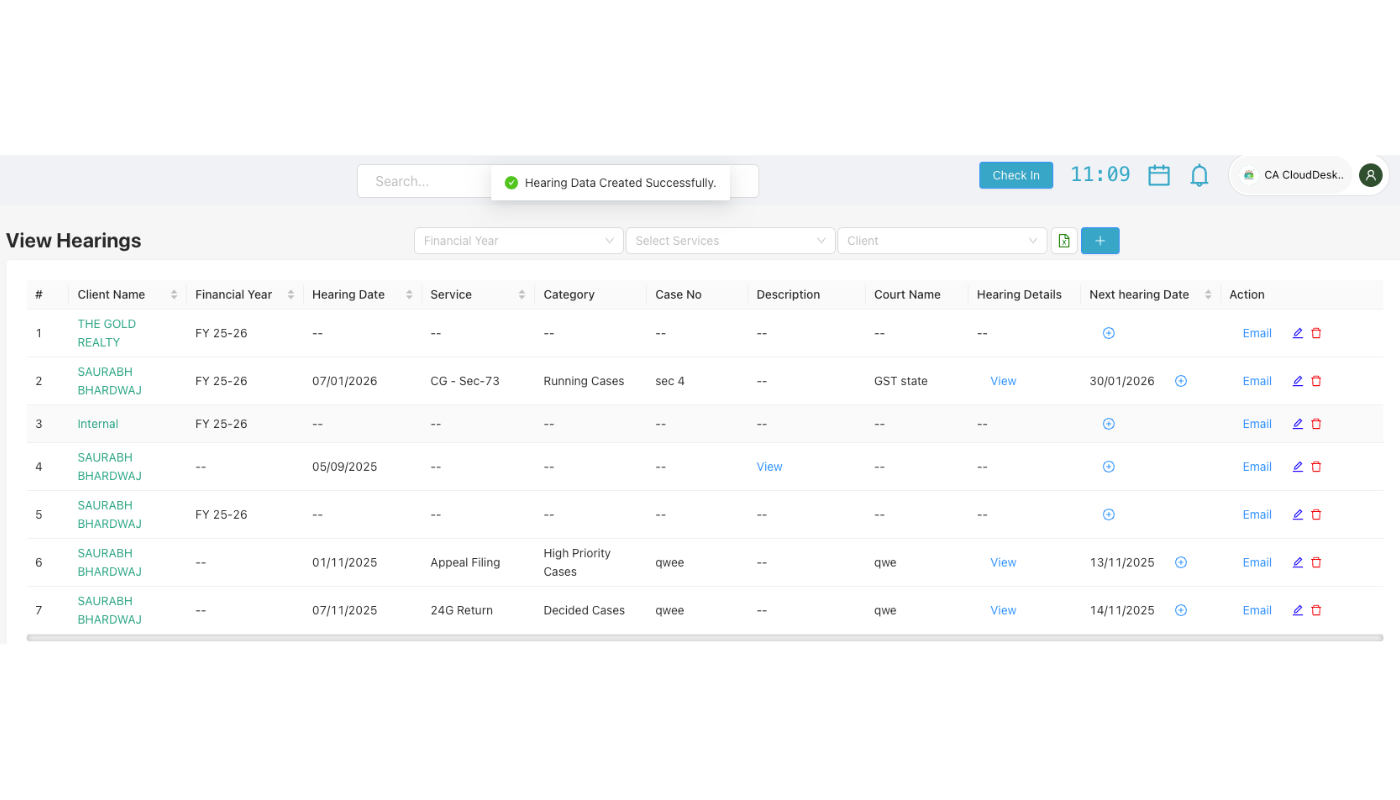
Save and confirm
After all details, stages and attachments are filled, click Save. A confirmation message “Hearing Data Added Successfully” will appear on the top of the View Hearings page.