Website (Marketing)
Use the Website menu to manage your practice website on the CA CloudDesk ca24 domain — update company details, homepage content, and the list of services your clients see.
Path
Log in to your CA CloudDesk Partner Desk account. From the left menu, click Website to open the Website module.
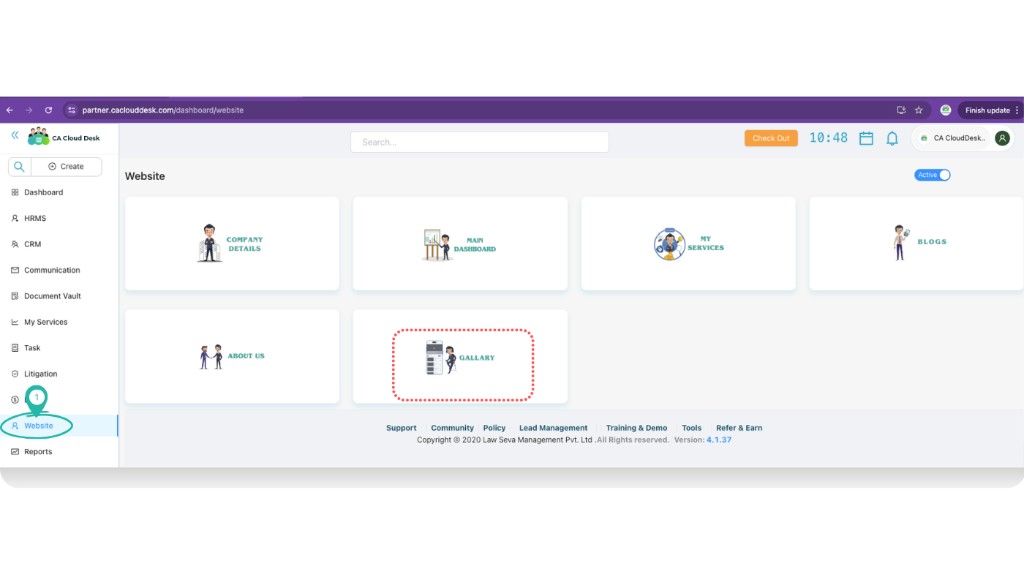
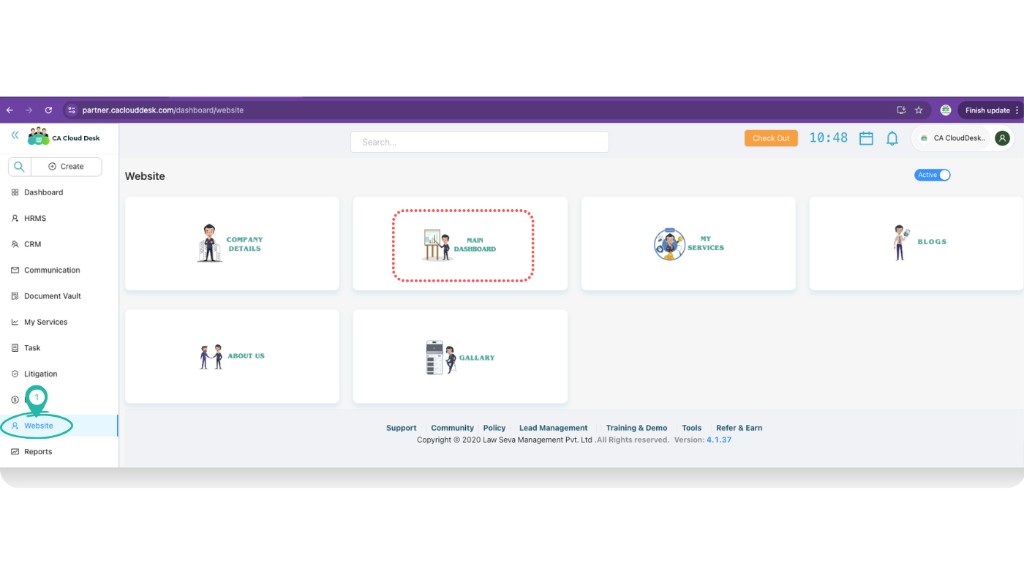
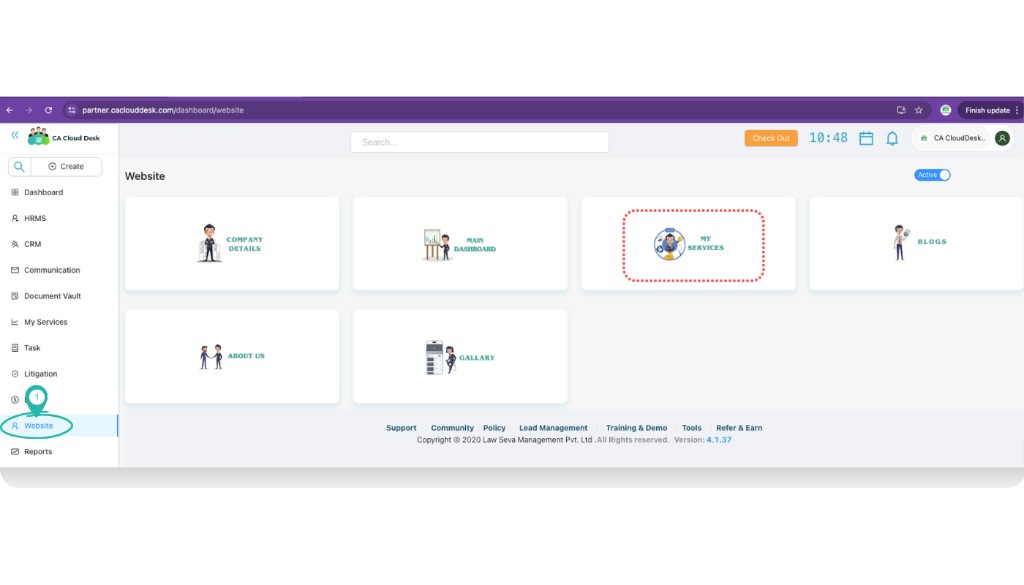
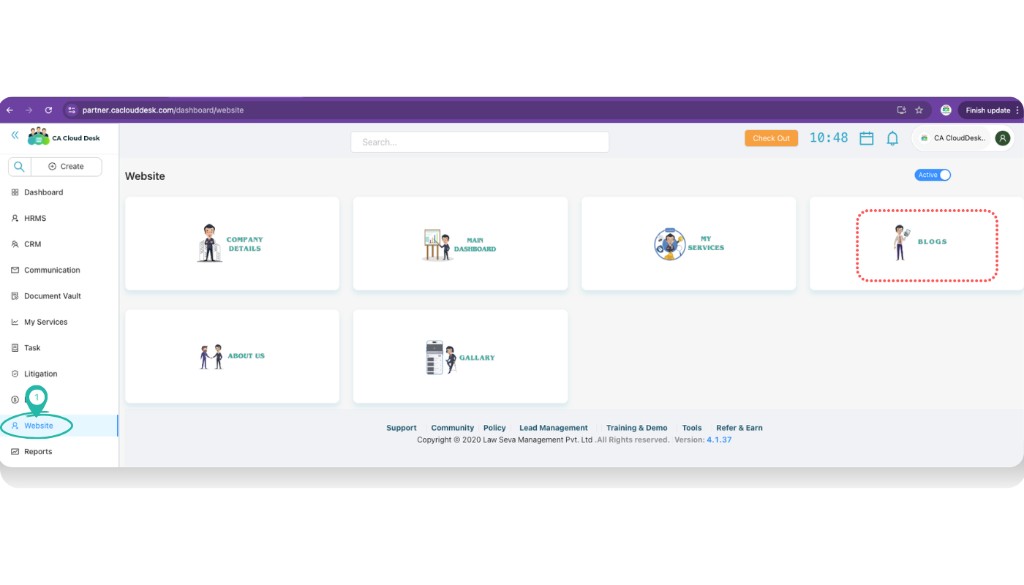
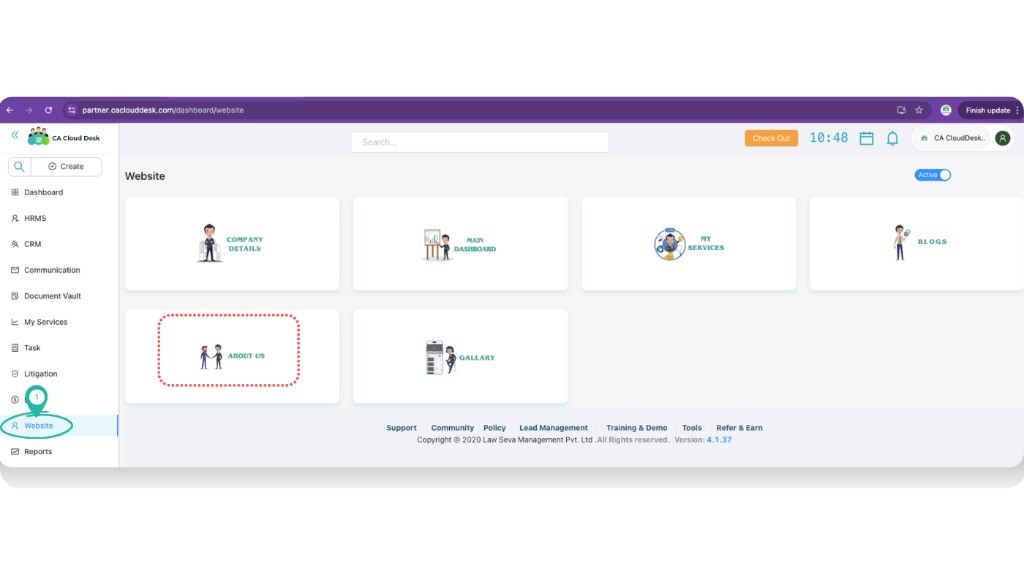
Website tiles at a glance
Inside the Website module you will see tiles for the main sections of your site: Company Details, Main Dashboard, My Services, Blogs, About Us, and Gallery.
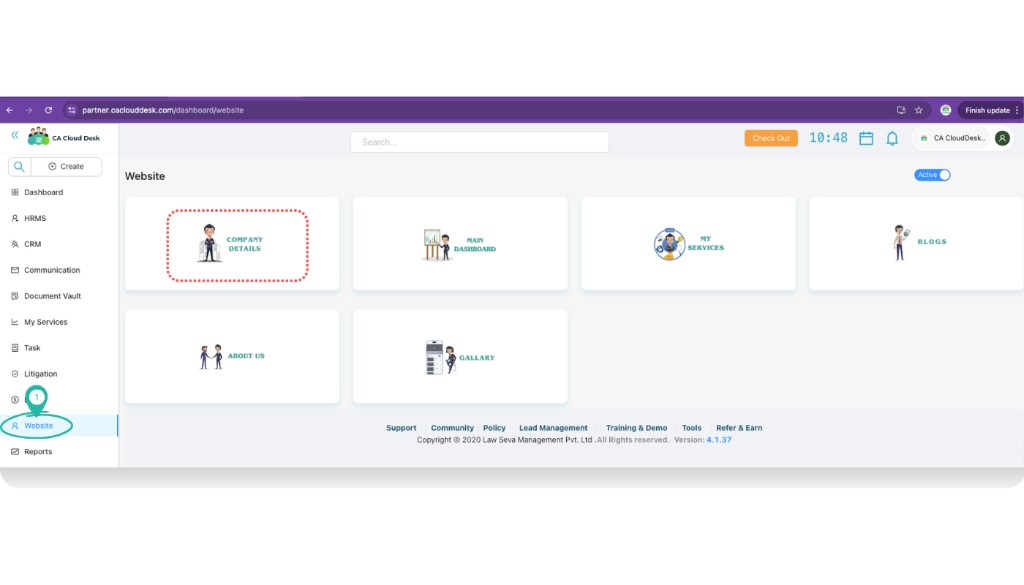
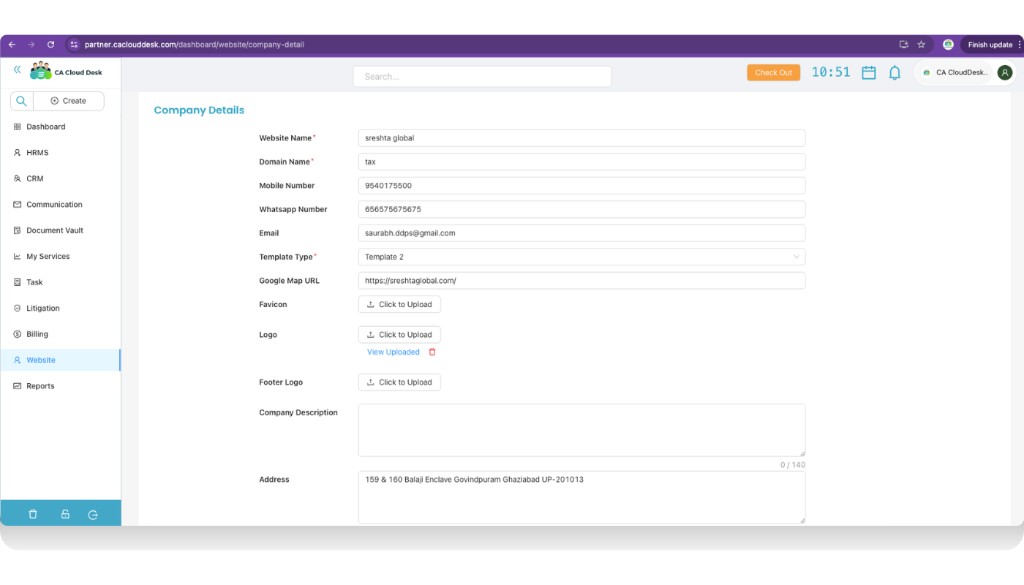
Step 1 — Company Details
Open Company Details and edit your firm profile
Click the Company Details tile, update the fields that should appear on your public website, then click Save.
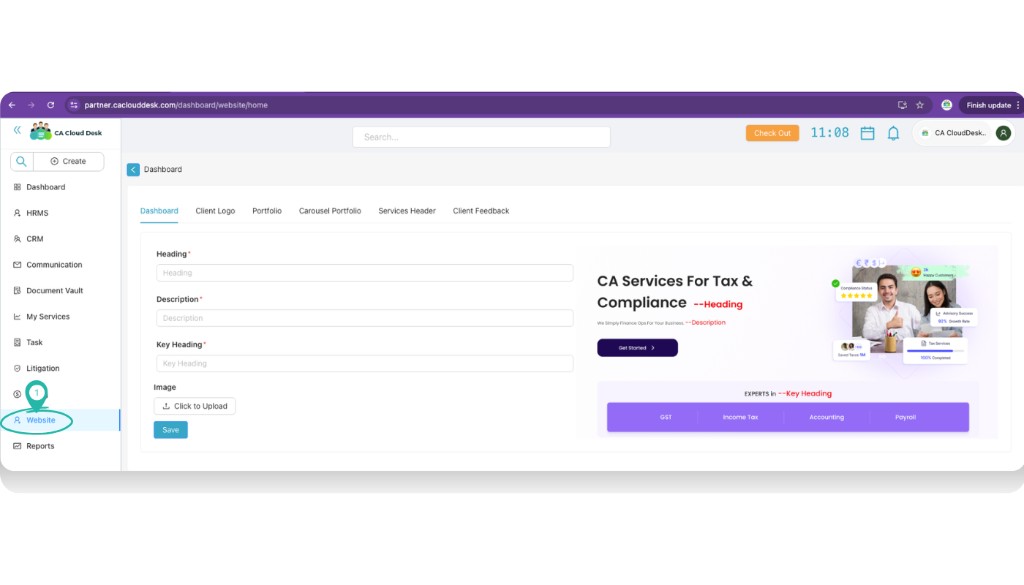
Step 2 — Main Dashboard content
Edit homepage sections
Open the Main Dashboard tile. Use the tabs to control what visitors see on your homepage.
- Dashboard — main hero heading, description, key heading, and banner image.
- Client Logo — upload logos of your key clients to build trust.
- Portfolio and Carousel Portfolio — highlight services, case studies, or featured work.
- Services Header — heading/description shown above the services section.
- Client Feedback — add testimonials from your clients.
Step 3 — My Services
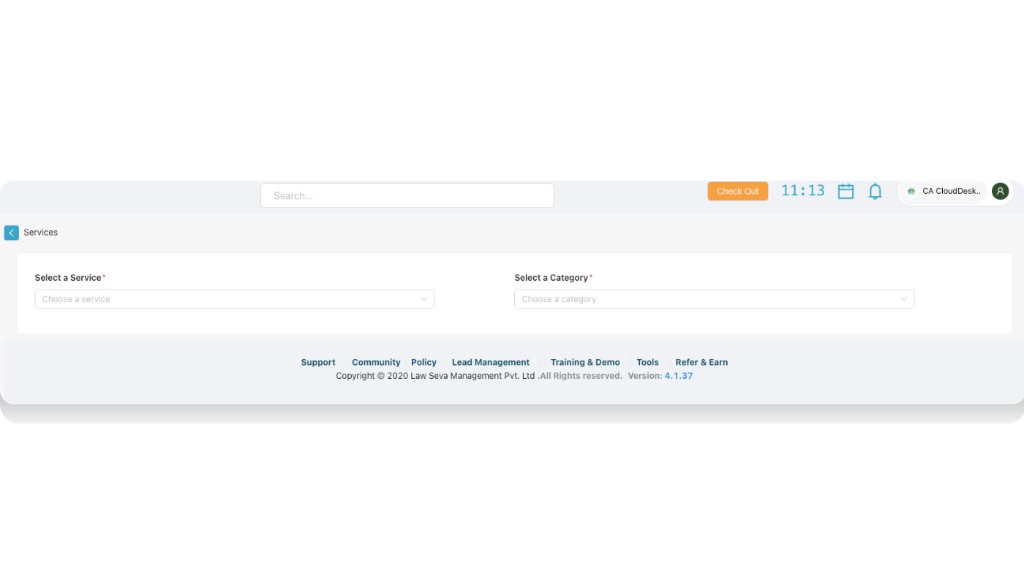
Select service and category shown on website
Click the My Services tile. Use the dropdowns to pick which services and categories you want to show on the website.
- Select a Service* — choose the service (for example, Income Tax, GST, ROC, Audit).
- Select a Category* — map the service to a category (for example, Compliance, Advisory, Registration).
- Repeat the selection process to add more services to your website listing.
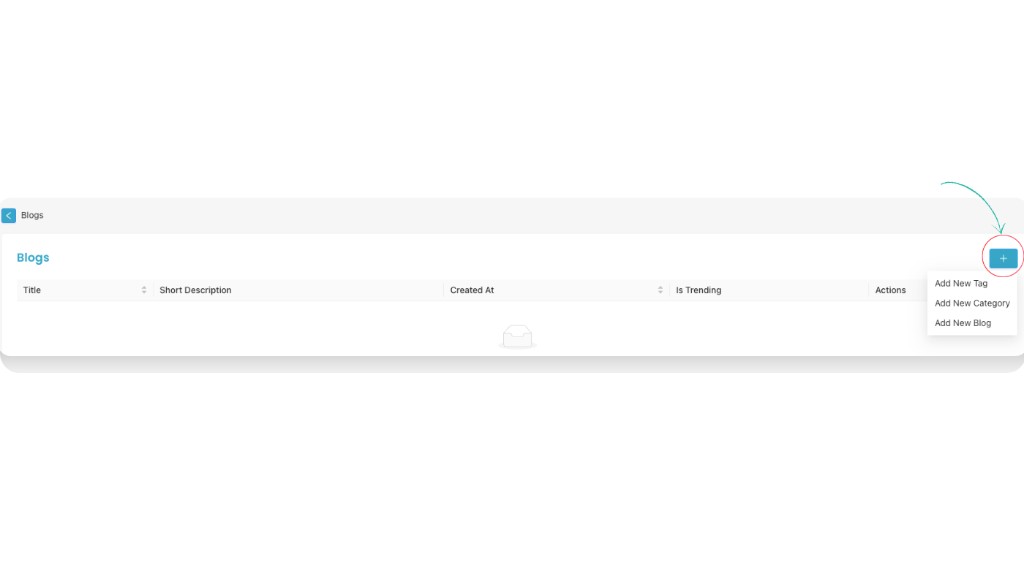
4 — Blogs
Use the Blogs tile to publish articles that improve SEO and keep clients updated.
- Open Website → Blogs.
- Click the + button and choose Add New Tag, Add New Category or Add New Blog.
- Fill the title, short description and other details, then save.
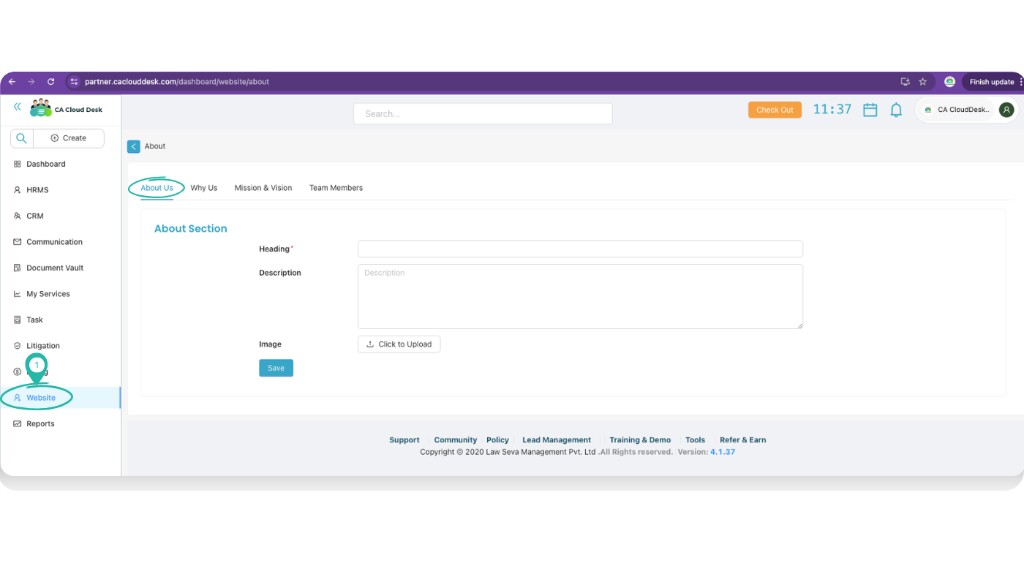
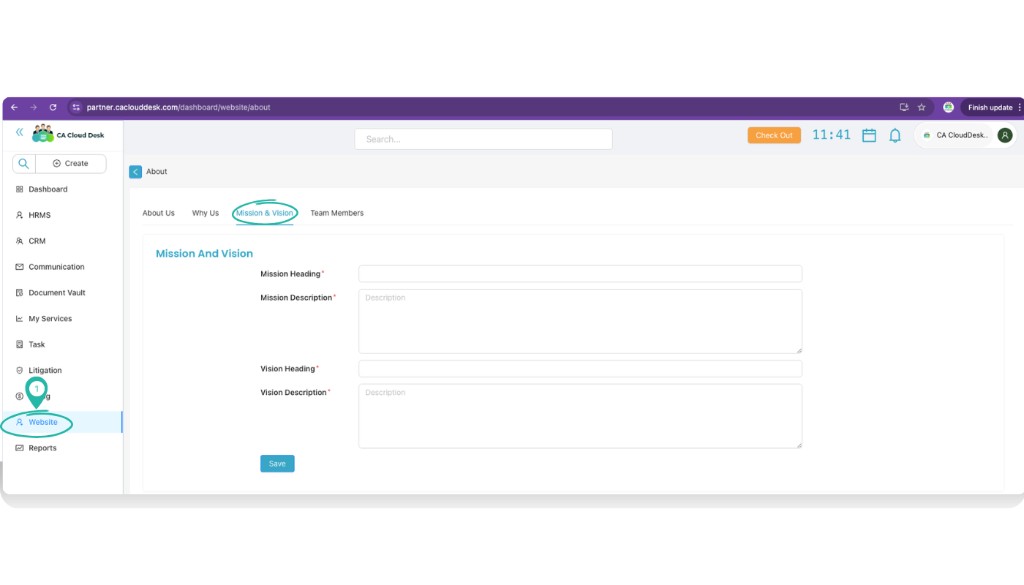
5 — About Us
The About Us tile controls your story page — why clients should choose you and who is in your team.
- In Website → About Us, use the About Us tab for the main heading, description and image.
- Use Why Us to highlight your strengths.
- On the Mission & Vision tab, add mission and vision headings with short descriptions.
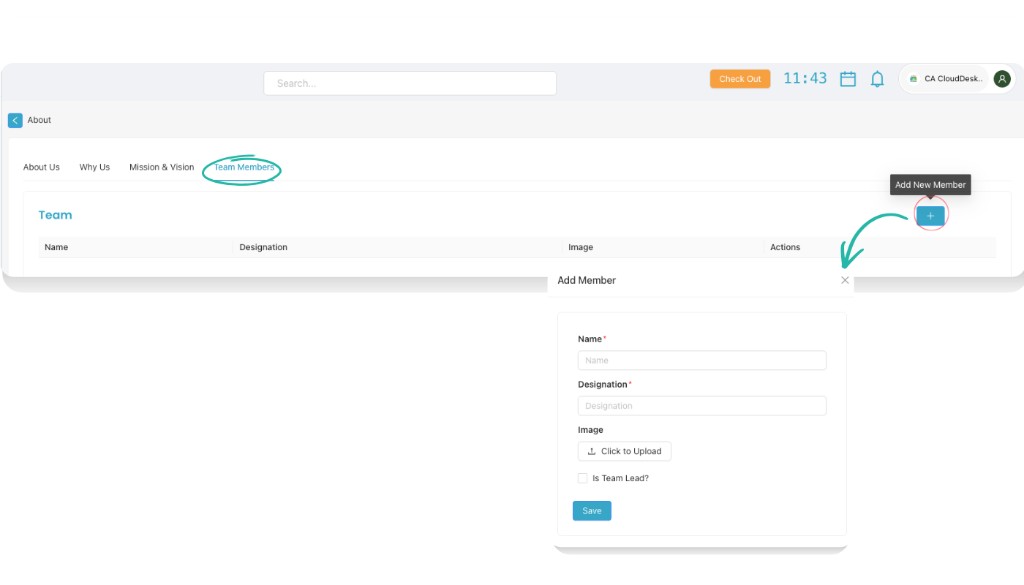
- On the Team Members tab, click Add Member to add name, designation, image and whether the member is team lead.
6 — Gallery
Use the Gallery tile to share photos from events, seminars and office activities.
- Open Website → Gallery.
- Click Add New Event, give it a title, and upload one or more images.
- Save to publish the event and its images on your website.