How to Add an Employee in CA Cloud Desk
A structured employee onboarding process with controlled access, secure credentials, and HRMS compliance—designed for modern CA firms.
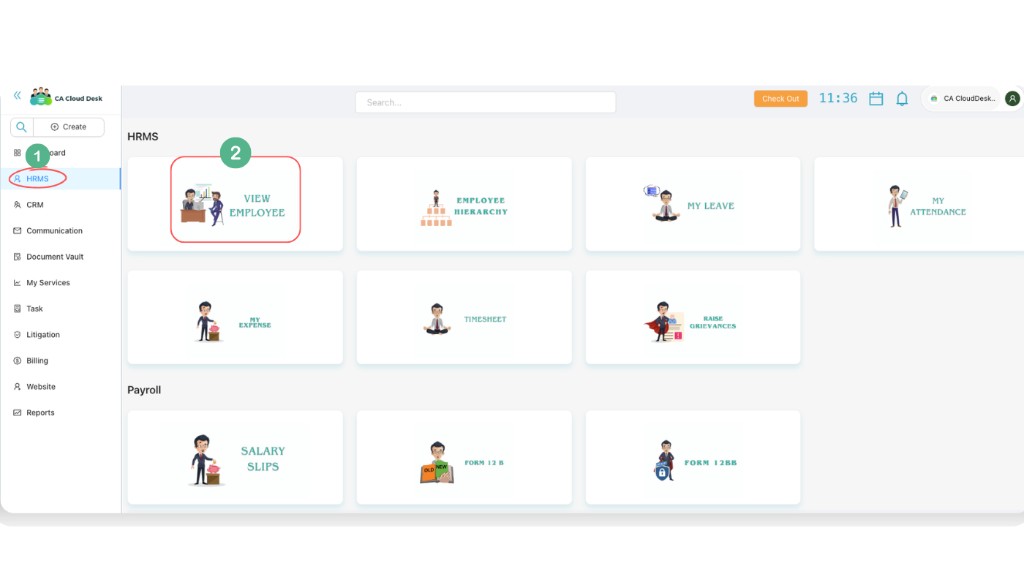
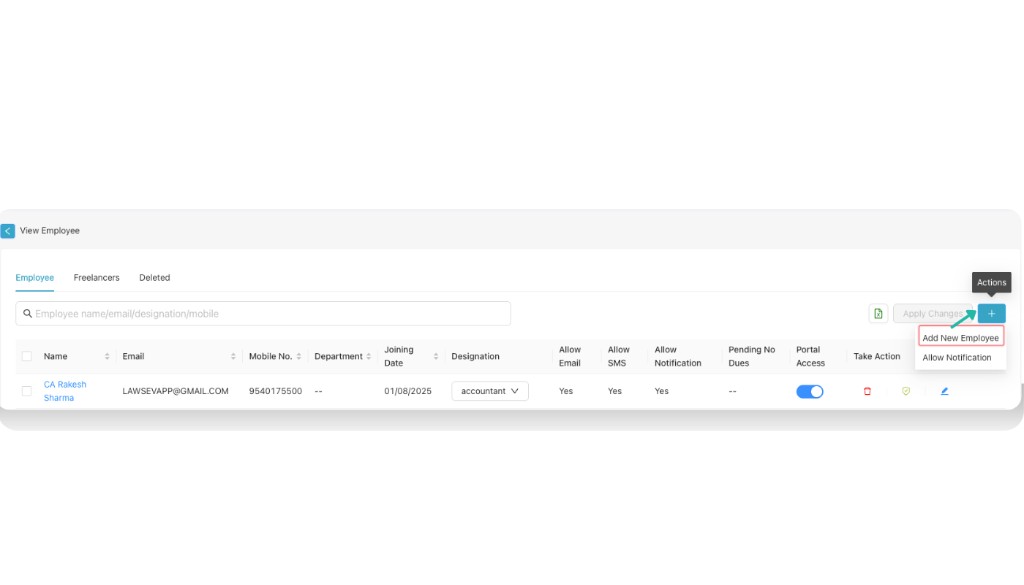
Path
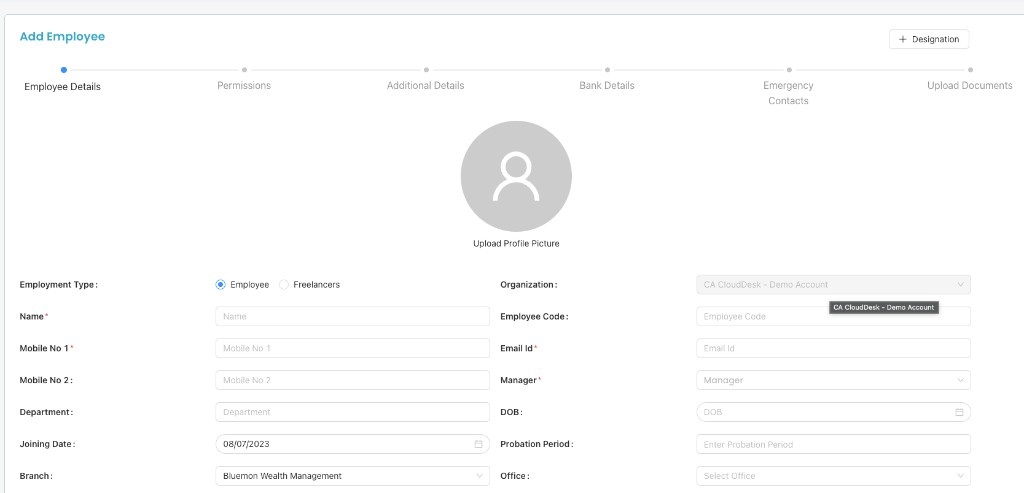
Part A: Basic Details Mandatory
Fill the following mandatory fields to create an employee record:
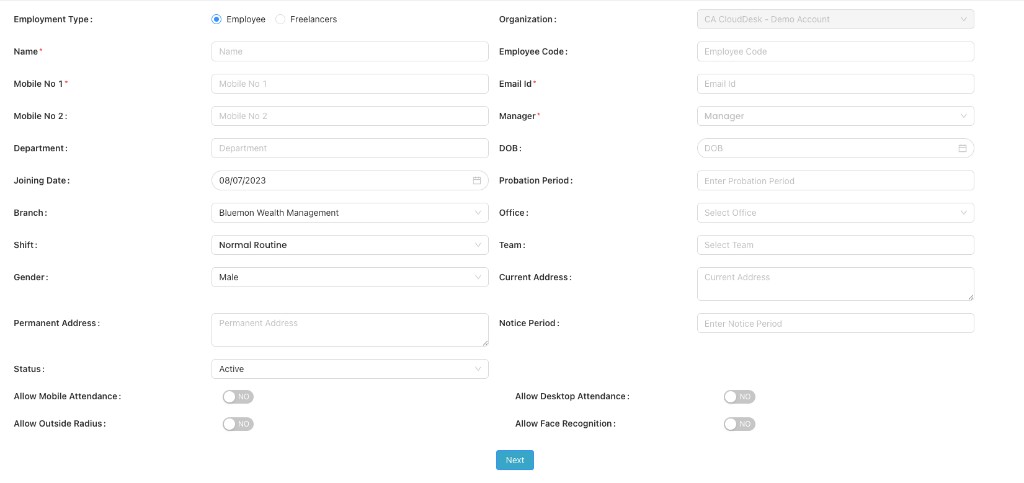
Part B: Employment Details Optional
Additional employment information you can provide:
| Field | Description |
|---|---|
| Employment Type | Employee / Freelancer |
| Employee Code | Unique code for the employee |
| Mobile No. 2 | Secondary contact number |
| Department | Department or team |
| Date of Birth | Employee’s DOB |
| Joining Date | Date of joining |
| Probation Period | e.g. 30 days |
| Branch | Dropdown |
| Office | Dropdown |
| Shift | Dropdown |
| Team | Dropdown |
| Gender | Dropdown |
| Current Address | Current residential address |
| Permanent Address | Permanent address |
| Status | Dropdown |
| Attendance & Access Controls | |
| Allow Mobile Attendance | Yes / No |
| Allow Desktop Attendance | Yes / No |
| Allow Outside Radius | Yes / No |
| Allow Face Recognition | Yes / No |
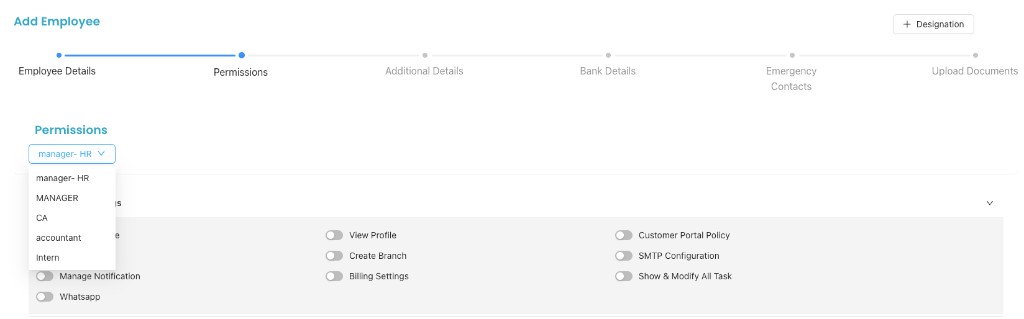
Part C: Permissions Optional
Assign additional permissions if required.
Note
Primary access is driven by the employee’s designation. Use this section only for extra permissions beyond the designation.
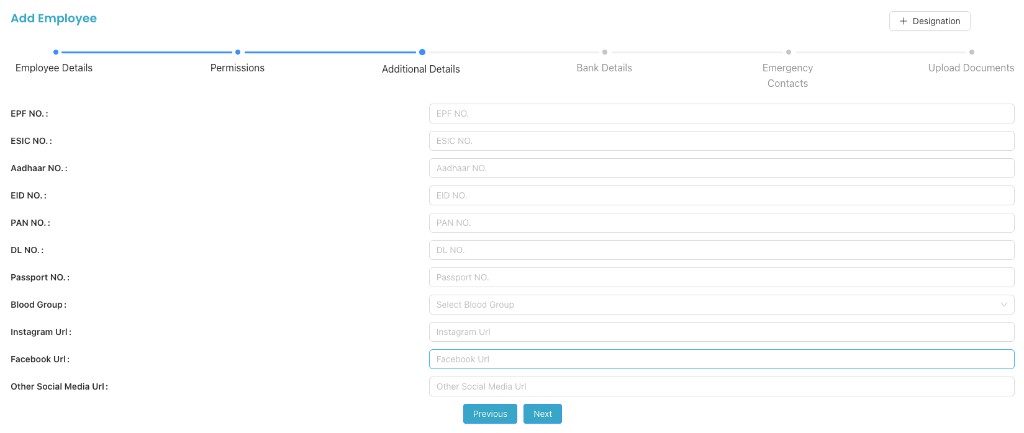
Part D: Additional Details Optional
Document and identity details for HR and compliance:
Part E: Bank Details Optional
Bank account information for payroll and reimbursements:

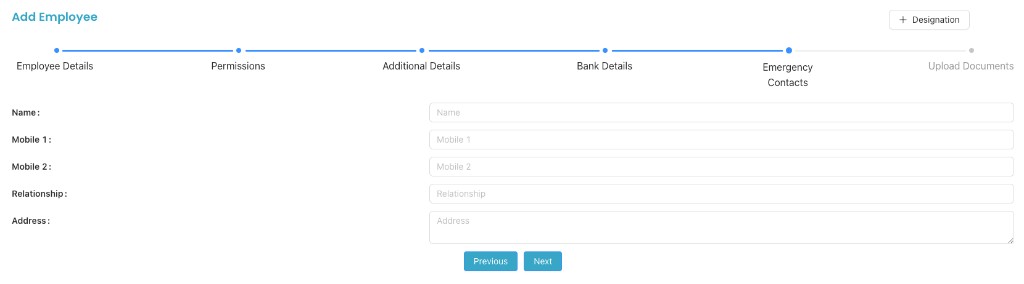
Part F: Emergency Contact Optional
Contact details to be used in case of emergency:
Part G: Upload Documents Optional
Upload employee-related documents for secure record-keeping (e.g. offer letter, ID proof, certificates).

Final Step: Submit
Click Submit to save the employee details.
Login Credentials
Login ID
- Employee’s Email ID (as entered in Part A)
Password
- System-generated password sent automatically via email
- Password can be changed on first login
Video Tutorial
Description: This video walks through adding an employee from HRMS → View Employee → “+”, and explains each part (Basic Details, Employment Details, Permissions, Documents) and how login credentials are generated.
Outcome
A structured employee onboarding process with controlled access, secure credentials, and HRMS compliance—designed for modern CA firms.