My Expense in CA Cloud Desk
Submit, track, and manage your expense claims from the HRMS My Expense screen. View Pending, Approved, and Rejected expenses and add new expenses with client, amount, bill, and billable option.
Path
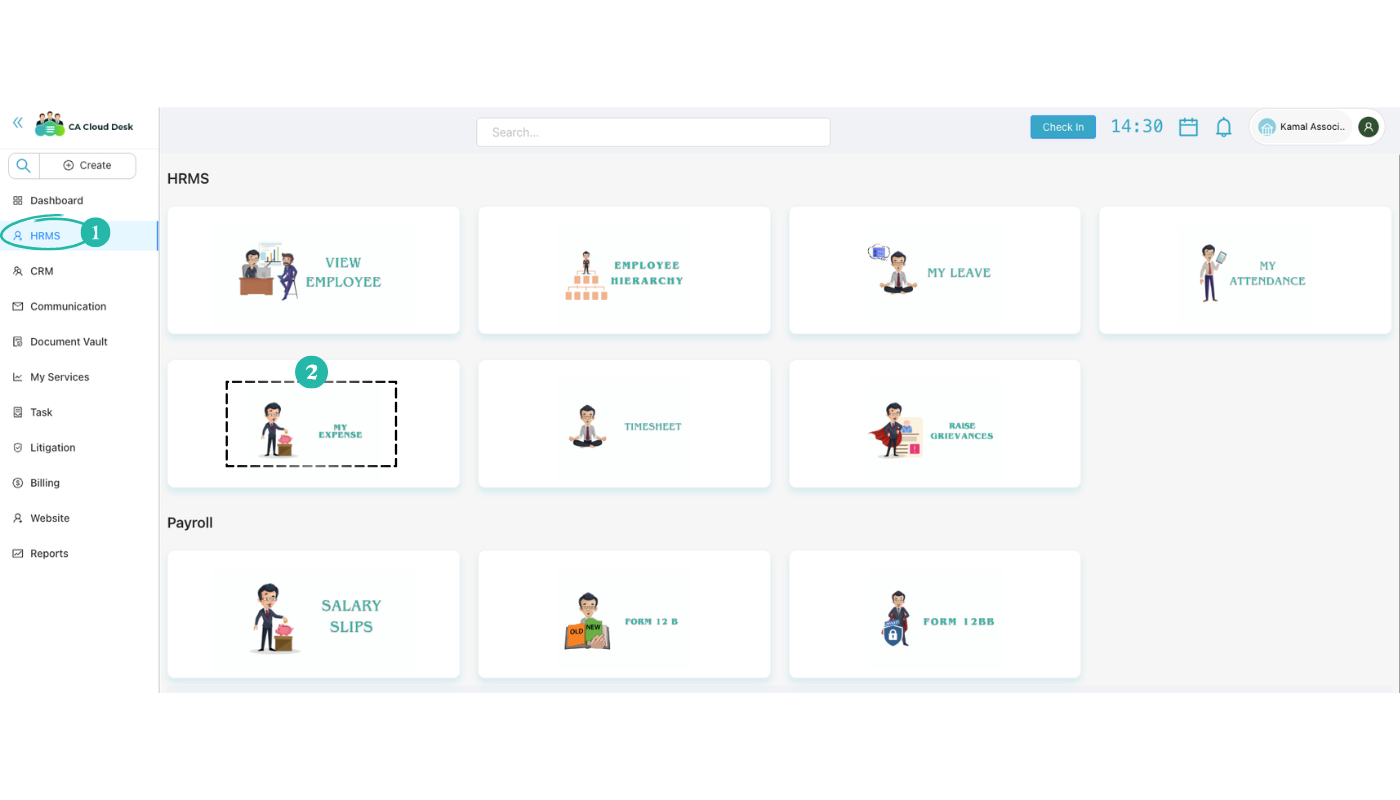
Step 1: Go to dashboard, select HRMS, then My Expense
From the CA Cloud Desk dashboard, open the left navigation and click HRMS. On the HRMS screen, click the MY EXPENSE card to open the expense management screen.
Step 2: My Expense tabs and expense list
On the My Expense screen you will see three tabs:
The expense list shows the following columns for each entry:
| Column | Description |
|---|---|
| S. No. | Serial number |
| Created Date | Date the expense was created |
| Customer Name | Client or customer linked to the expense |
| Expense ID | Unique identifier for the expense |
| Expense Type | Category of the expense |
| Total Amount | Amount claimed |
| Employee Name | Employee who submitted the expense |
| Attachments | Uploaded bills or documents |
| Status | Pending, Approved, or Rejected |
| Action | Actions available for the row |
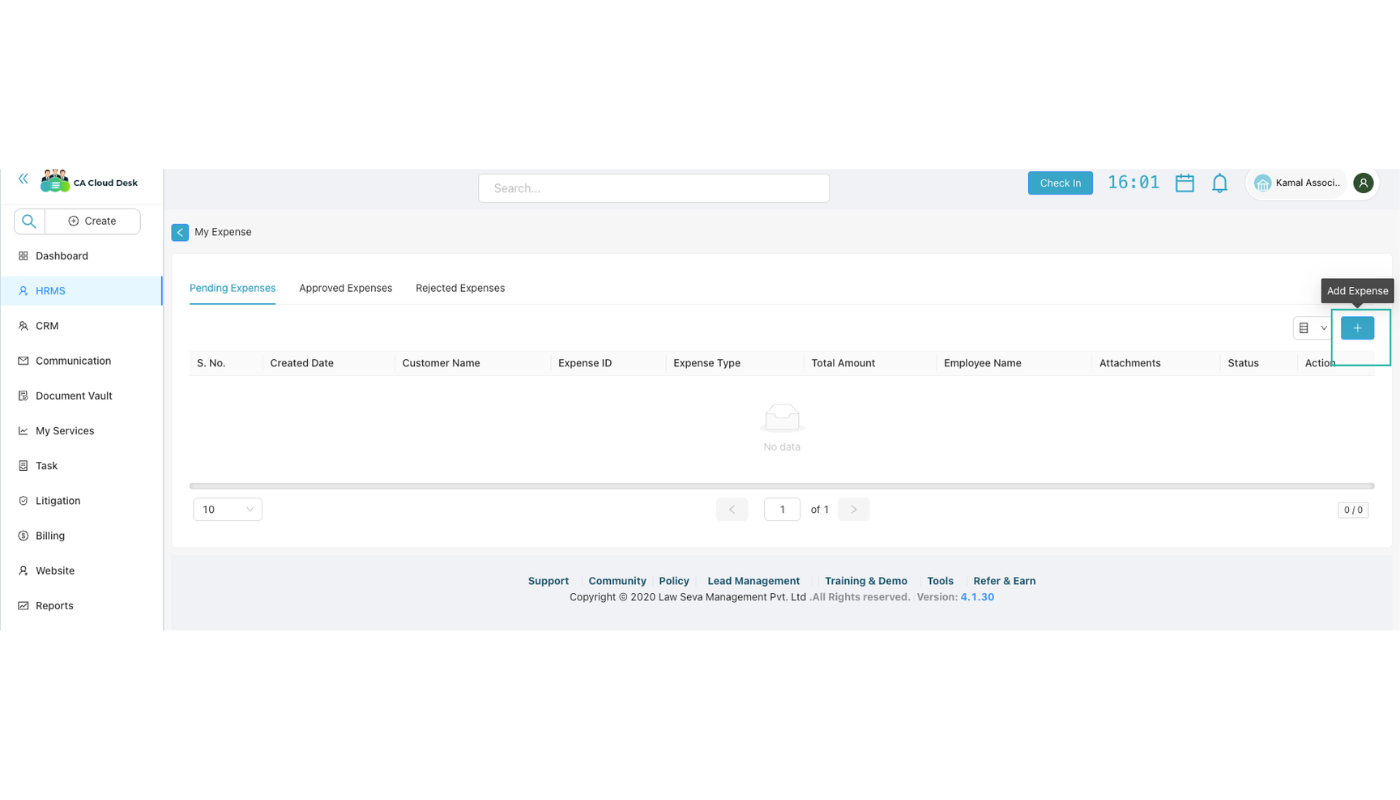
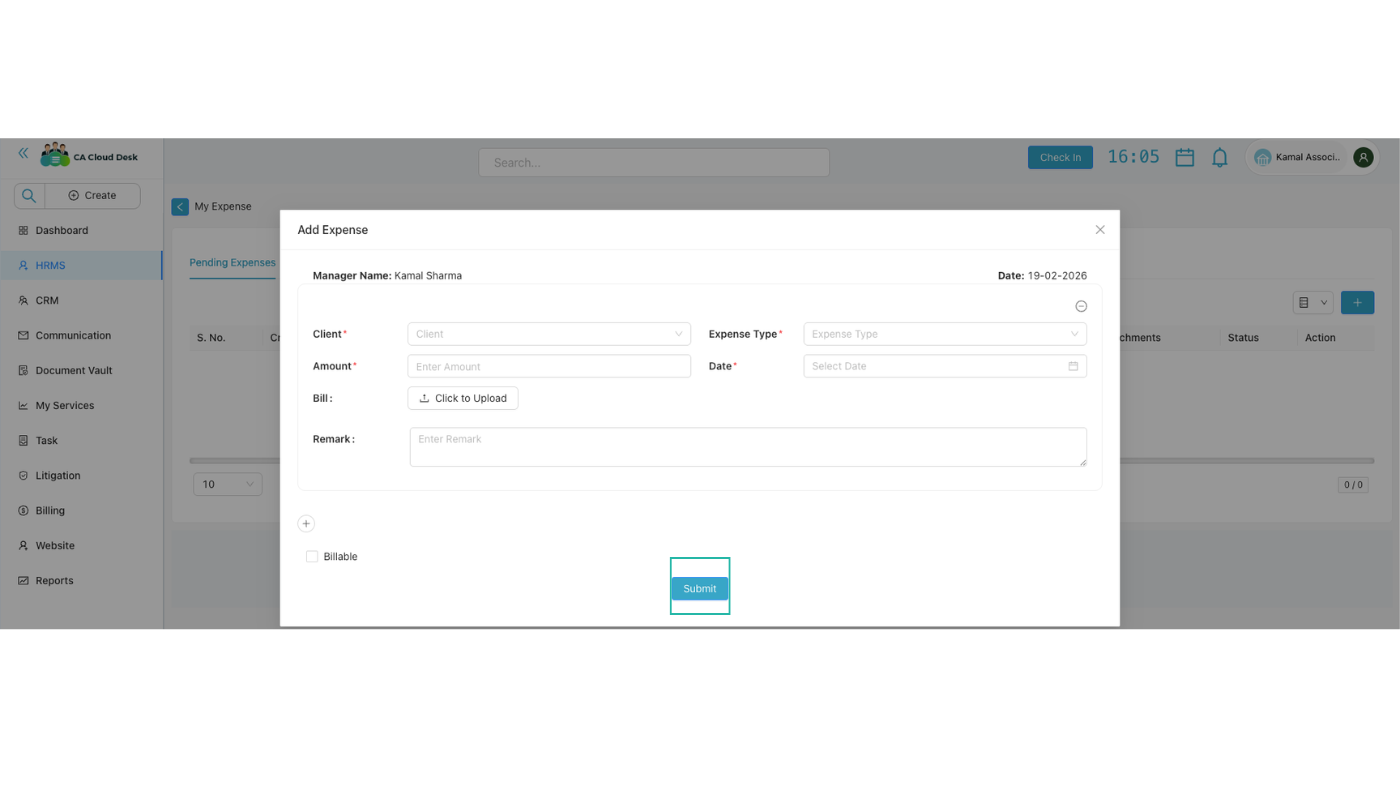
Step 3: Add Expense — click + icon, fill details, then submit
Click the + (Add Expense) icon to open the Add Expense form. Fill in the following:
After filling all required fields (marked with *), click Submit to submit the expense for approval.
Video Tutorial
Watch a walkthrough of using My Expense in CA Cloud Desk: navigating to HRMS → My Expense, viewing Pending/Approved/Rejected expenses, and adding a new expense with Client, Amount, Bill, Remark, and Billable.