My Leave
View leave balance, apply for leaves, and track leave history. Go to Dashboard → HRMS → My Leave, then use the + icon to apply leave after selecting View Leave.
Path
Step-by-step instructions
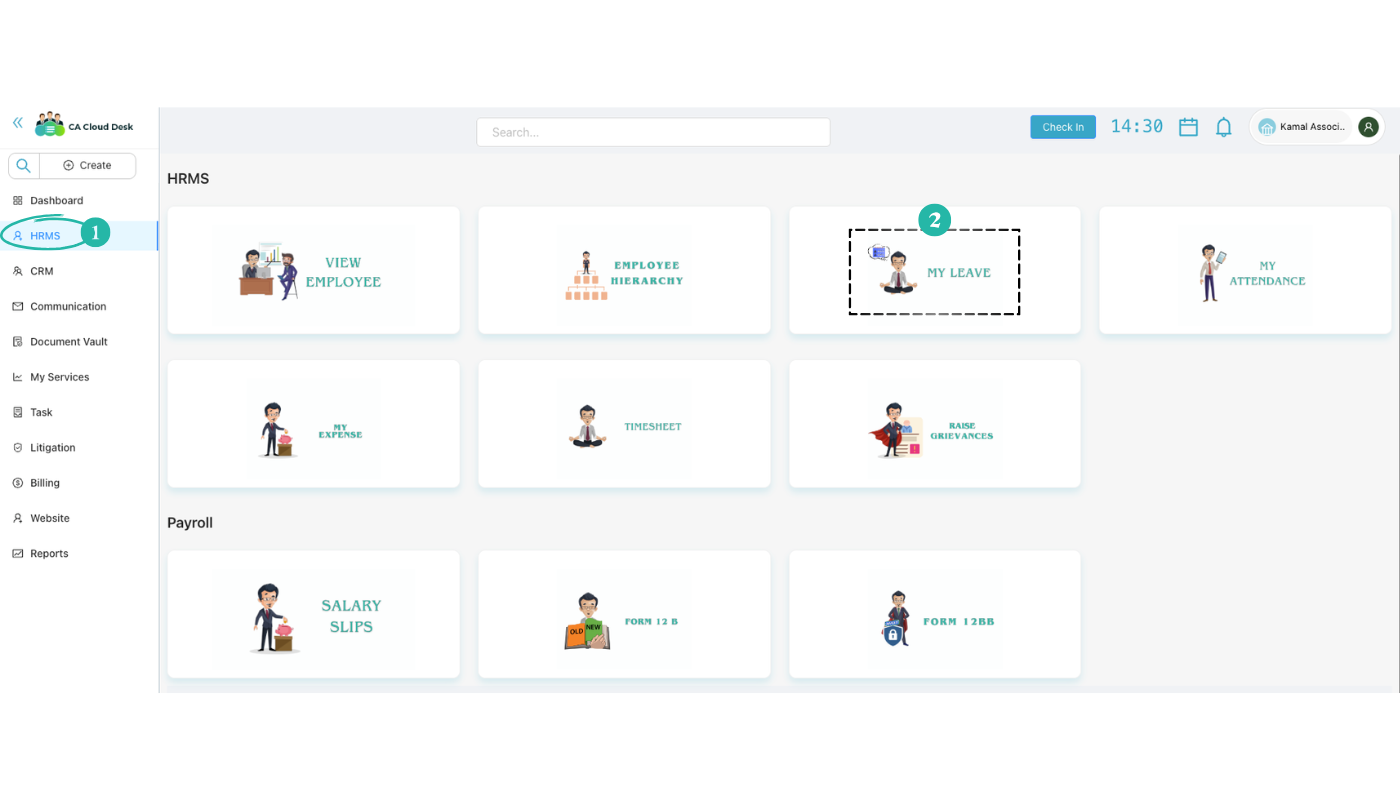
Go to Dashboard, select HRMS, then My Leave
From the Dashboard, open HRMS in the left menu. On the HRMS page, select the My Leave card to open the leave screen.
Click the + icon and select View Leave
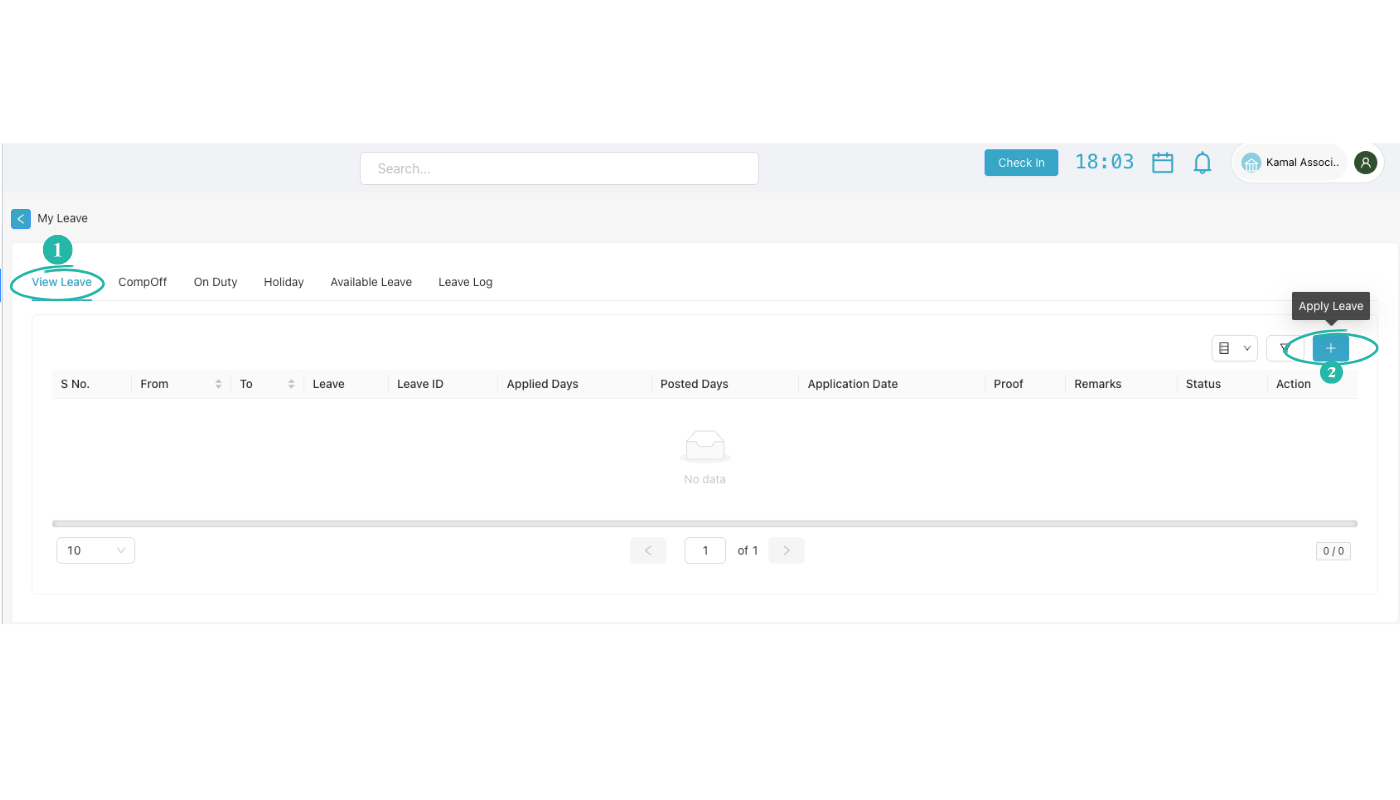
On the My Leave screen, click the blue + (Apply Leave) button. You can switch between these tabs to view different leave information:
Select View Leave to see your leave records. The table shows S No., From, To, Leave, Leave ID, Applied Days, Posted Days, Application Date, Proof, Remarks, Status, and Action.
Apply leave
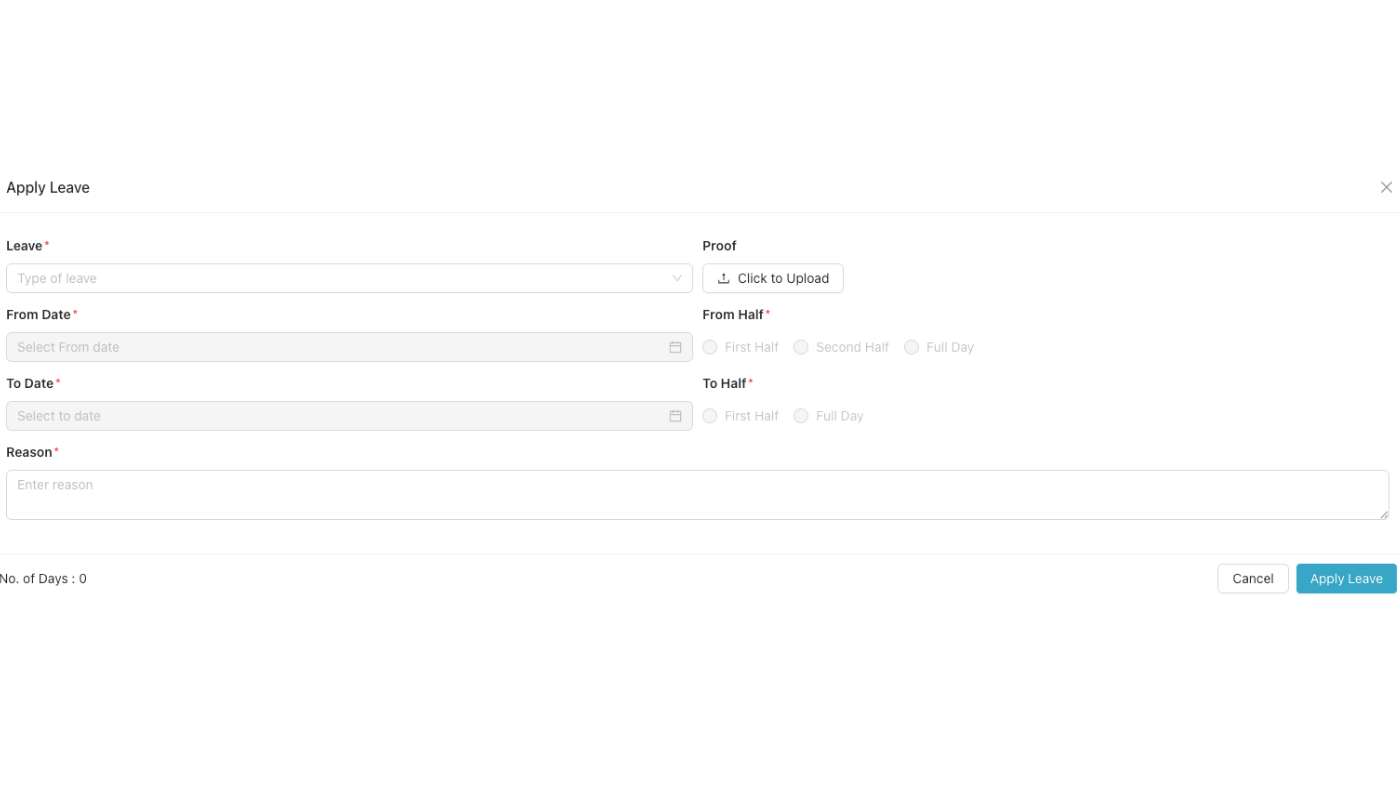
Click the + (Apply Leave) button to open the Apply Leave form. Fill in all required details (see below), then click Apply Leave. Your leave will be applied.
Apply Leave form
In the Apply Leave dialog, fill these fields. Fields marked with * are required. Then click Apply Leave to submit. The number of days is calculated automatically.
Video Tutorial
Watch a step-by-step walkthrough of applying leave in CA Cloud Desk: Dashboard → HRMS → My Leave, click + to apply, select View Leave, fill the form and submit.
Video tutorial for My Leave will be added here. Check back later or use the PDF guide above.