Timesheet
Log work hours, view timesheets by status and date range, add new entries with client, branch, service, and task, then view your employee timesheet summary.
Path
Step-by-step instructions
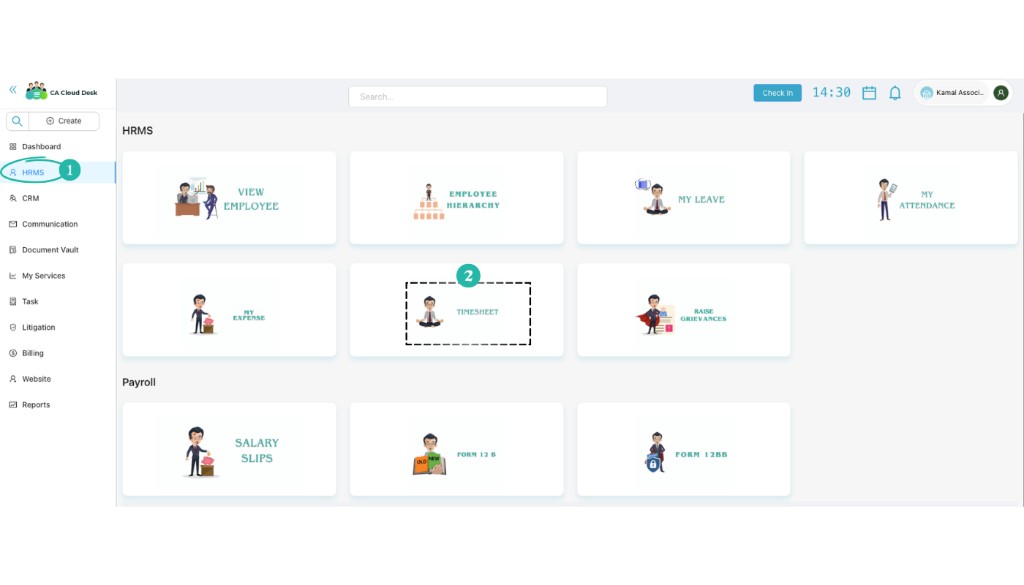
Go to Dashboard, select HRMS, then Timesheet
From the Dashboard, open HRMS in the left menu. On the HRMS page, select the Timesheet card to open the timesheet screen.
Select Timesheet Status
At the top of the page you will see different tabs: Approved Timesheet, Rejected Timesheet, Pending Timesheet, and Suggest Modification. Click on the relevant tab to view records based on status.
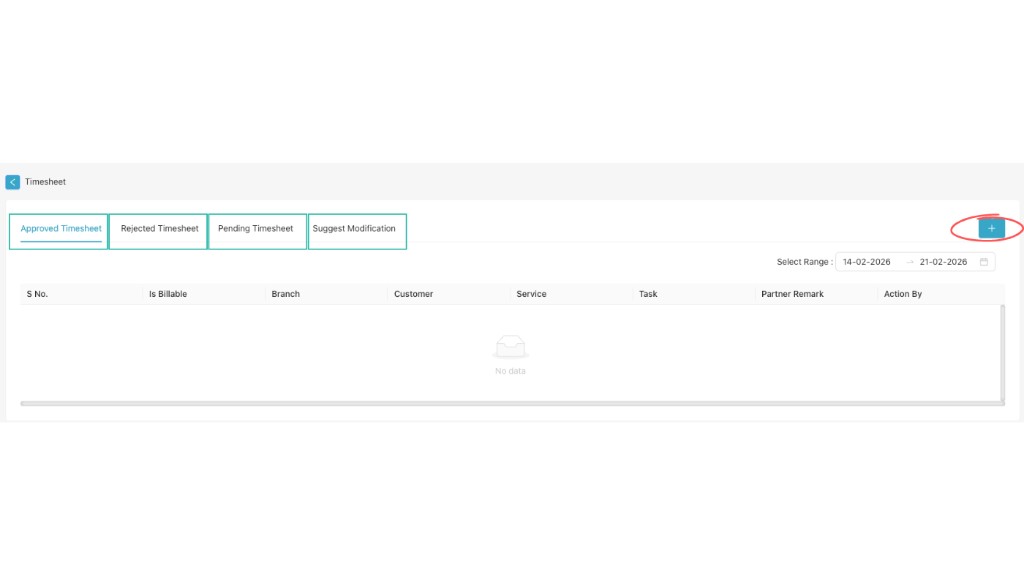
Select Date Range
On the top right corner, locate Select Range. Choose the From Date and To Date. The system will display timesheet records for the selected period.
Add New Timesheet Entry
Click on the + (Add Button) on the right side. The Add Timesheet form will open.
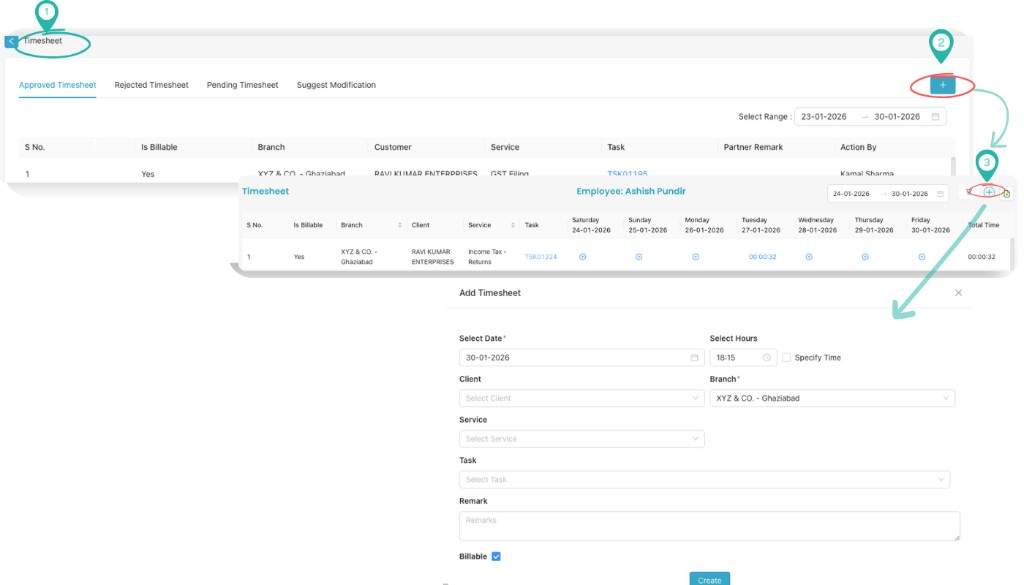
Fill Timesheet Details
Complete the following fields in the Add Timesheet form: Select Date (working date), Select Hours (total working hours; you can click Specify Time if required), Client, Branch (if applicable), Service, Task, Remark (work description/details), and Billable (tick the checkbox if the work is billable).
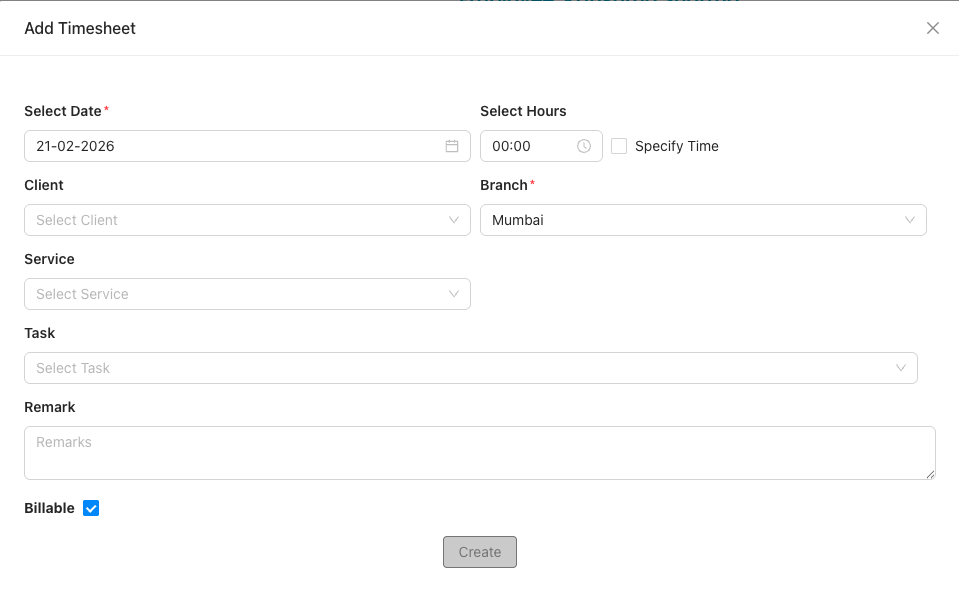
Save Entry
Click the Create button. The timesheet will be saved and will appear in the Pending Timesheet section until approved.

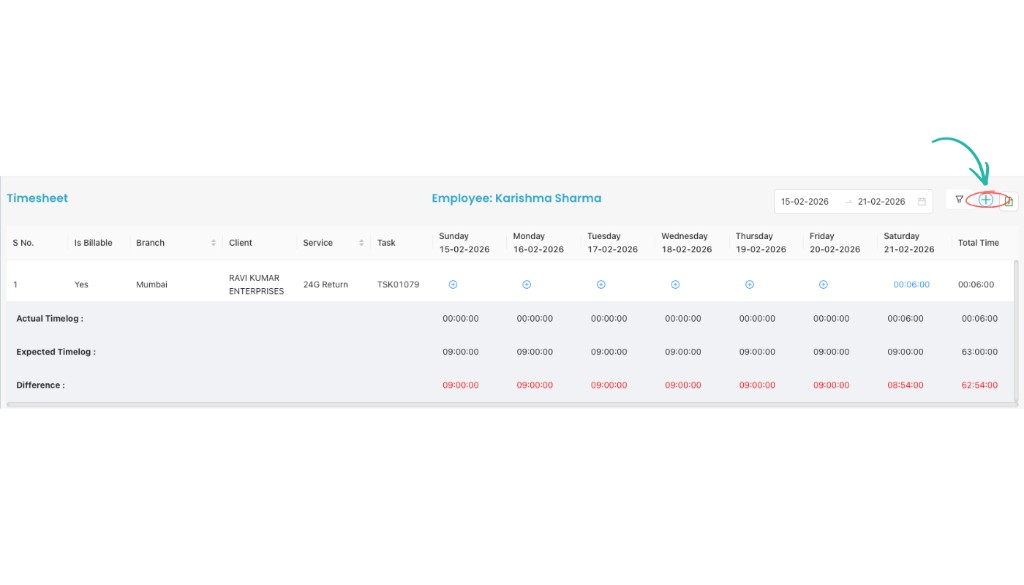
View Employee Timesheet Summary
You can see: Employee Name, Task details, Date-wise hours, and Total Time. The summary also shows Actual Timelog, Expected Timelog, and Difference for the selected period.
Timesheet form fields
In the Add Timesheet form, fill these fields. Fields marked with * are required. Then click Create to save.
Video Tutorial
Watch a step-by-step walkthrough of using the Timesheet module in CA Cloud Desk: Dashboard → HRMS → Timesheet, select status and date range, add entries with +, fill the form and save, then view your summary.