View Employee in CA Cloud Desk
View, edit, and manage employee profiles, details, designations, and permissions from the HRMS View Employee screen.
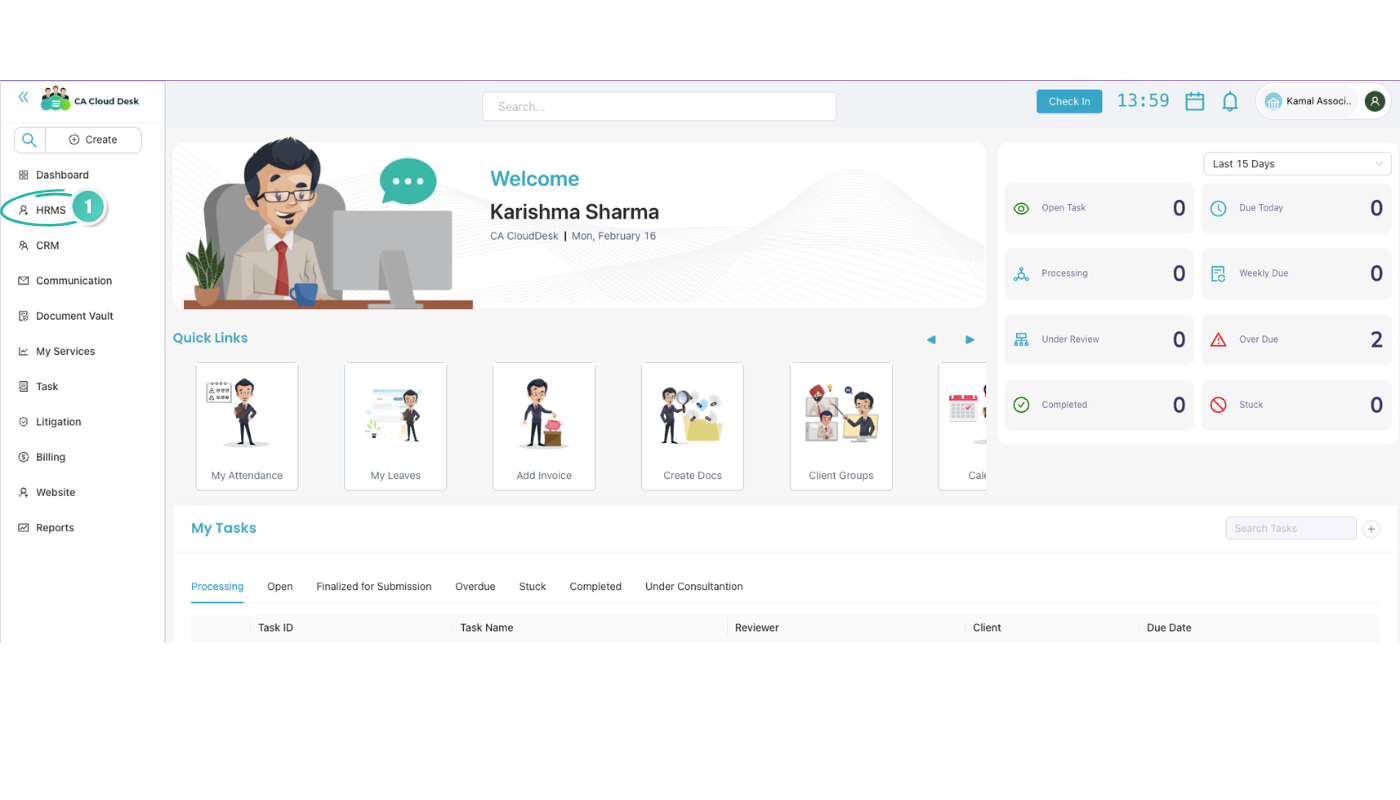
Step 1: Go to dashboard, select HRMS from left panel
From the CA Cloud Desk dashboard, open the left navigation panel and click HRMS to enter the HRMS module.
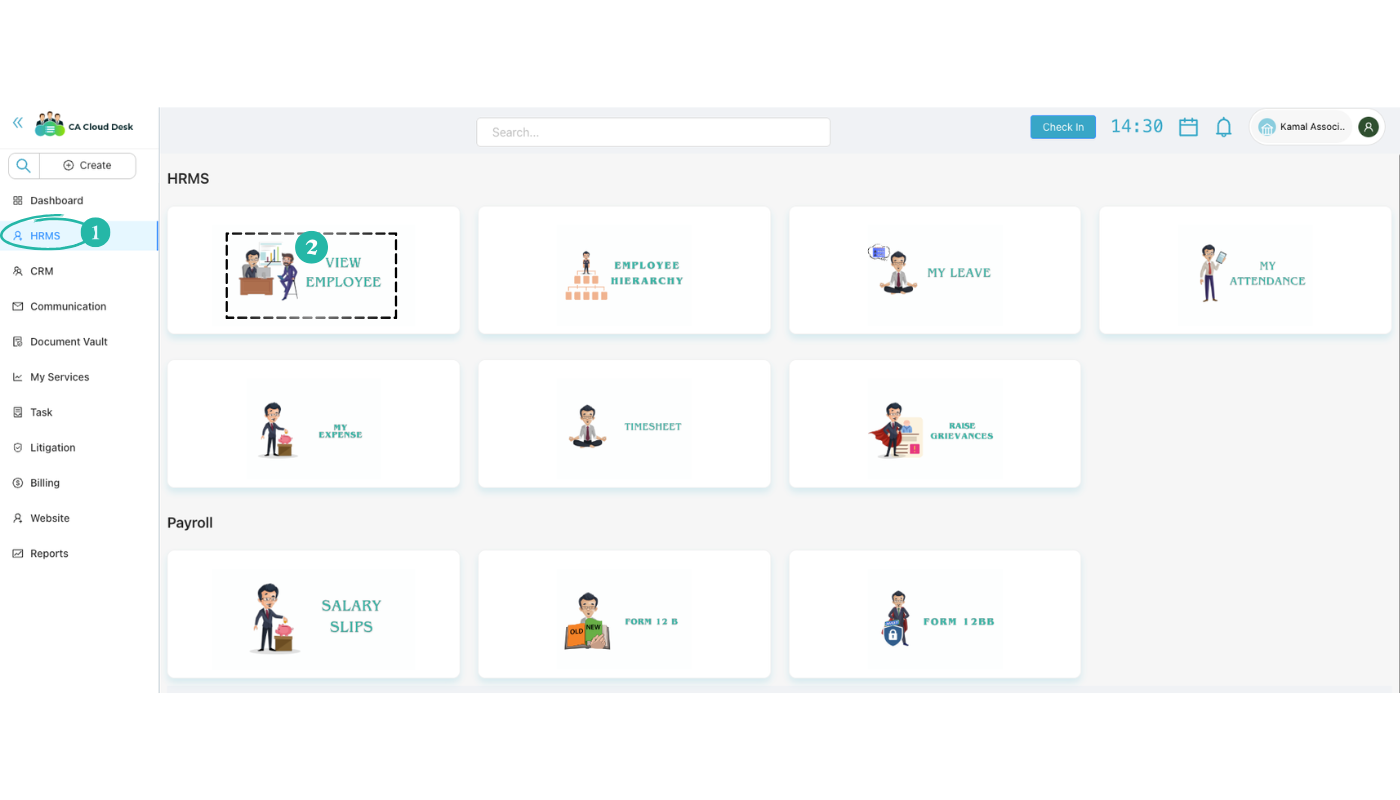
Step 2: Select View Employee from the given options or tabs
On the HRMS screen, you will see cards for different HR functions. Click the VIEW EMPLOYEE card to open the employee list and management screen.
Step 3: View employee list and take action
On the View Employee screen you can see all employees in a table. Use the Employee tab (or Freelancers / Deleted as needed). You can search by employee name, email, designation, or mobile.
Columns shown for each employee:
| Column | Description |
|---|---|
| Name | Employee name |
| Email address | |
| Mobile No. | Contact number |
| Department | Department or team |
| Joining Date | Date of joining |
| Designation | Role / permission set (dropdown) |
| Allow Email | Whether email notifications are allowed |
| Allow SMS | Whether SMS notifications are allowed |
| Allow Notification | Whether in-app notifications are allowed |
| Pending No Dues | No-dues status |
| Portal Access | Toggle for portal access |
| Take Action | Delete, Reset Password, Edit |
From the Take Action column you can:

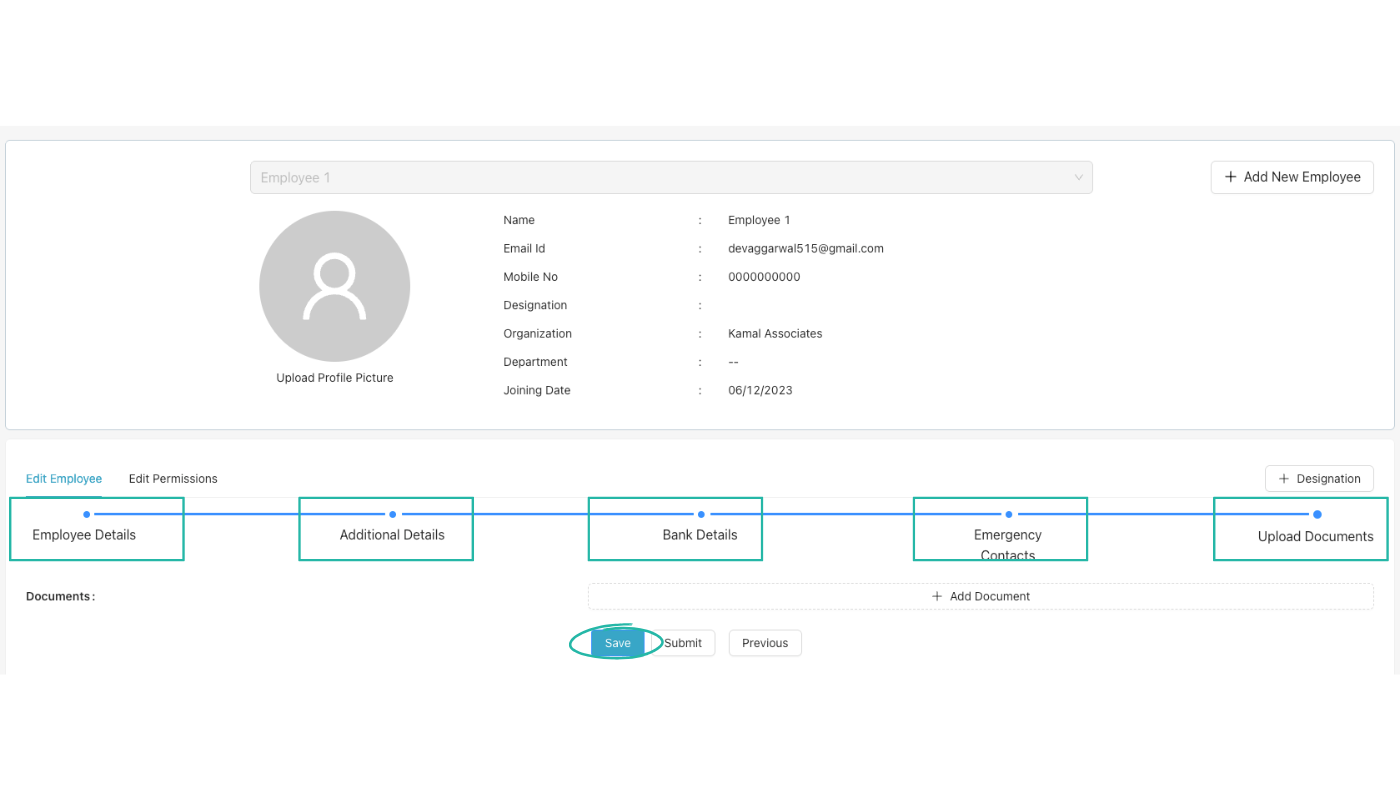
Step 4: Edit employee
After clicking Edit for an employee, you can update their information in a step-by-step flow. Use the horizontal steps to move between sections:
Use Save, Submit, and Previous as needed. You can also use the employee dropdown at the top to switch between employees or + Add New Employee to create a new record.
Step 5: Designation & Edit Permission
You can set or change an employee’s designation and edit their permissions:
- + Designation button — Use the + Designation button (next to the edit steps) to create or manage designations. Assign a designation to the employee from the Designation dropdown in the table or in Edit Employee.
- Edit Permissions — Switch to the Edit Permissions tab to control access by module. Permissions can follow the designation or be adjusted per employee.
Permission areas you can manage include:
Configure these according to the employee’s role and designation so they have the right access across CA Cloud Desk.

Video Tutorial
Watch a walkthrough of viewing and managing employees in CA Cloud Desk: navigating to HRMS → View Employee, using the employee table, and editing details, designations, and permissions.