Add Client Documents
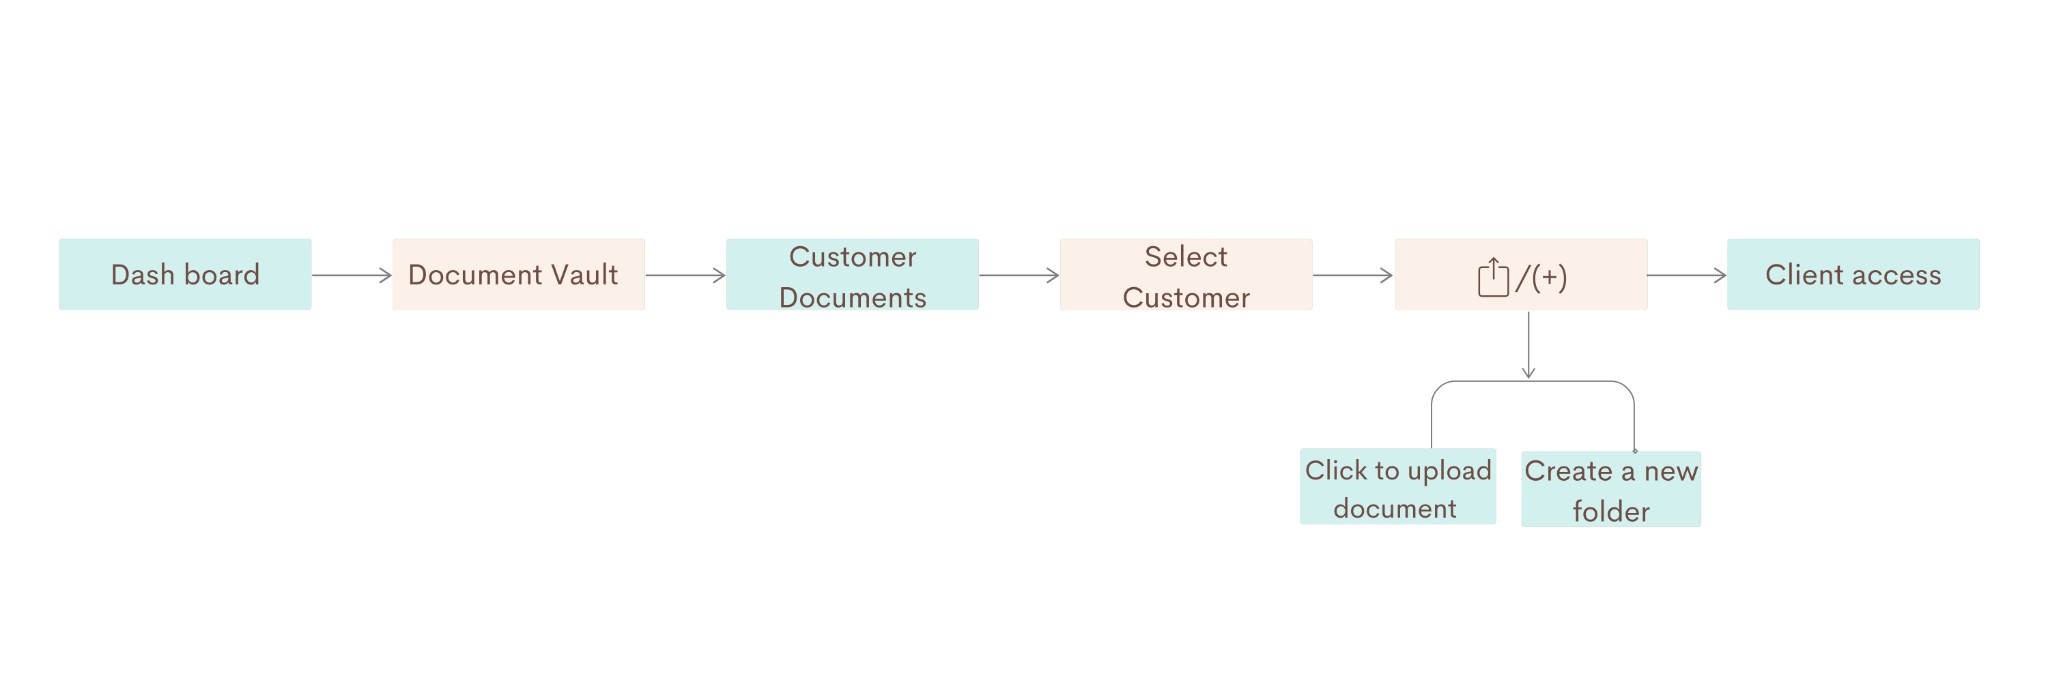
Upload and manage client documents from the Document Vault: select Customer Document, choose a customer, then upload files or create folders. Control whether each document is visible to the client (client access: Yes or No).
Path
Step-by-step instructions
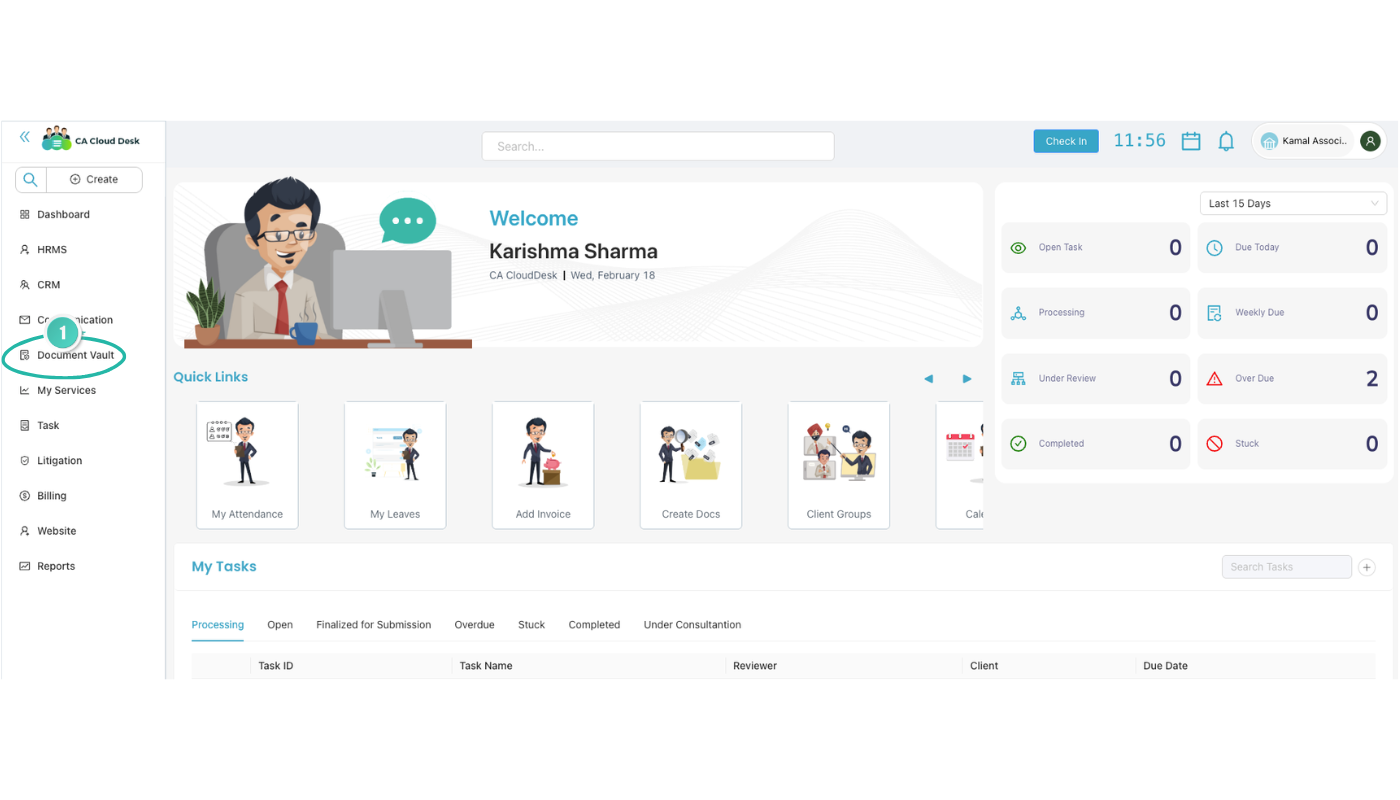
Go to Dashboard, then select Document Vault from the left panel
From the main Dashboard, use the left navigation panel and select Document Vault to open the document management area.
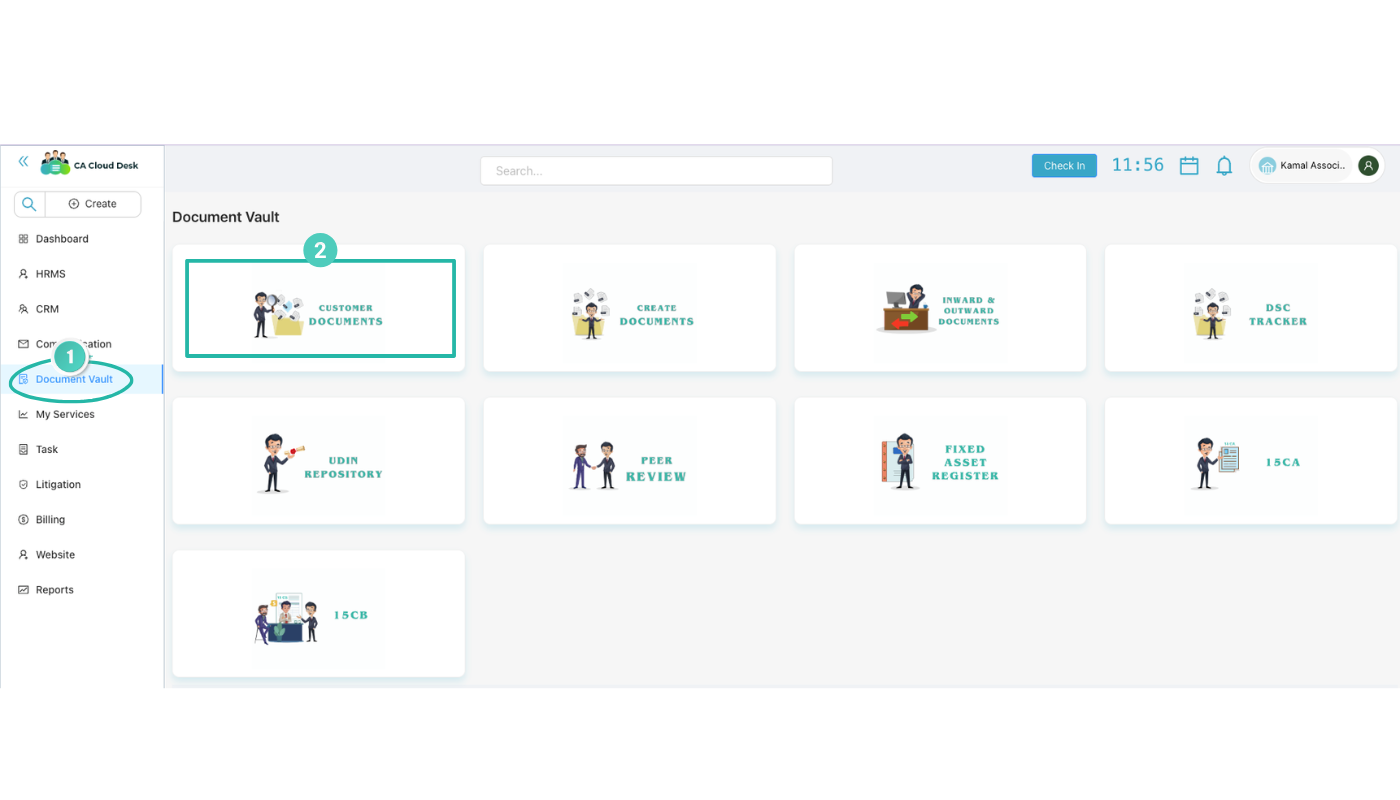
Select Customer Document
Inside Document Vault, choose Customer Document to work with client-specific documents.
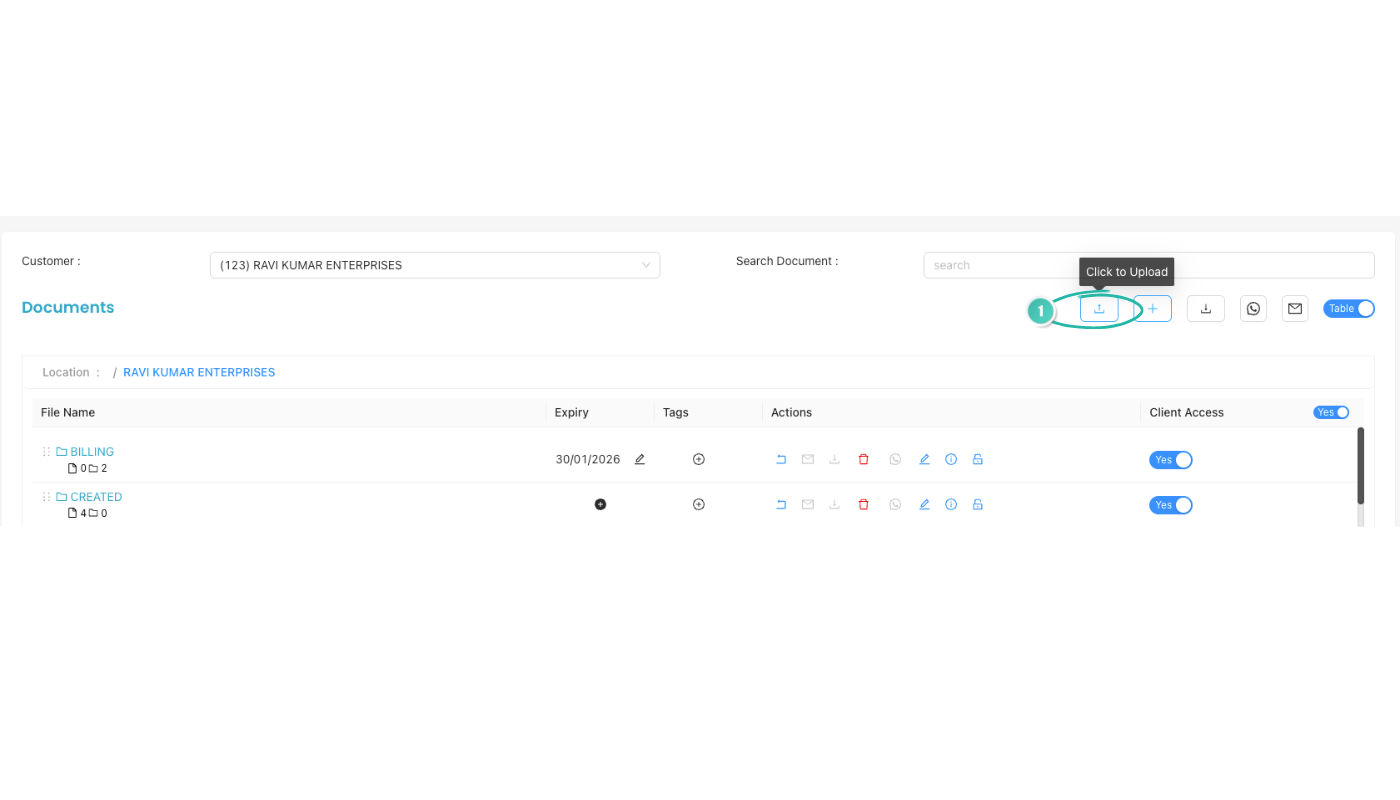
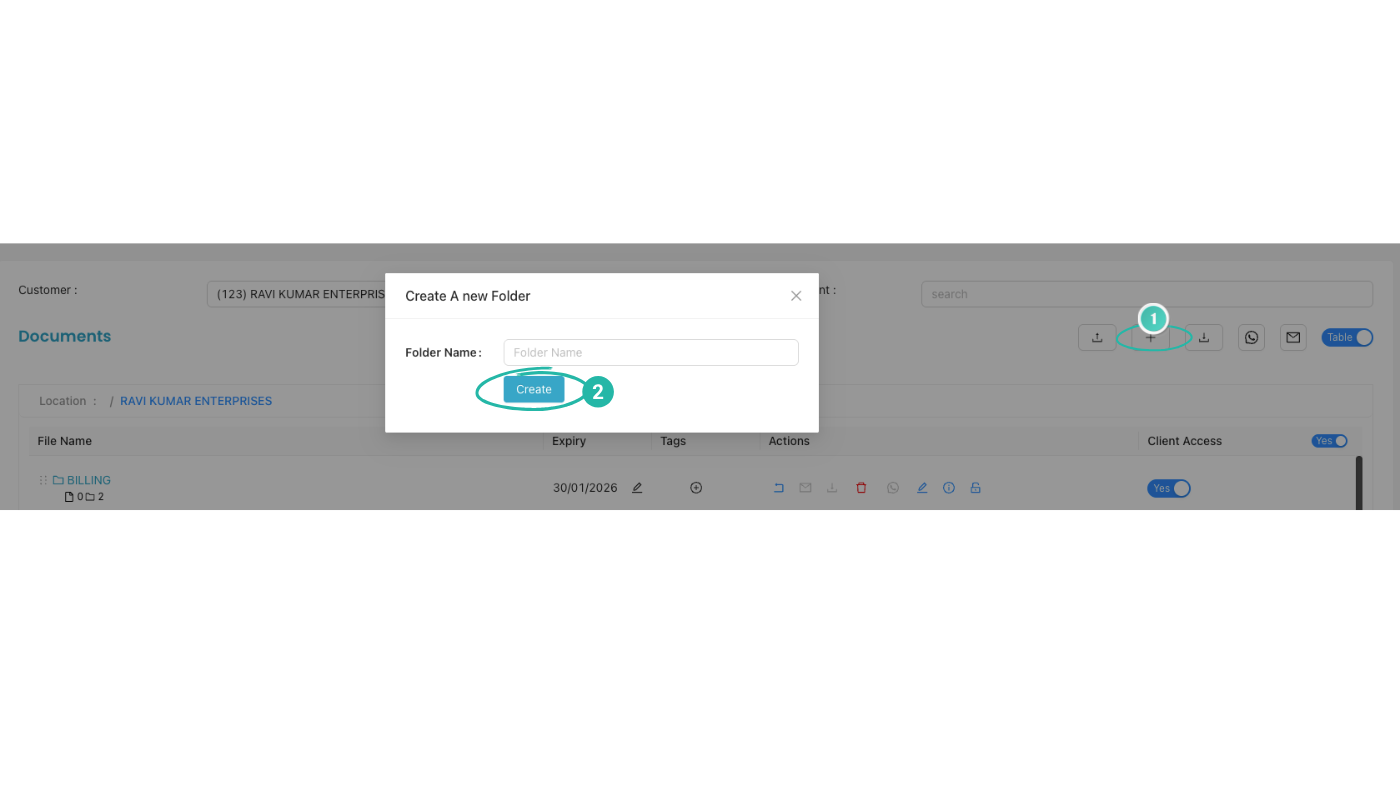
Select Customer, then upload or create a folder
Select the Customer you want to add documents for. Then you can:
- a) Click to upload document — add files for this client.
- b) Create a new folder — name the folder using the Folder Name field to organize documents.
Client access
After saving, you will see the following for each document you uploaded:
- File Name
- Expiry
- Tags
- Actions
To give the client access to a document, use the client access option and select Yes or No for that document.
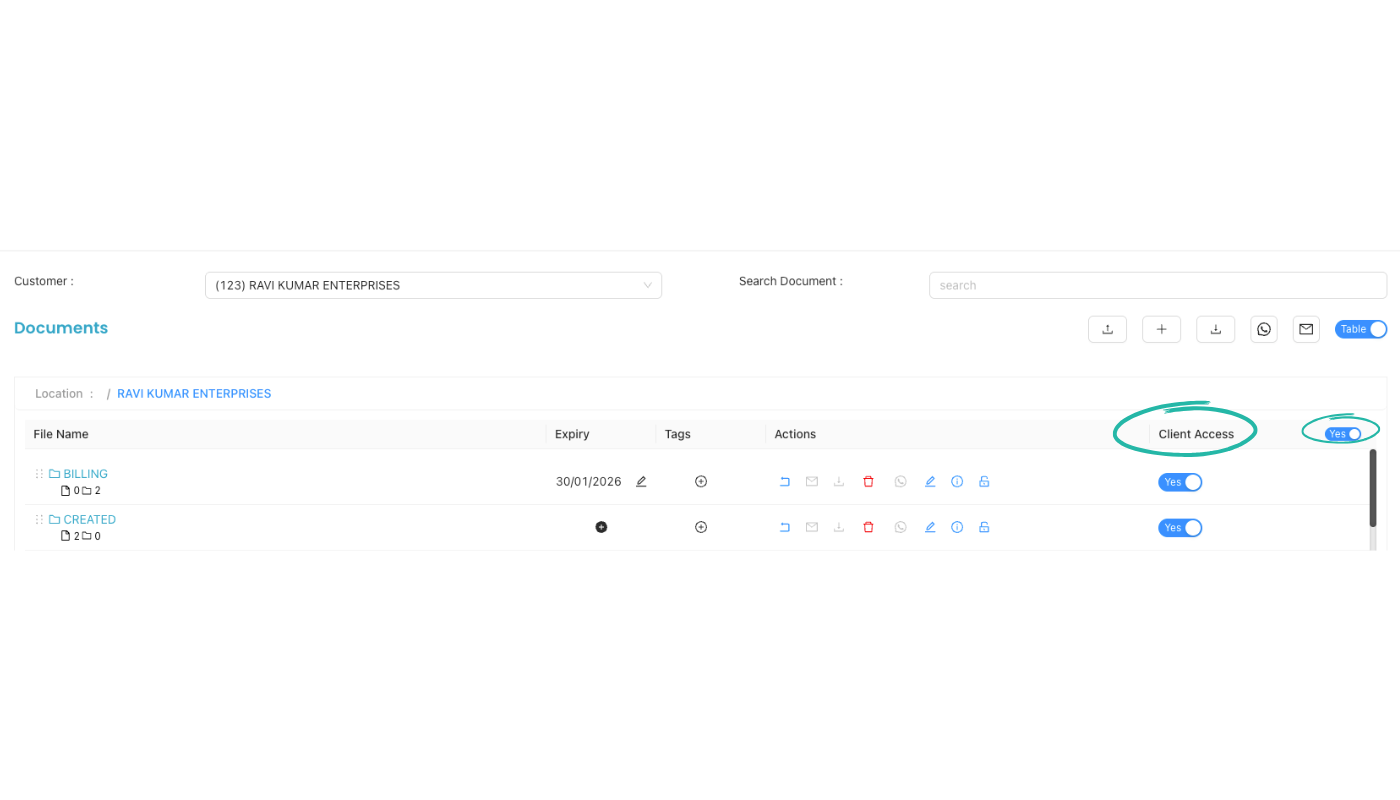
Client access summary
Each uploaded document can be made visible (or hidden) to the client. Use the Yes or No option for client access so the client can view only the documents you allow.
Video Tutorial
Watch this video for a step-by-step walkthrough of adding client documents in CA Cloud Desk — Dashboard → Document Vault → Customer Document → select customer, upload or create folder, and set client access.