Add Holidays
Add and manage holidays in CA Cloud Desk: go to Dashboard → Profile → HRMS → HRMS Setting, open the Holiday tab, then use the + icon to create holidays via Add from template, Add holiday, or Add bulk holiday.
Path
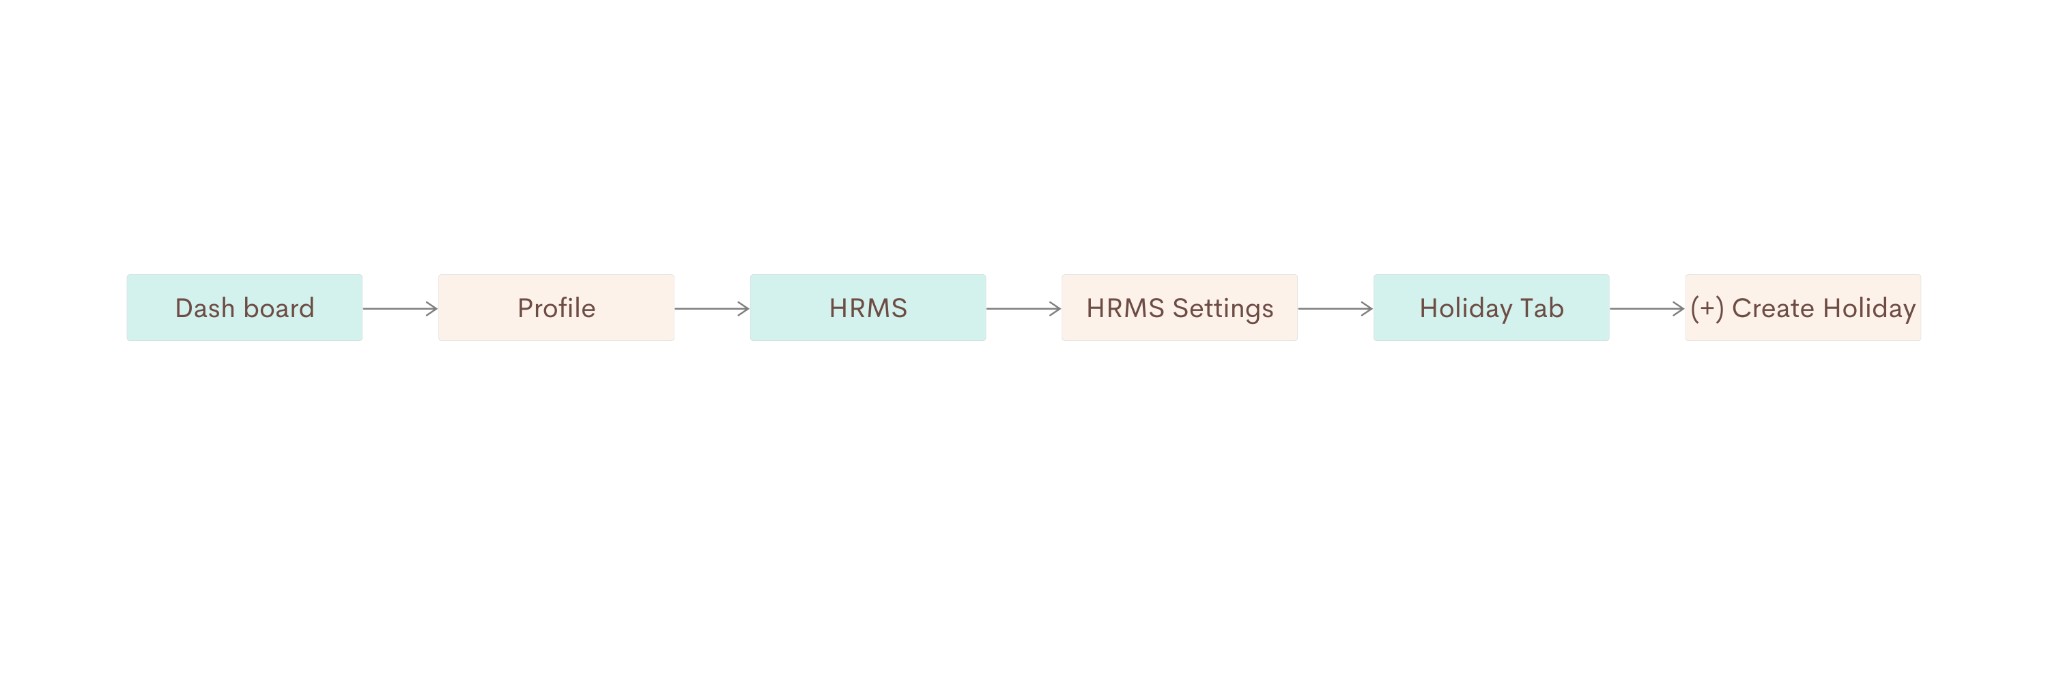
Step-by-step instructions
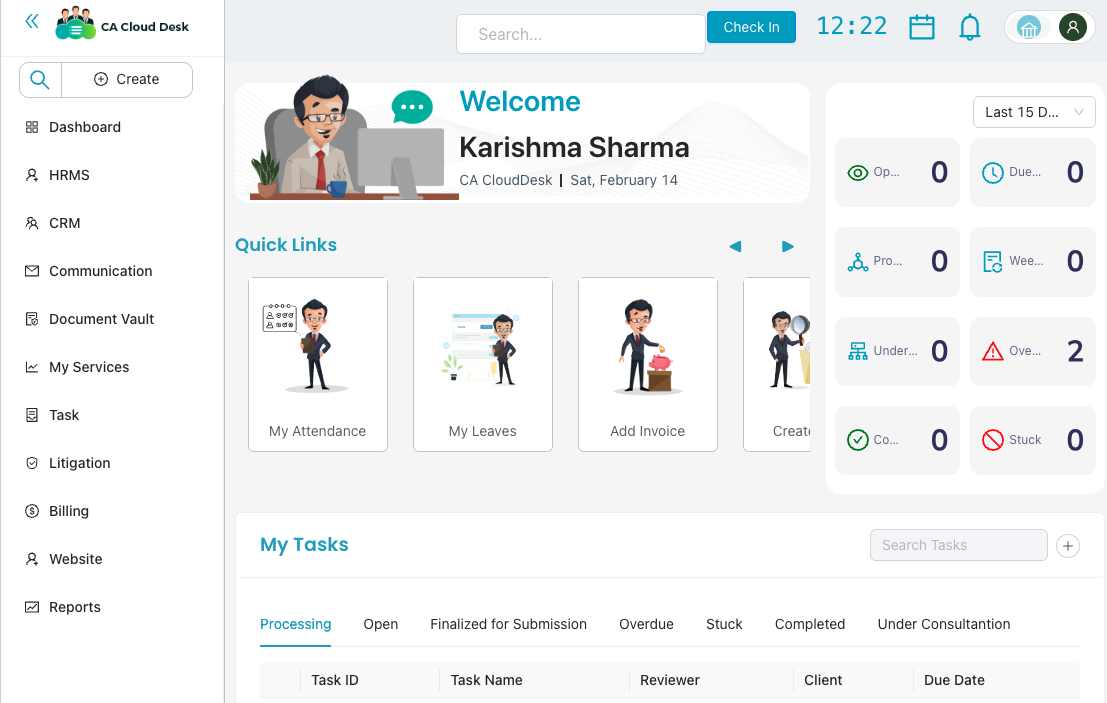
Go to Dashboard, then select Profile
From the main Dashboard, click your profile icon (user avatar) in the top-right corner of the header to open your profile area.
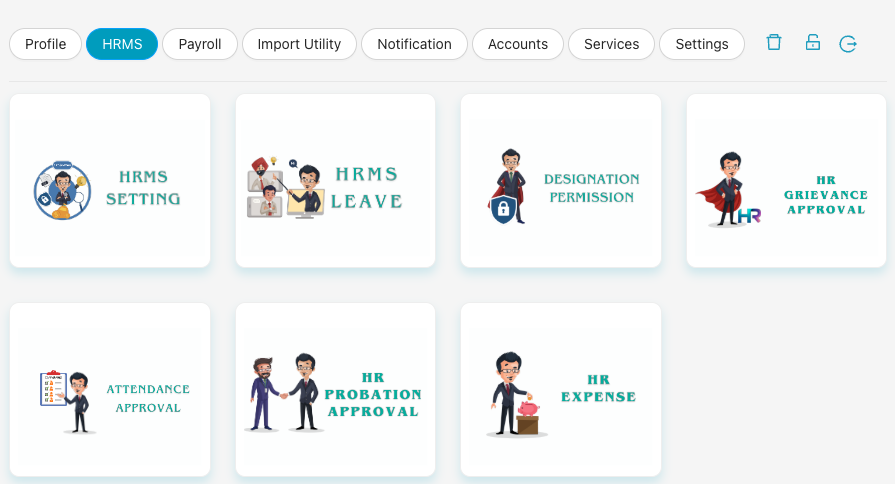
Select HRMS, then HRMS Setting
In the left navigation sidebar, click HRMS. On the HRMS page, use the top tabs and select HRMS Setting (the card with settings/gears icon).
Select Holiday tab and use the + icon to create holiday
Inside HRMS Setting, click the Holiday tab. Then click the blue + button to open the create-holiday menu. You will see three options: Add From Template, Add Holiday, and Add Bulk Holiday.

Create holiday options
Add From Template
Opens a Shift Template (or holiday template) dialog listing predefined holidays (e.g. Republic Day, Maha Shivaratri) with name, from/to date, holiday type, and description. Use the action icon on each row to add that holiday to your list.

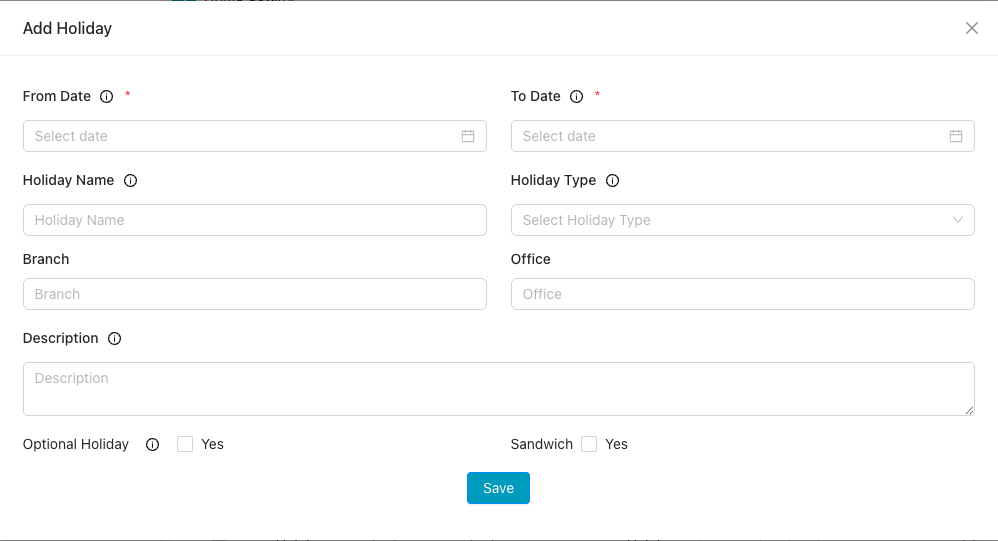
Add Holiday
Opens the Add Holiday form to create a single holiday. Fill in:
- From Date, To Date (required) — use the date picker
- Holiday Name
- Holiday Type — select from dropdown
- Branch, Office
- Description
- Optional Holiday — Yes/No
- Sandwich — Yes/No
Click Save to add the holiday.
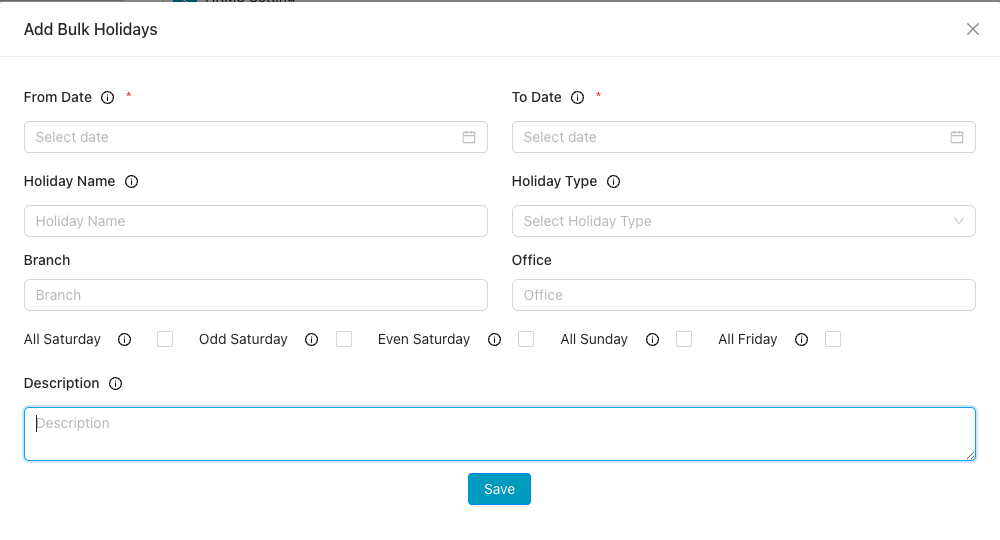
Add Bulk Holiday
Opens the Add Bulk Holidays form to create multiple holidays at once. You can set:
- From Date, To Date (required)
- Holiday Name, Holiday Type
- Branch, Office
- Day selection — All Saturday, Odd Saturday, Even Saturday, All Sunday, All Friday (checkboxes)
- Description
Click Save to add all matching dates in the range as holidays.
Video Tutorial
Watch this video for a step-by-step walkthrough of adding holidays in CA Cloud Desk—Dashboard → Profile → HRMS → HRMS Setting → Holiday, and Add from template, Add holiday, or Add bulk holiday.