Add Pay Details
You can add pay details in two ways. Part A (Manual): go to Profile setting → Payroll → Account setting → Pay details, click the plus icon, fill the form and save. Part B (Bulk): use Import utility → HRMS → upload pay details via a sample Excel file.
Path
Part A
Add pay details manually from the CA Cloud Desk dashboard: go to Profile setting → Payroll → Account setting → Pay details, click the plus icon, fill all fields and save.
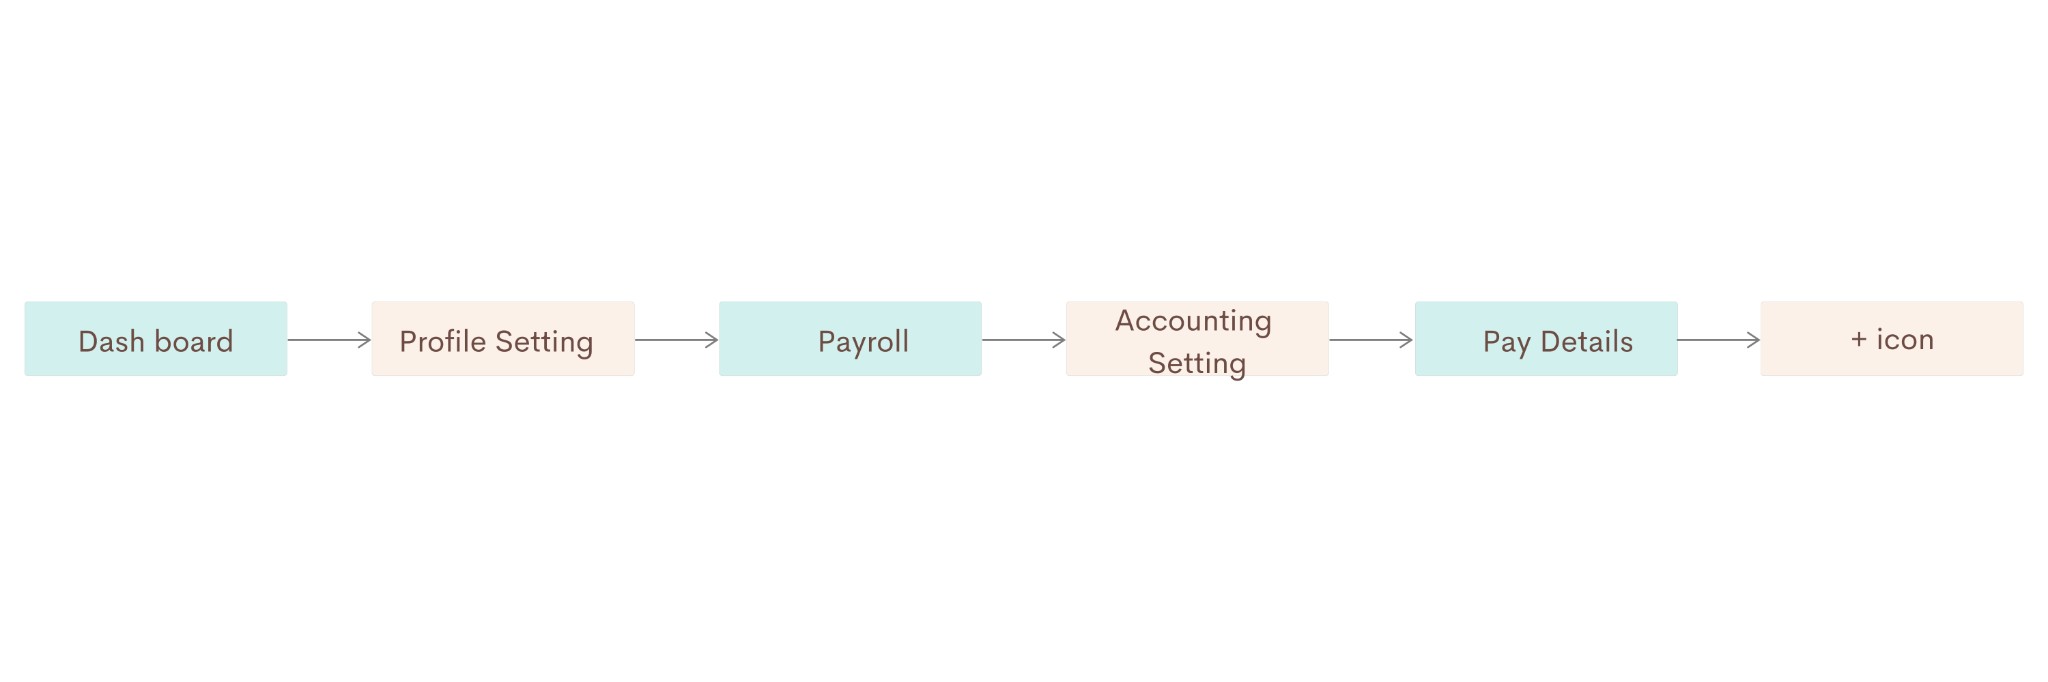
Flowchart (Part A) — Dashboard → Profile Setting → Payroll → Accounting Setting → Pay Details → + icon.
Go to CA Cloud Desk dashboard, then go to Profile setting
Open the CA Cloud Desk dashboard, then click Profile setting (profile icon in the top right) to open your profile and organization settings.
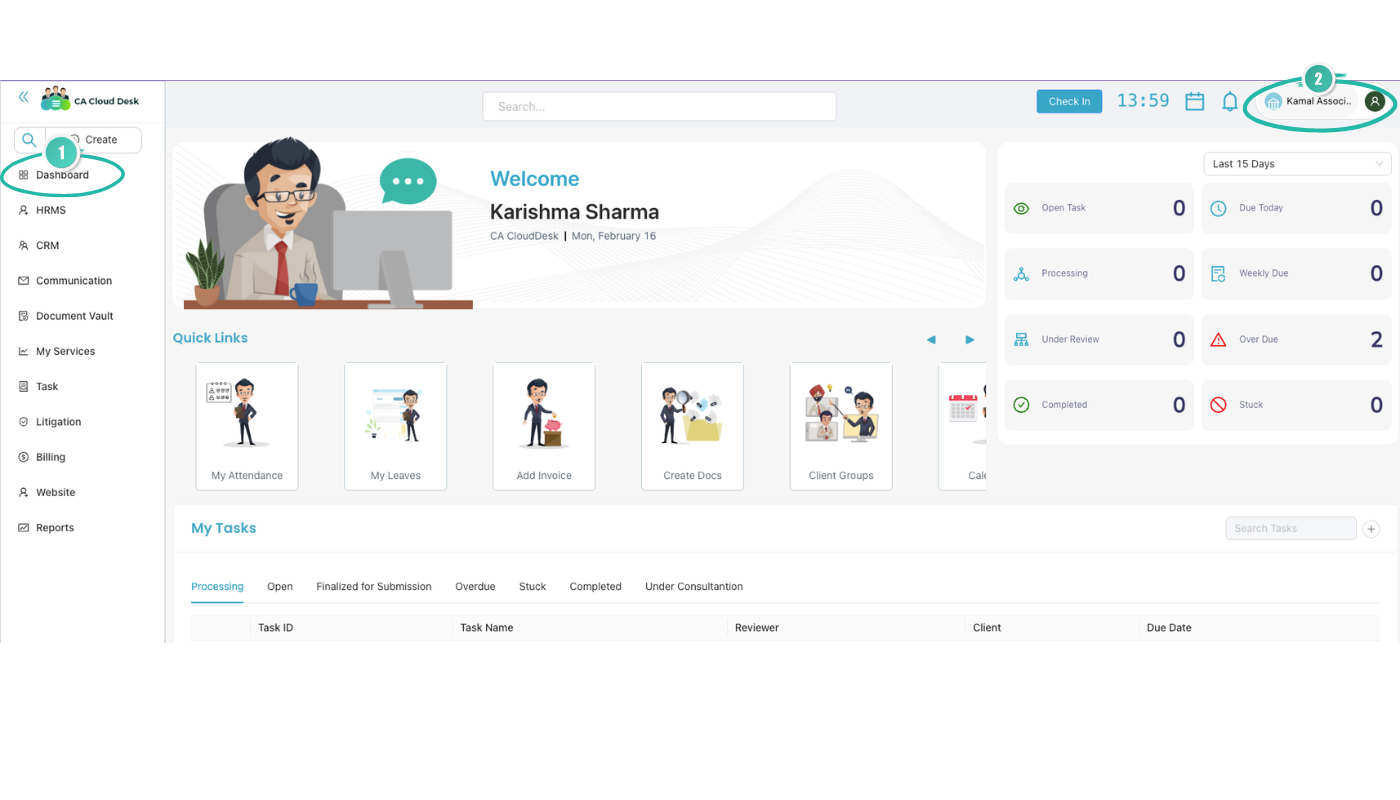
Step 1 — Dashboard (1); click the profile area (2) in the top right for Profile setting.
Select Payroll, then select Account setting
From the menu, select Payroll, then select Account setting to access payroll and account configuration.
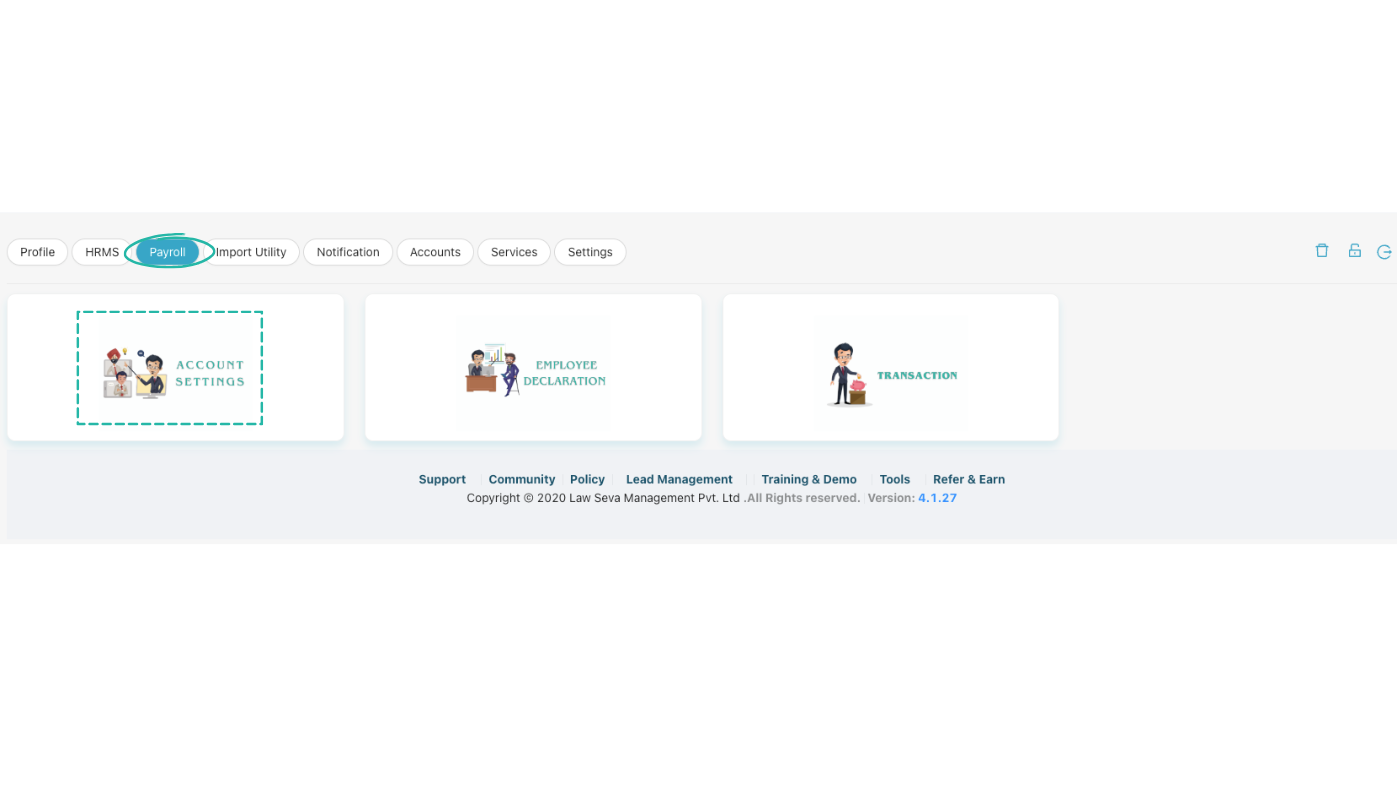
Step 2 — Select Payroll, then click the ACCOUNT SETTINGS card.
From Account setting, select Pay details, then click the plus icon
Under Account setting, select Pay details, then click the + (plus) icon to add new pay details.
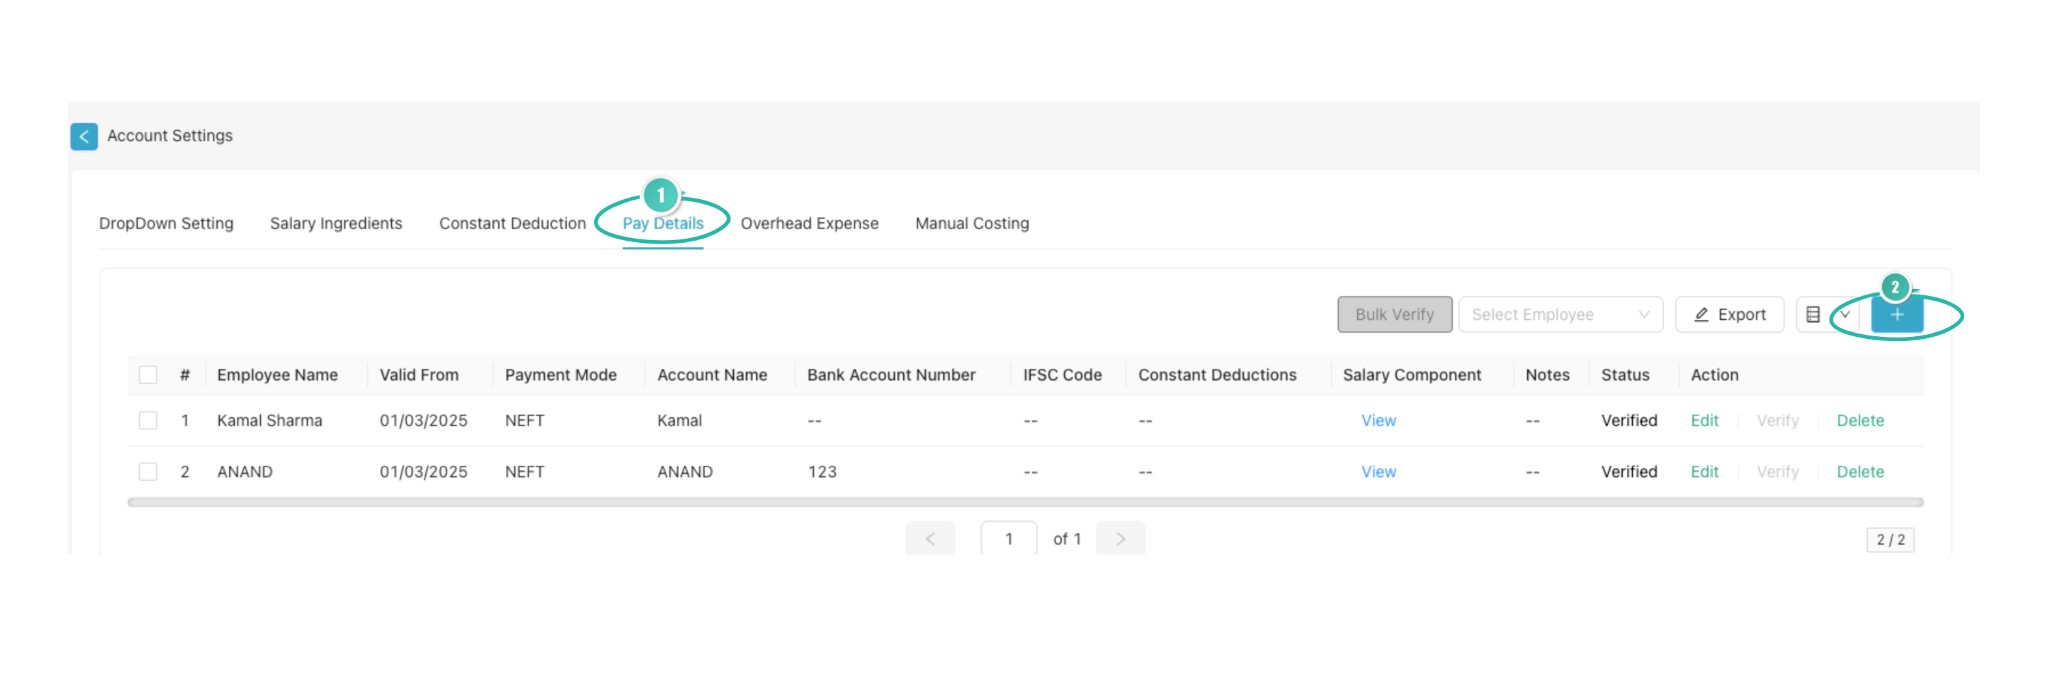
Step 3 — Select the Pay Details tab (1), then click the + button (2) to add new pay details.
Fill all the details and click Save
Fill in all required and optional fields in the form, then click Save.
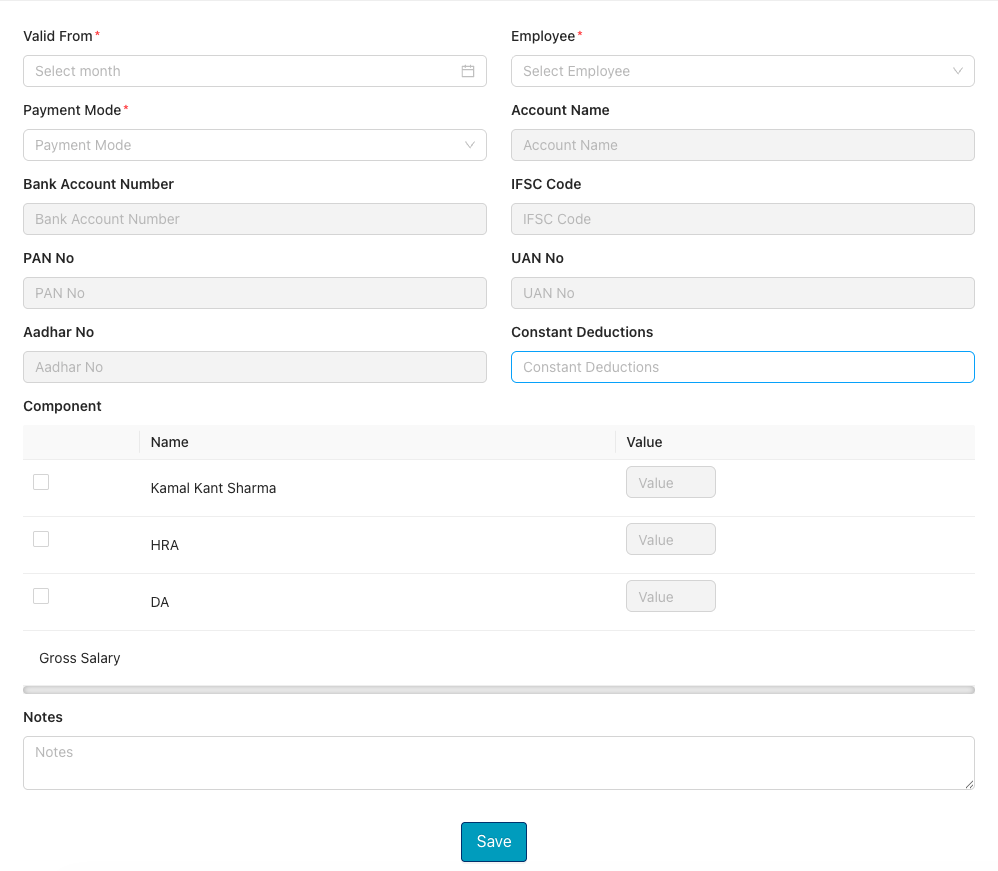
Step 4 — Fill in Valid From, Employee, Payment Mode, account and bank details, Component values, Notes, then click Save.
Pay details form fields
- Valid From — effective date for the pay details
- Employee / Select Employee — choose the employee
- Payment Mode — select payment mode (e.g. Bank Transfer, Cash, Cheque)
- Account Name — name of the bank account
- Bank Account Number
- IFSC Code
- PAN No
- UAN No — Universal Account Number (PF)
- Aadhar No
- Constant Deductions — optional constant deduction amount or toggle
- Component — salary components with Name and Value (e.g. HRA, DA, Gross Salary)
- Notes — optional notes
Component table example:
| Name | Value |
|---|---|
| HRA | — |
| DA | — |
| Gross Salary | — |
Part B
Upload pay details in bulk using the Import utility. Go to Profile setting → Import utility → HRMS, select Pay details, download the sample Excel file, prepare your file as per the guidelines, and upload.
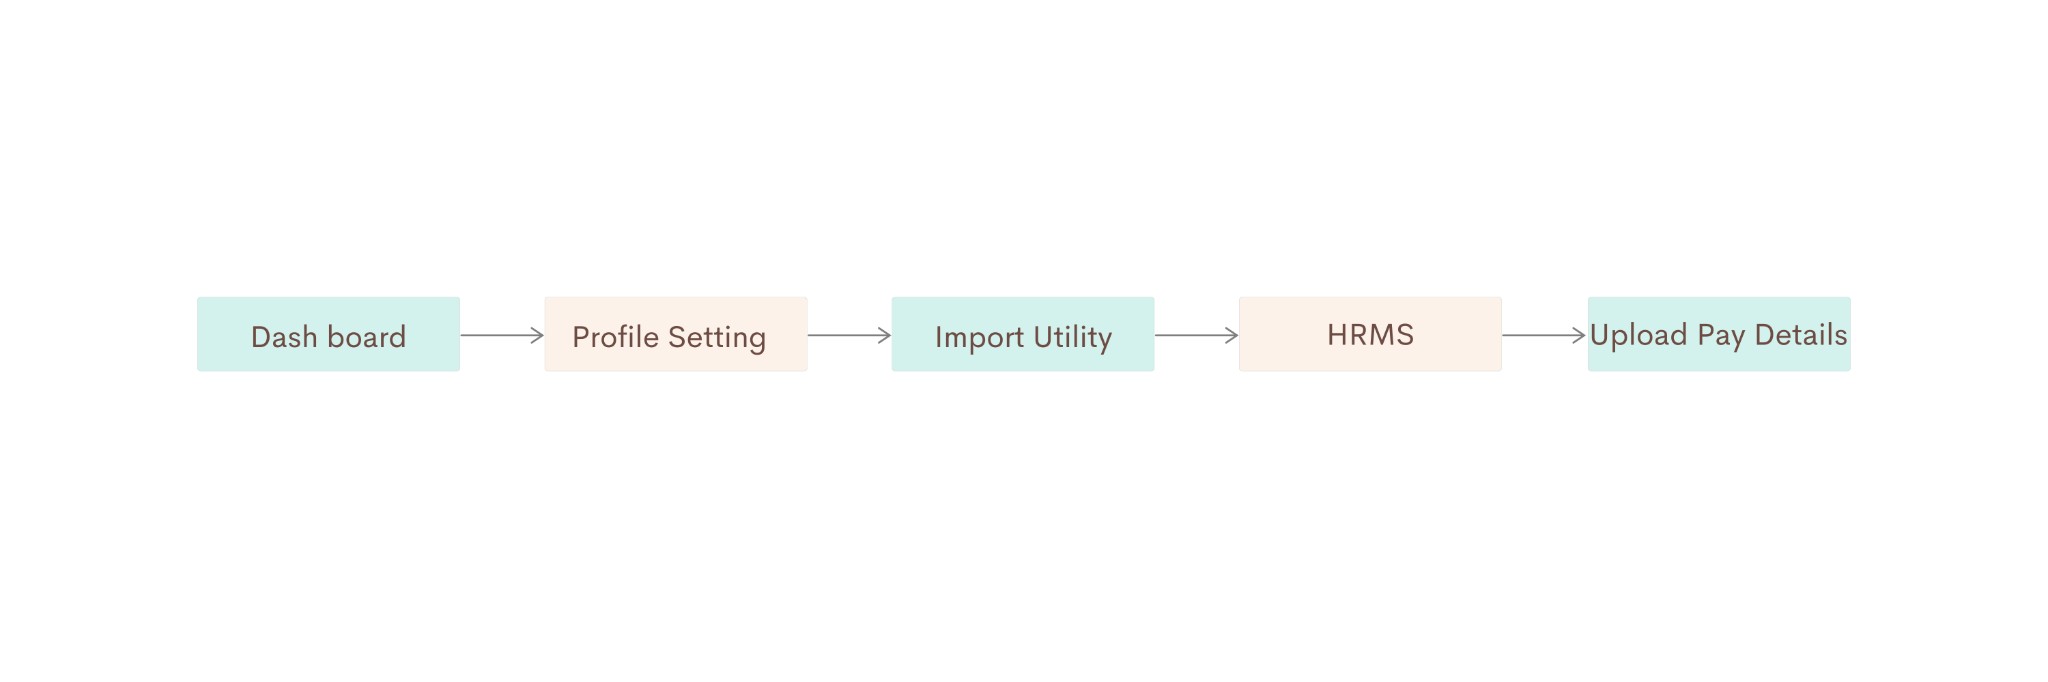
Flowchart (Part B) — Dashboard → Profile Setting → Import Utility → HRMS → Upload Pay Details.
Go to the dashboard, then select Profile setting
From the Dashboard, click Profile setting (profile icon in the top right) to open your profile and organization settings.

Step 1 — Ensure Dashboard is selected (1) in the left menu, then click your profile/company name (2) in the top right for Profile setting.
Select Import utility, then from Clients, Task, Billing, HRMS and Document vault select HRMS
Select Import utility. From the options (Clients, Task, Billing, HRMS, Document vault), select HRMS to import HRMS data.
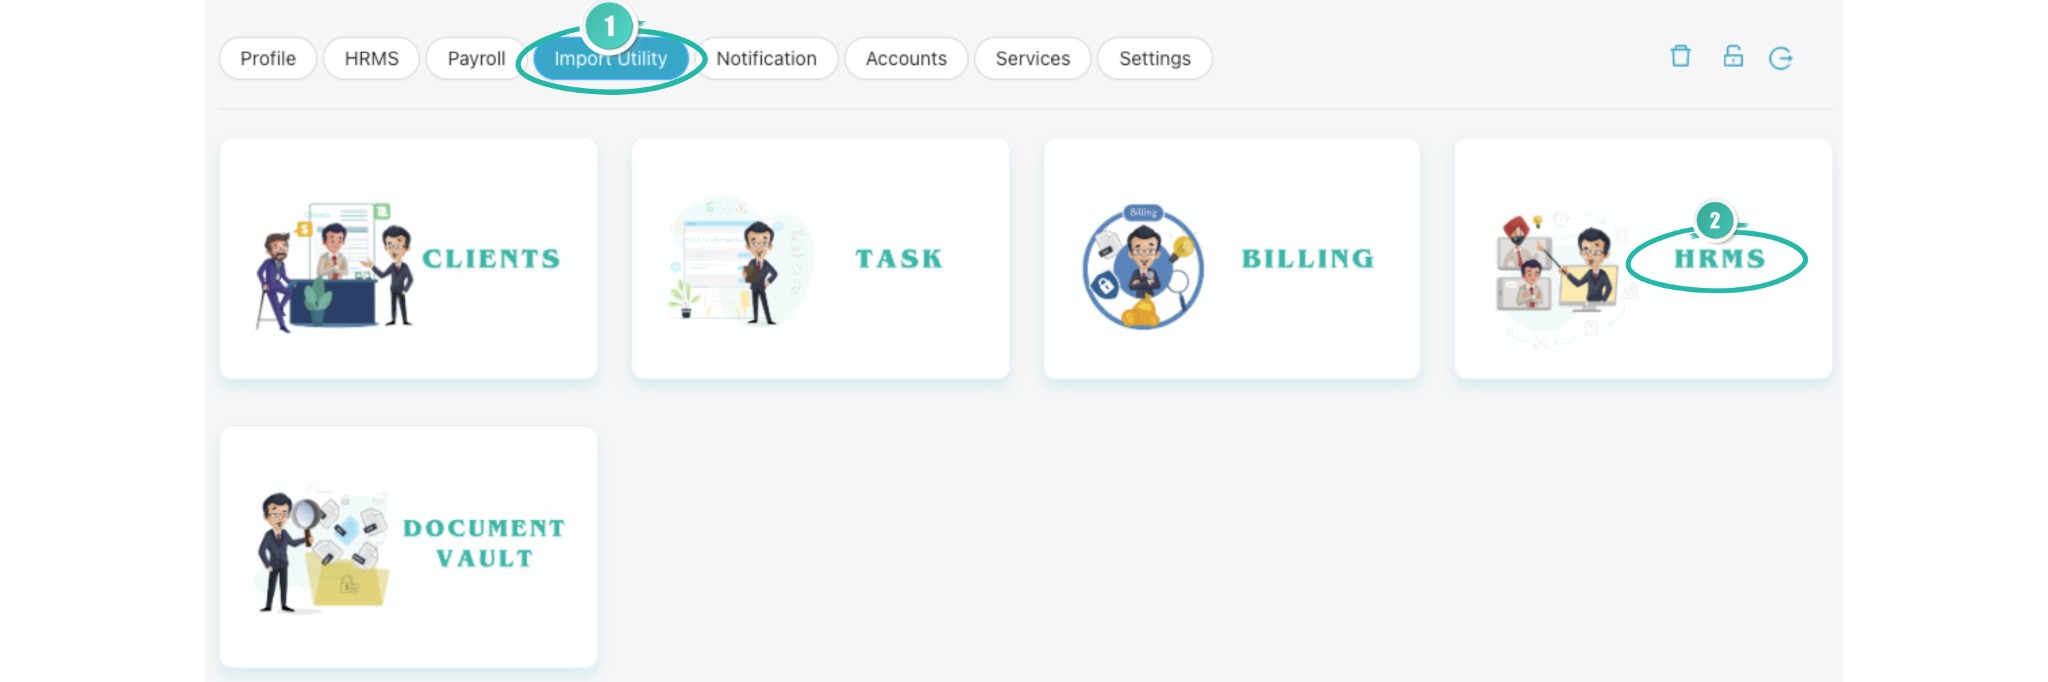
Step 2 — Click Import Utility (1) in the top menu, then select the HRMS card (2).
Upload pay details
From the options given, select Pay details. The import options under HRMS typically include:
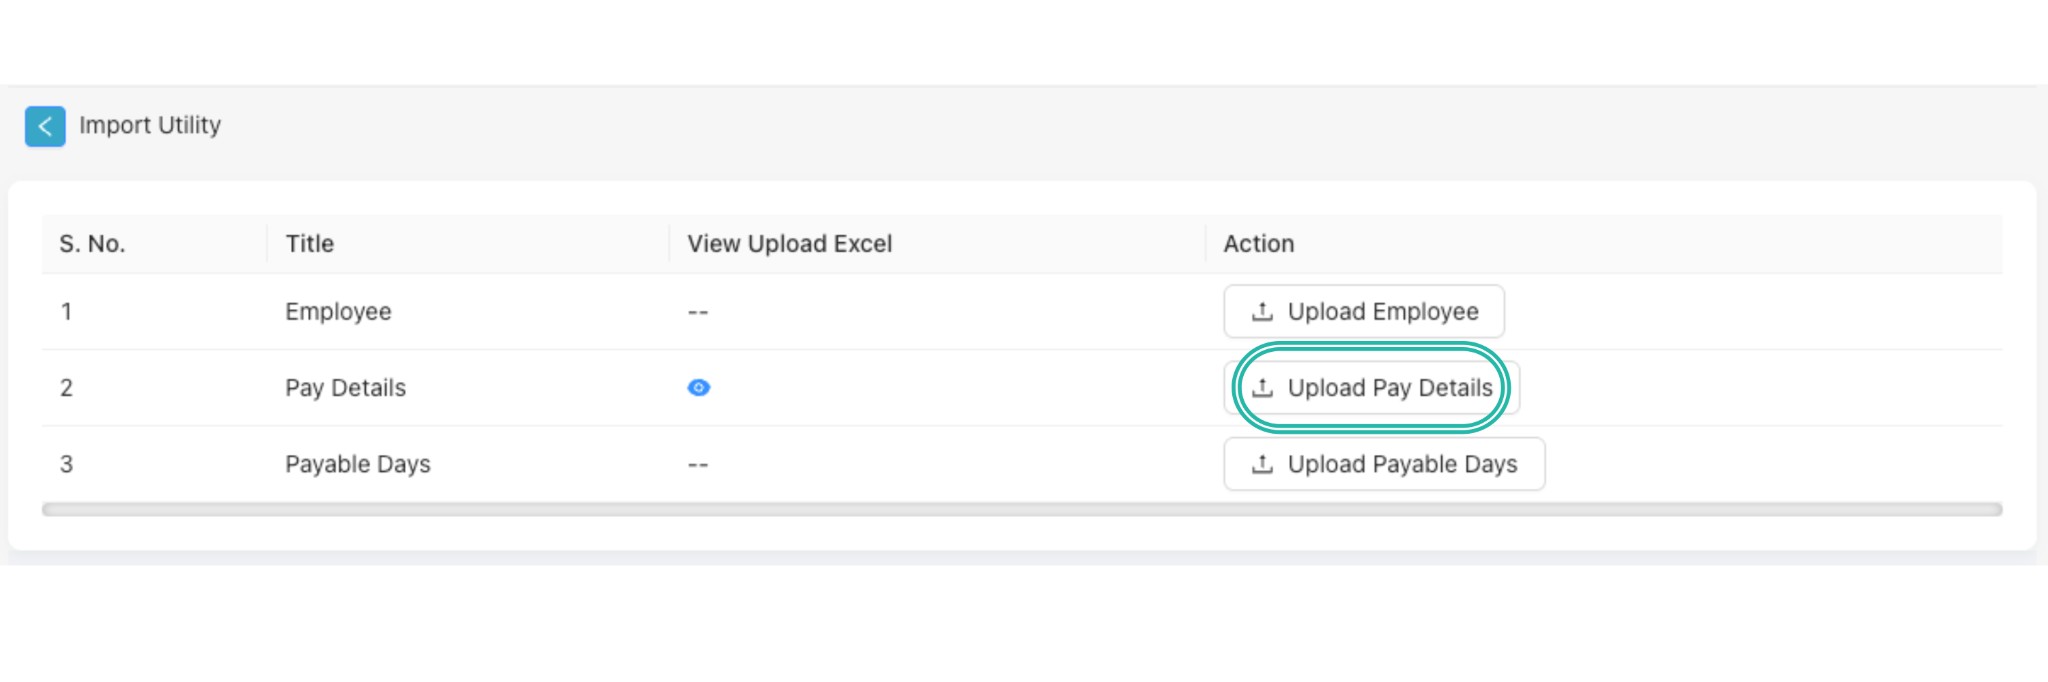
Step 3 — In the Import Utility table, find the Pay Details row and click Upload Pay Details.
Then:
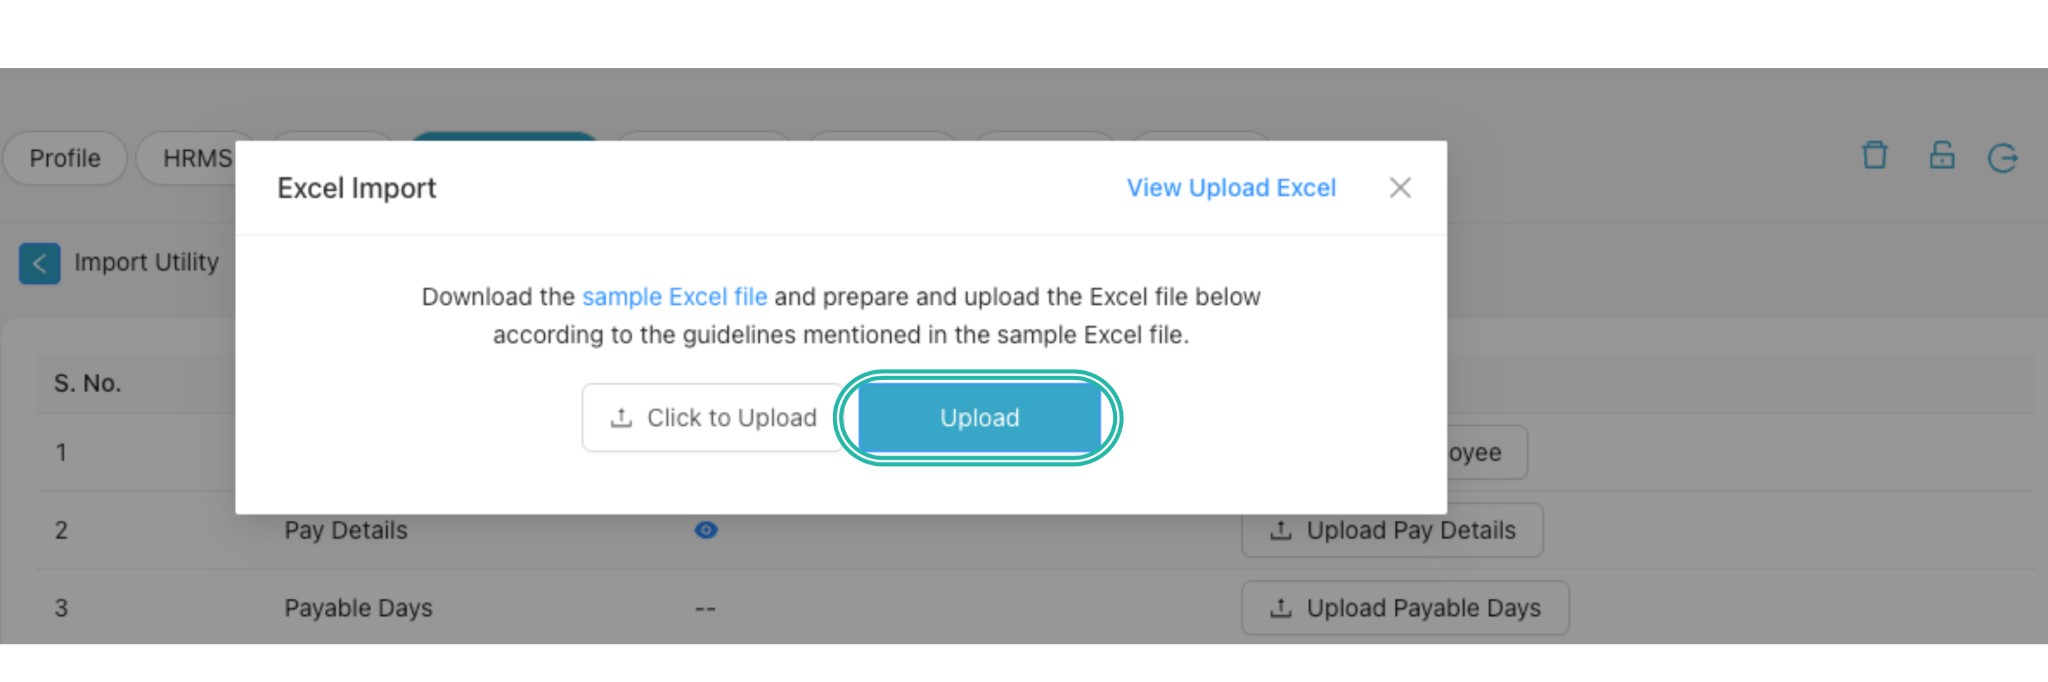
Step 3 — In the Excel Import dialog, use the sample Excel file link to download the template, prepare your file, then use Click to Upload and click Upload to complete.
Your pay details will be imported in bulk according to the uploaded file.
Video Tutorial
A video walkthrough for adding pay details in CA Cloud Desk will be available here—Part A (manual: Profile → Payroll → Account setting → Pay details) and Part B (bulk: Import utility → HRMS → Upload Pay Details). You can also use the View PDF Guide button in the left sidebar to open or download the full guide.
Video tutorial link will be added here.
Tutorial: Add Pay Details in CA Cloud Desk — video link to be added.