HR Expense
Use the HR Expense module (Part C – HRMS for HRs) to review and manage employee expense claims. Go to Dashboard → Profile settings → HRMS → HR Expense. The HR Expense screen has three tabs: Pending Expenses, Approved Expenses, and Rejected Expenses.
Path
How to open HR Expense
Go to the Dashboard
From the left navigation, click Dashboard so that you are on the main dashboard view.
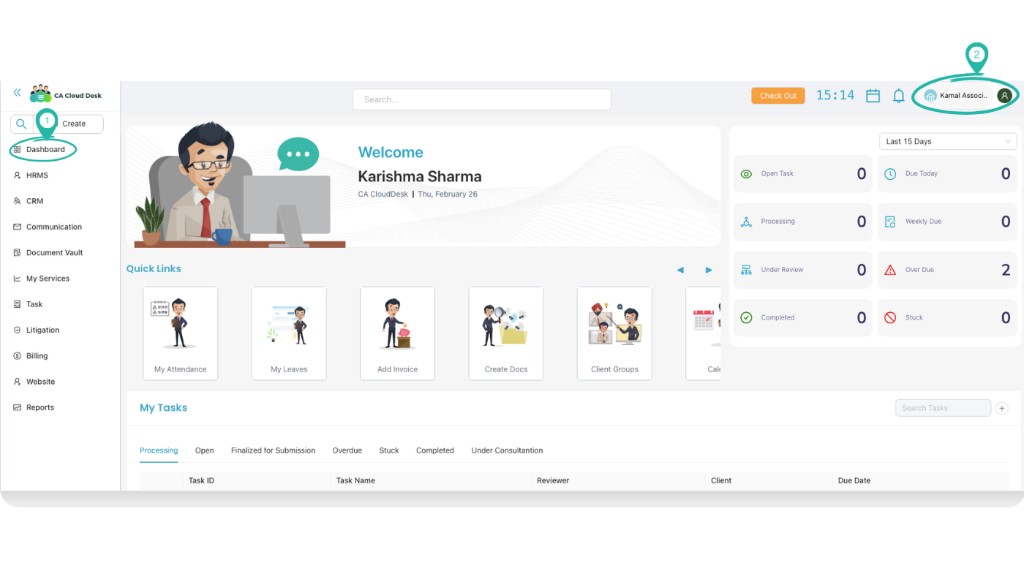
Select Profile settings
In the top-right corner, click your profile name or the person/company name (e.g. “Kamal Associ…”). From the menu, select Profile settings.
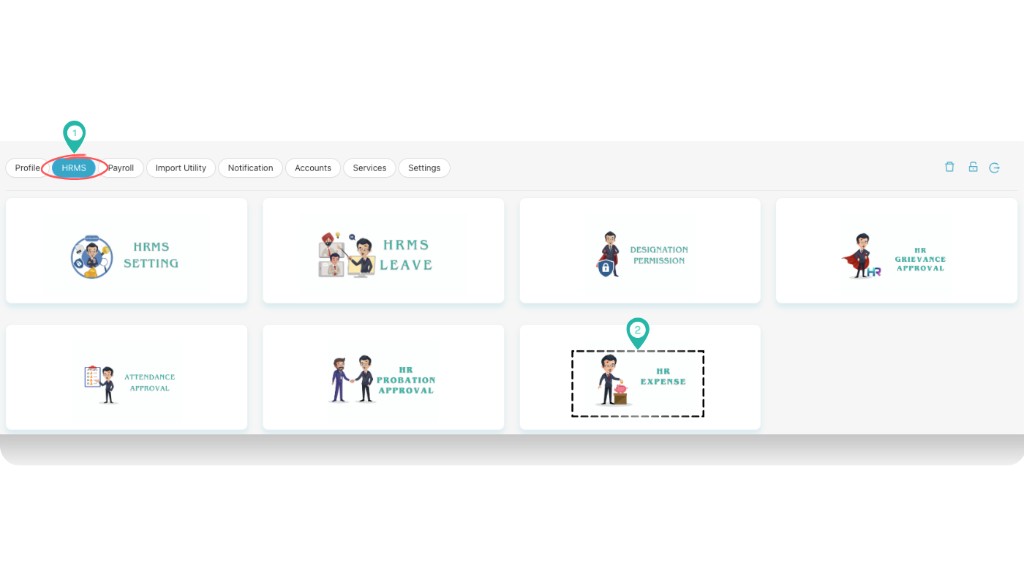
Select HRMS, then HR Expense
In Profile settings, click HRMS in the top navigation. On the HRMS screen, click the HR EXPENSE card.
HR Expense screen
The HR Expense screen opens with three tabs: Pending Expenses, Approved Expenses, and Rejected Expenses. Use the sections below to work with each tab.
a. Pending Expenses
In the Pending Expenses tab you see all expense claims awaiting approval. You can filter the list using Select Employee and Select customer. Use the green icon to refresh or export the list. For each expense you can take action (e.g. approve or reject) using the action icon in the Action column.
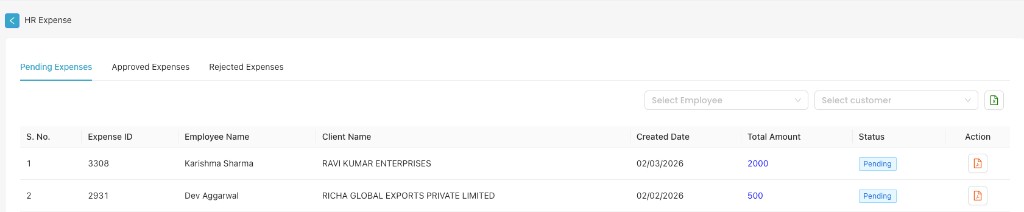
Table columns in Pending Expenses:
| Column | Description |
|---|---|
| S. No. | Serial number |
| Expense ID | Unique identifier for the expense |
| Employee Name | Employee who submitted the expense |
| Client Name | Client or customer linked to the expense |
| Created Date | Date the expense was created |
| Total Amount | Total amount claimed |
| Status | Shows "Pending" for items awaiting approval |
| Action | Icon to view details or approve/reject the expense |
b. Approved Expenses
The Approved Expenses tab shows expenses that have been approved. Here you can Update Payment Status (e.g. mark as PAID), filter by Select Payment Status, Select Employee, and Select customer. The table includes payment details such as Paid Date, Payment Mode, Final Payable Amount, and HR/Emp remarks.
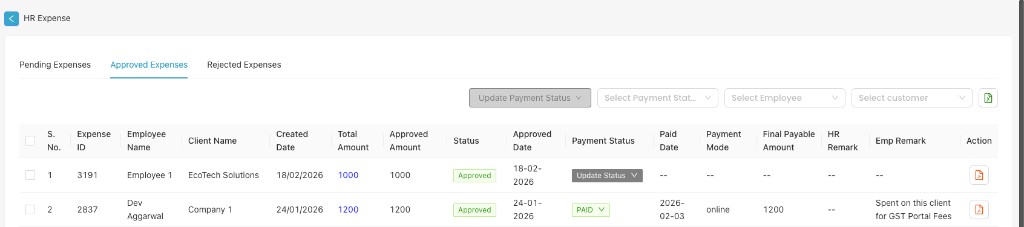
Table columns in Approved Expenses:
| Column | Description |
|---|---|
| S. No. | Serial number (with checkbox for bulk actions) |
| Expense ID | Unique identifier |
| Employee Name | Employee who submitted the expense |
| Client Name | Client linked to the expense |
| Created Date | Date created |
| Total Amount | Total claimed amount |
| Approved Amount | Amount approved by HR |
| Status | Shows "Approved" |
| Approved Date | Date the expense was approved |
| Payment Status | e.g. "Update Status" or "PAID" — use dropdown to update |
| Paid Date | Date payment was made (if paid) |
| Payment Mode | e.g. online, cash |
| Final Payable Amount | Amount to be paid |
| HR Remark | Remarks added by HR |
| Emp Remark | Employee’s remark (e.g. purpose of expense) |
| Action | Icon to view or edit expense details |
c. Rejected Expenses
The Rejected Expenses tab lists expenses that have been rejected. You can filter by Select Employee and Select customer. The green icon can be used to export the list. The table shows Expense ID, Employee Name, Client Name, Created Date, Total Amount, Status (Rejected), Rejected Date, Remark, and Action.

Table columns in Rejected Expenses:
| Column | Description |
|---|---|
| S. No. | Serial number |
| Expense ID | Unique identifier |
| Employee Name | Employee who submitted the expense |
| Client Name | Client linked to the expense |
| Created Date | Date created |
| Total Amount | Total claimed amount |
| Status | Shows "Rejected" |
| Rejected Date | Date the expense was rejected |
| Remark | Reason or remark for rejection |
| Action | Icon to view expense details |