Add Leaves
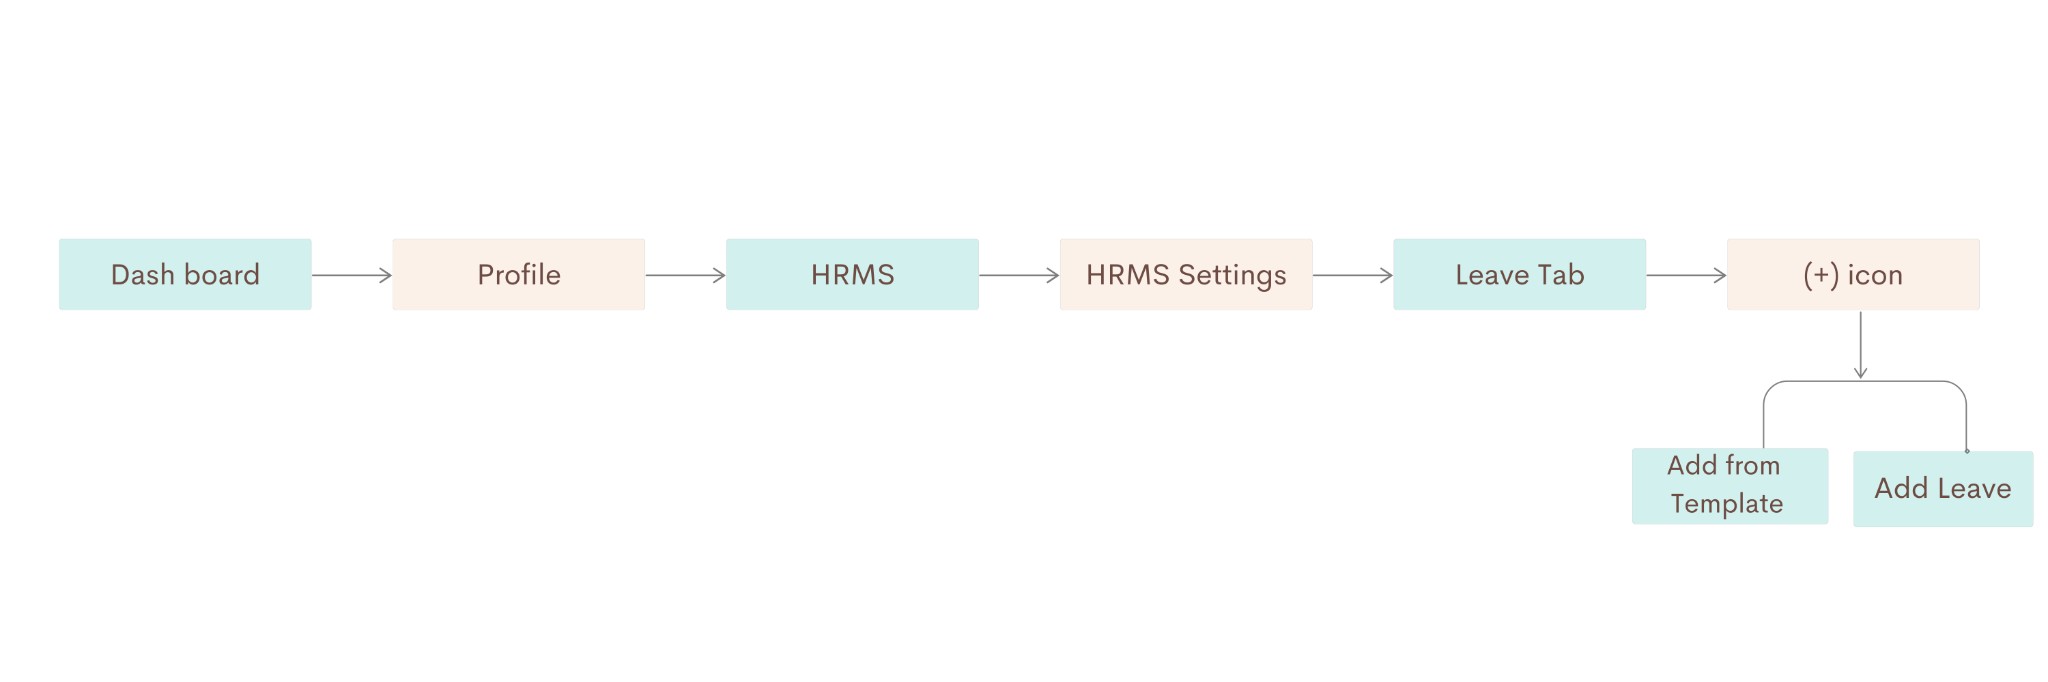
Create and manage leave types such as casual leave, sick leave, earned leave, and other policies. Go to Dashboard → Profile → HRMS → HRMS Setting, open the Leave tab, then click the + icon to Add from template or Add leave.
Path

Step-by-step instructions
Go to Dashboard and select Profile
From the Dashboard, click Profile (user/company icon in the top right) to open profile settings.
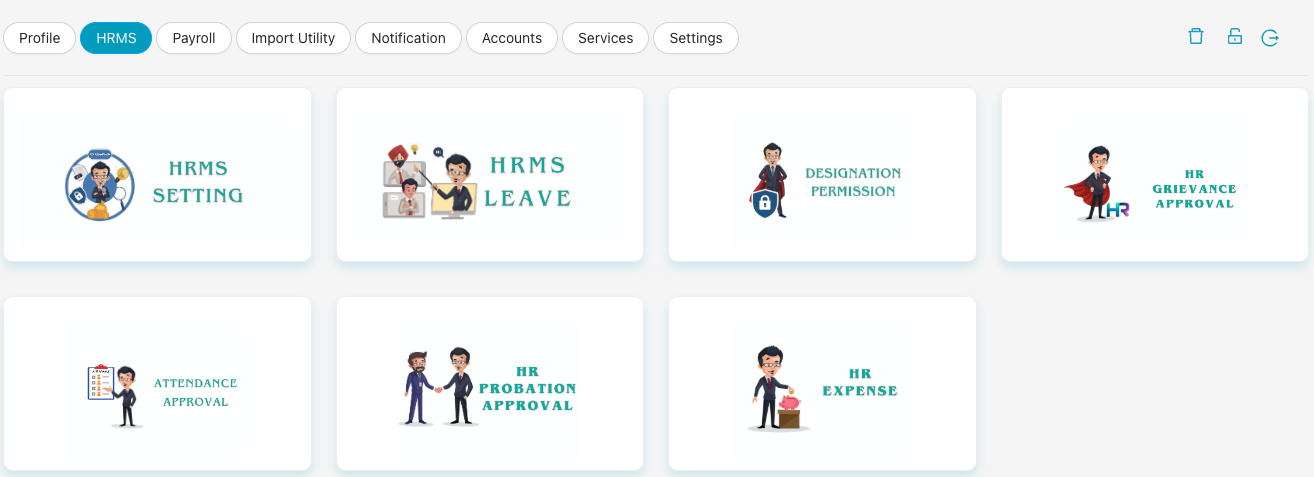
Select HRMS, then HRMS Setting
In the left navigation, click HRMS. On the HRMS page, select the HRMS Setting card (settings/gears icon).
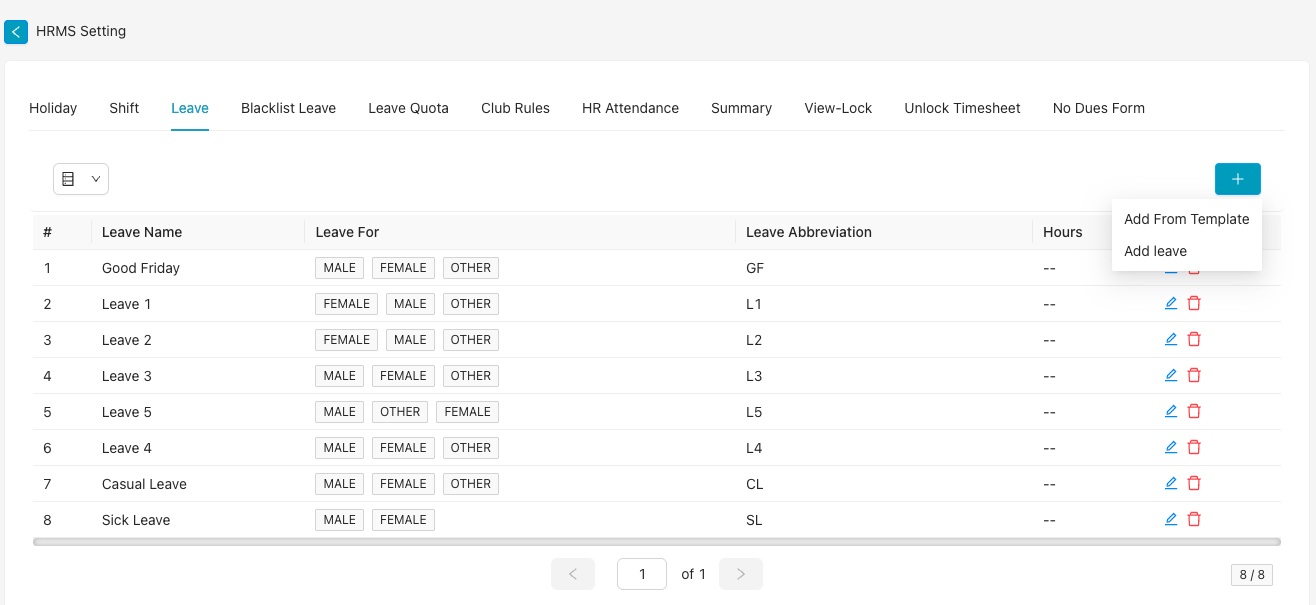
Select Leave tab, then click the + icon
Inside HRMS Setting, click the Leave tab. Then click the blue + button (top right of the leave table). You will see two options: (a) Add From Template — to add from predefined leave templates — and (b) Add leave — to create a new leave type manually.
Add from template / Add leave
(a) Add From Template
Opens the Leave Template modal with a table of predefined leave types. Templates include: Exam Leave (EXL), Sick Leave (SL), Earned Leave (EL), Audit Leave (AL), Tax Filing Leave (TFL), Training Leave (TL), Grace Period (GP), and Optional Holiday (OH). Each row shows Leave Name, Leave For (MALE, FEMALE, OTHERS), Leave Abbreviation, and Hours. Use the action icon on a row to add that template as a new leave type.

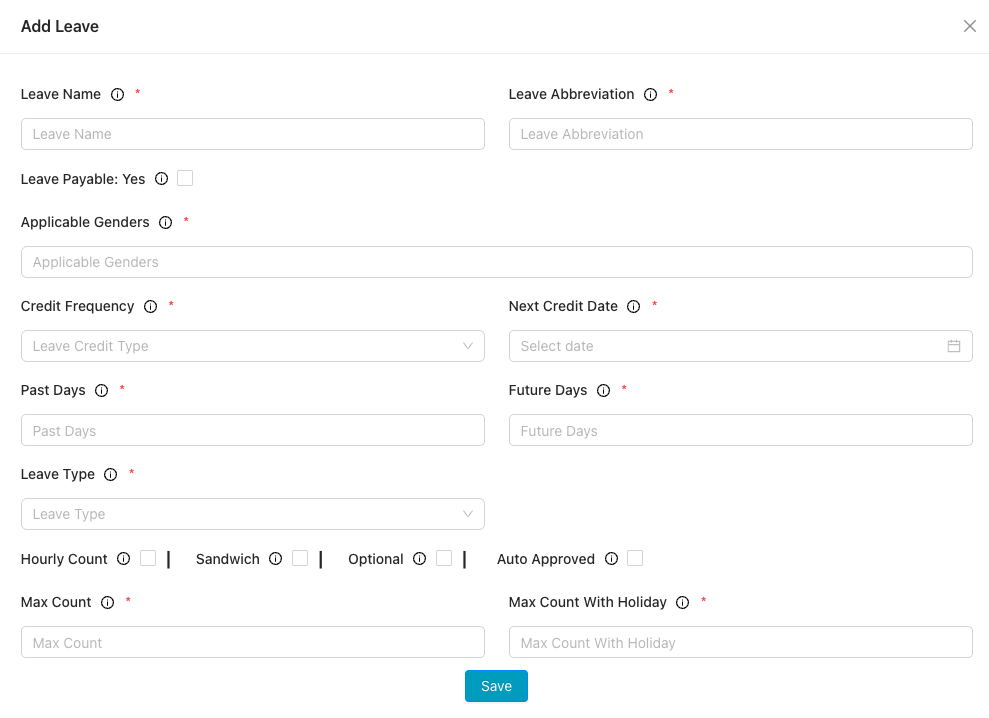
(b) Add leave
Opens the Add Leave form to create a leave type manually. Fill in the required fields (marked with *):
- Leave Name — full name of the leave type
- Leave Abbreviation — short code (e.g. CL, SL)
- Leave Payable: Yes — checkbox if the leave is paid
- Applicable Genders — MALE, FEMALE, OTHERS as needed
- Credit Frequency — leave credit type
- Next Credit Date — date picker
- Past Days, Future Days
- Leave Type — dropdown
- Hourly Count, Sandwich, Optional, Auto Approved — checkboxes as per policy
- Max Count — maximum leave days (required)
- Max Count With Holiday — optional
Click Save to add the leave type.
Video Tutorial
Watch this video for a step-by-step walkthrough of adding leaves in CA Cloud Desk—Dashboard → Profile → HRMS → HRMS Setting → Leave tab, then Add from template or Add leave. You can also use the View PDF Guide button in the left sidebar to open or download the full guide.