Allocate Leaves to Employee
This guide explains how to allocate leaves to employees in two ways. Part A (Manually): create a leave quota in HRMS Setting → Leave Quota (leave type, branch, designation, annual count). Part B (Bulk): use HRMS Leave → Leave Credit/Debit and upload an Excel file to allocate leaves in bulk.
Path
Part A
Create a leave quota by defining leave type, branch, designation, and annual count. After saving, the leave quota setting is created successfully.
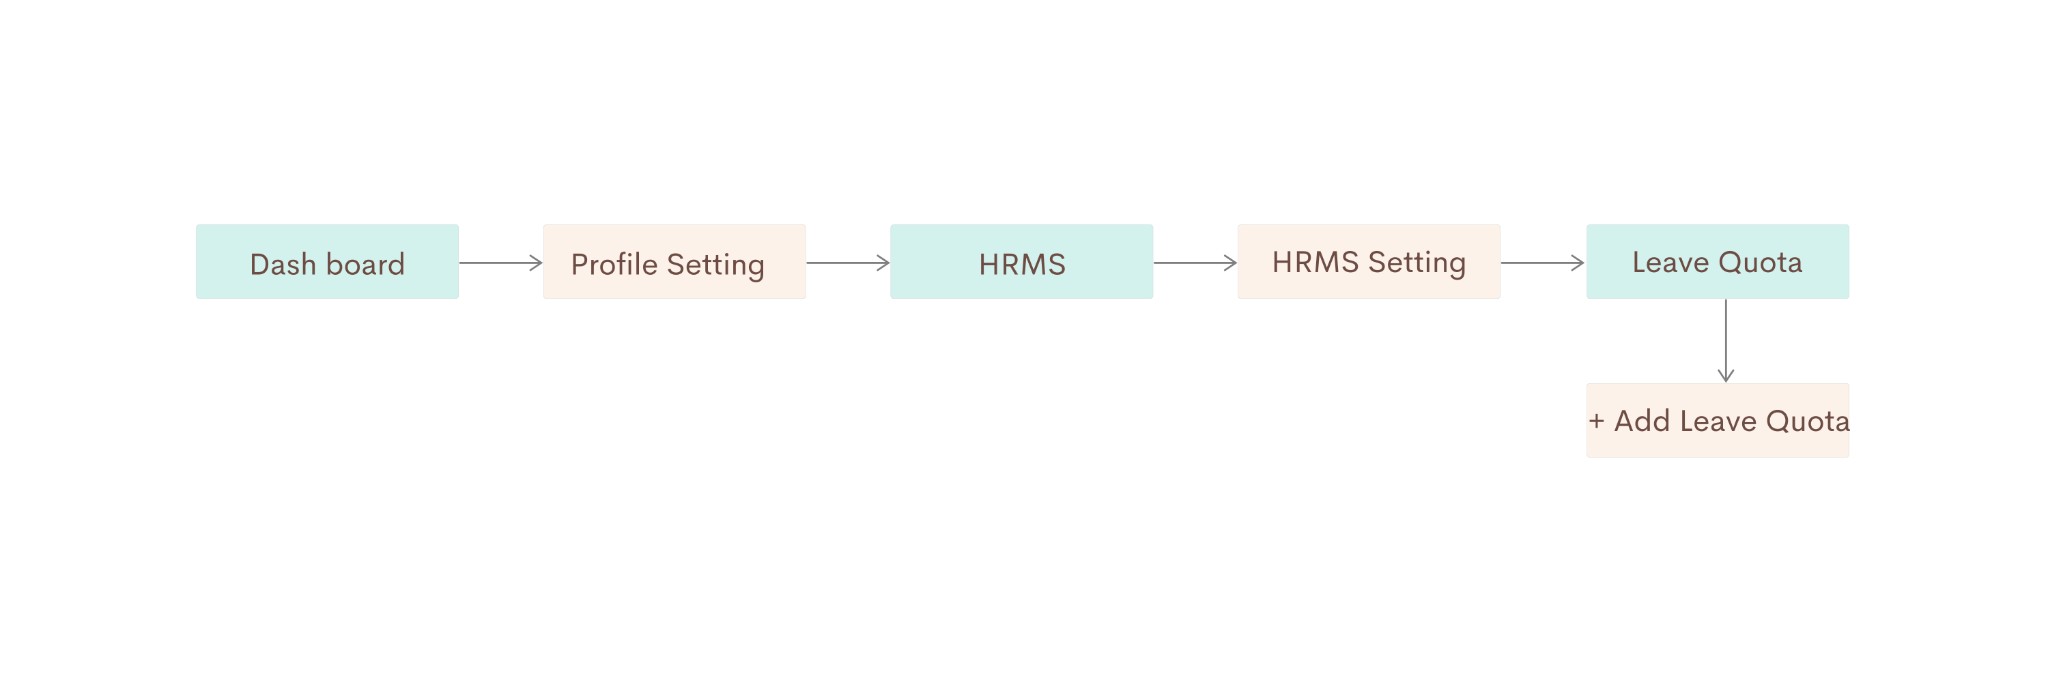
Part A — Dashboard → Profile Setting → HRMS → HRMS Setting → Leave Quota → + Add Leave Quota
Go to Dashboard, then click on Profile setting
Go to the Dashboard, then click on Profile setting (profile icon in the top right) to open your profile and organization settings.
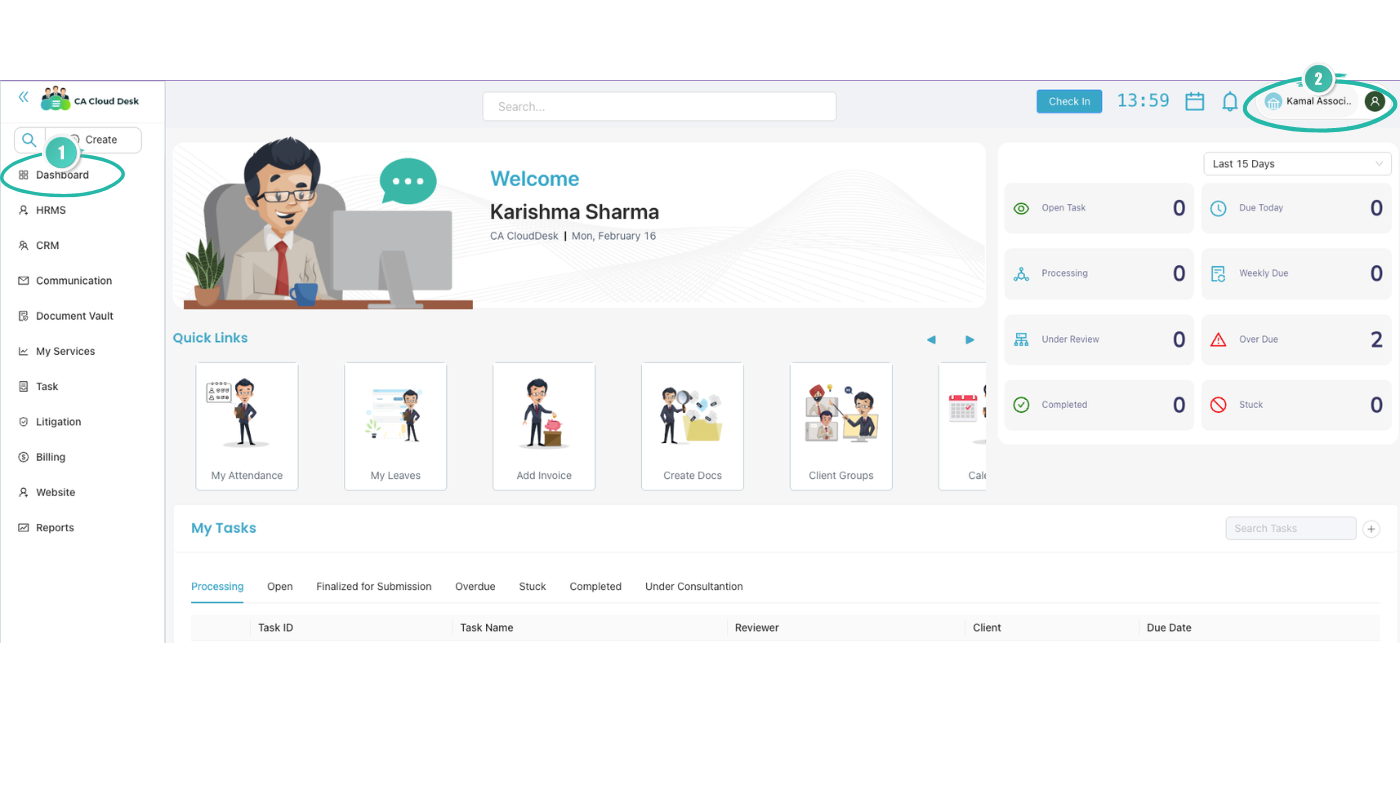
Step 1 — Dashboard; click the profile icon (top right) for Profile setting.
Select HRMS, then select HRMS Setting
Select HRMS, then select HRMS Setting to open HR configuration (designation, leave, shift, holiday, etc.).
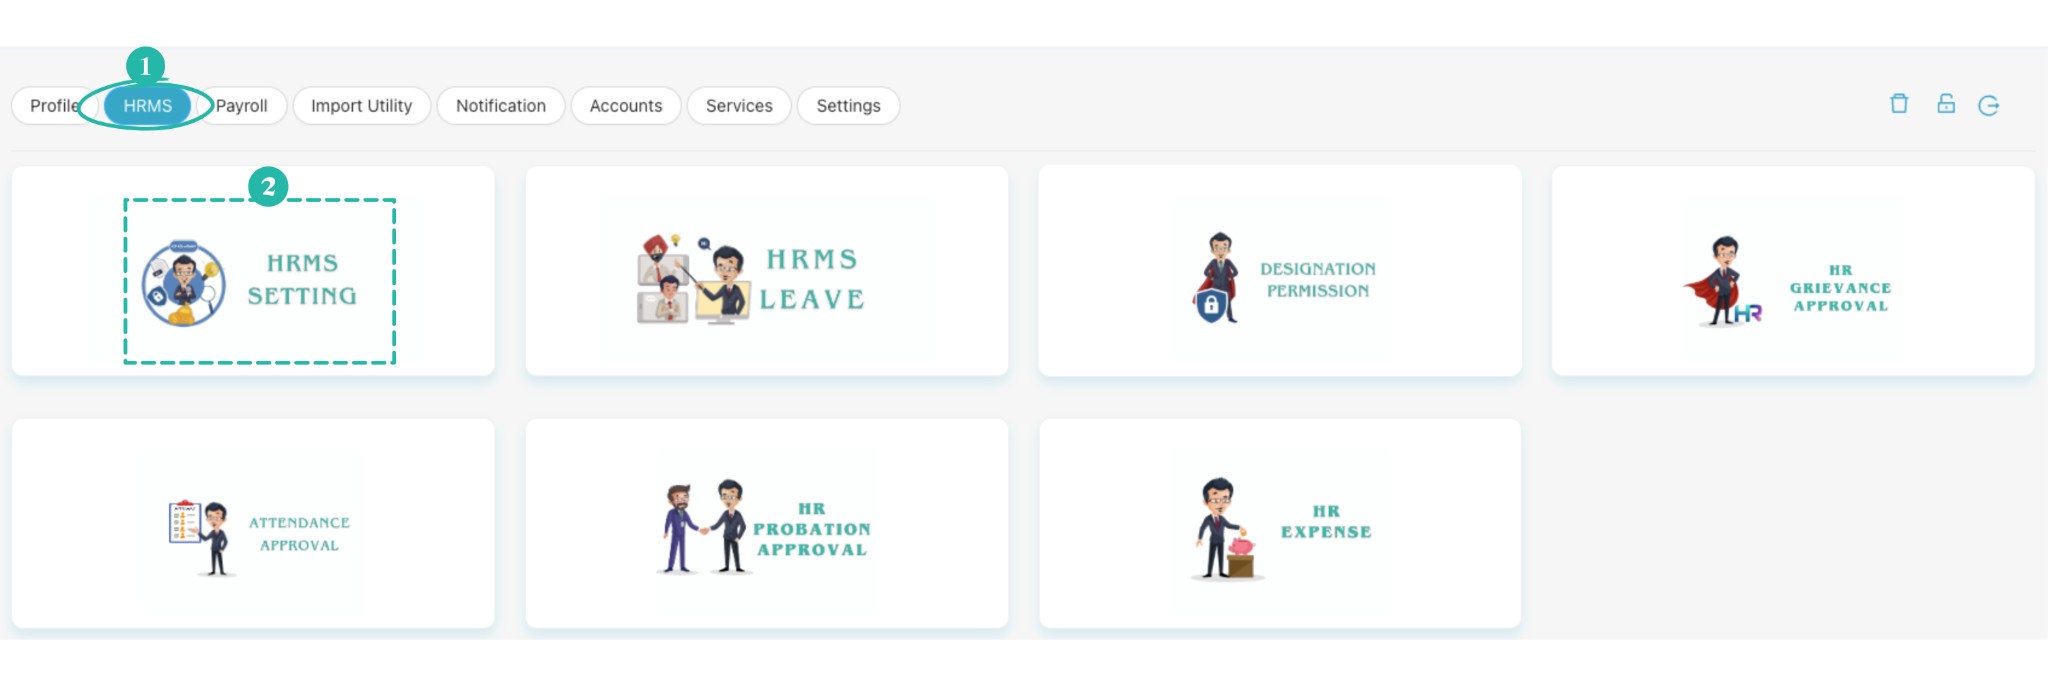
Step 2 — Select HRMS, then click the HRMS SETTING card.
Select Leave Quota, then click the plus icon to add leave quota
Select Leave Quota, then click the + (plus) icon to add a new leave quota.
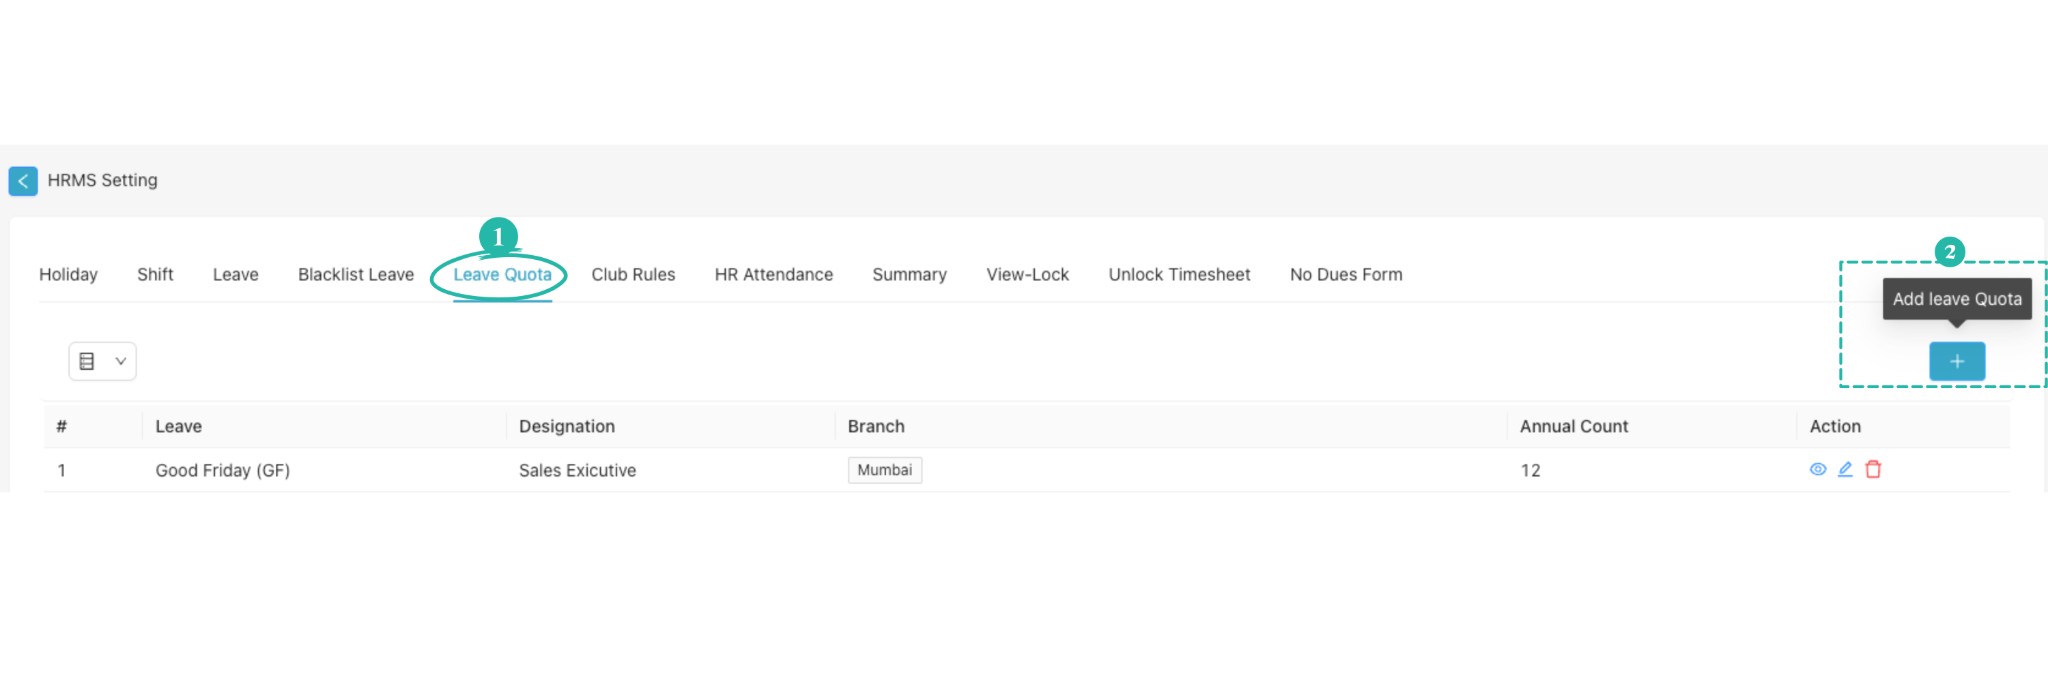
Step 3 — Leave Quota tab; click the blue + button to add a leave quota.
Fill leave type, branch, designation, annual count, then Save
Fill Leave type, Branch, Designation, and Annual count, then click Save.
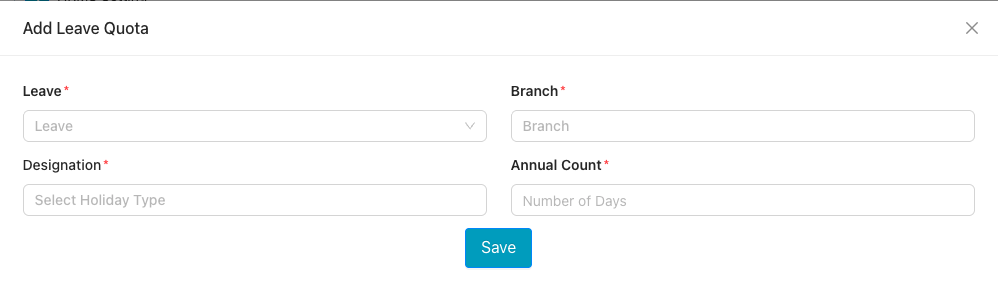
Step 4 — Add Leave Quota form; fill Leave, Branch, Designation, Annual Count, then Save.
Part B
Allocate leaves to employees in bulk by uploading an Excel file. Use HRMS Leave → Leave Credit/Debit, then the plus icon beside the Remarks column to download the sample file and upload your data.

Part B — Dashboard → Profile Setting → HRMS Leave → Leave Credit/Debit
Go to Dashboard, then click on Profile setting
Go to the Dashboard, then click on Profile setting (profile icon in the top right) to open your profile and organization settings.

Step 1 — Dashboard; click the profile icon (top right) for Profile setting.
Select HRMS, then select HRMS Leave
Select HRMS, then select HRMS Leave (not HRMS Setting). This opens the leave management screen with options such as View Leave, Comp Off, Leave Credit/Debit, and others.
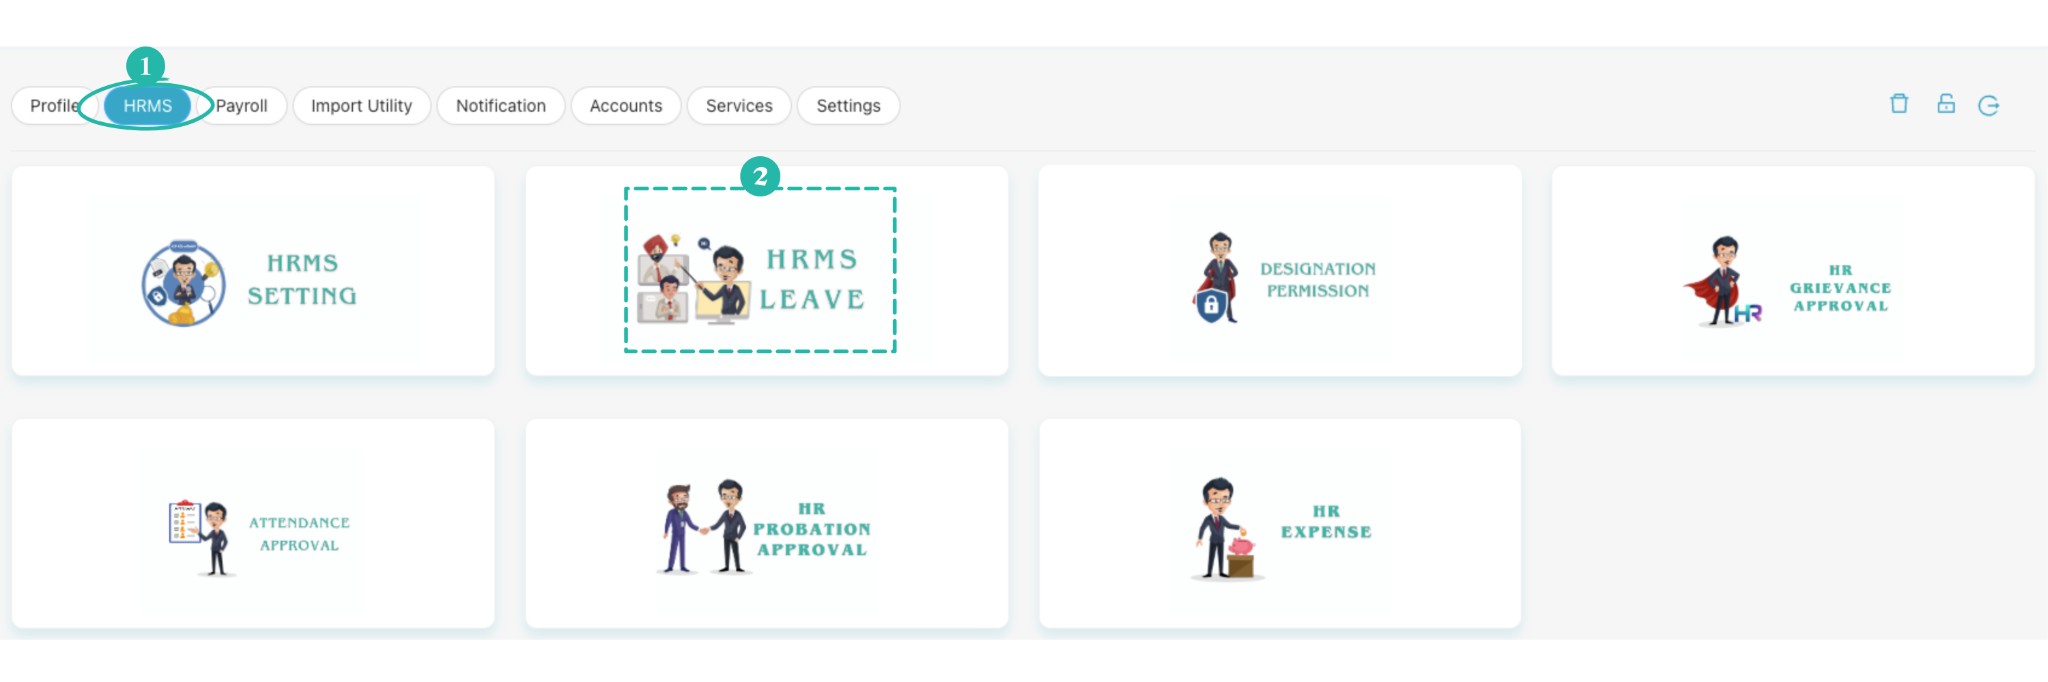
Step 2 — Select HRMS, then click the HRMS LEAVE card.
Select Leave Credit/Debit
Under HRMS Leave, select the Leave Credit/Debit tab. You will see options to select an employee, choose Credit or Debit, enter remarks, and manage leave counts by type.
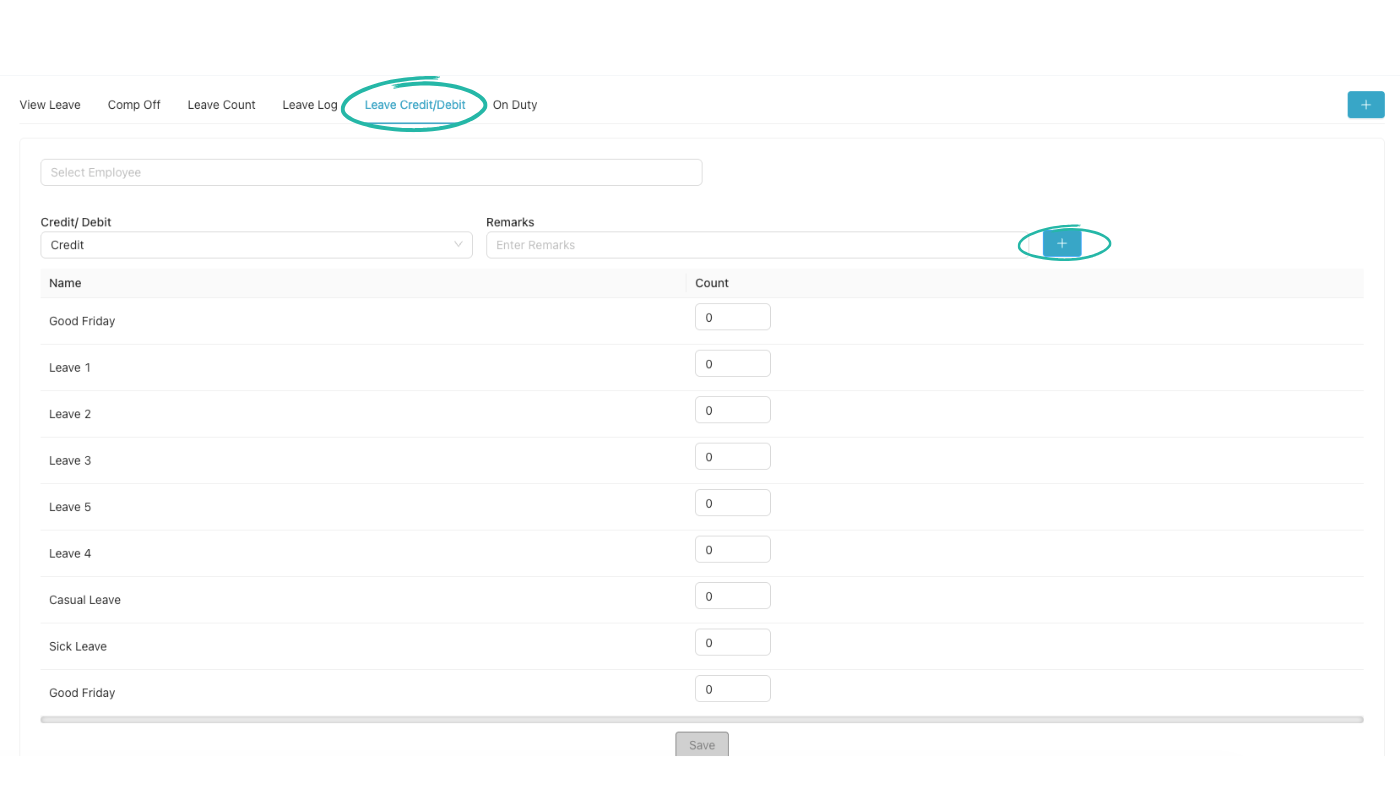
Step 3 — Leave Credit/Debit tab; use the + icon beside Remarks for bulk upload.
Bulk upload via plus icon, then Save
Click the plus icon (+) beside the Remarks column to open the bulk upload option. You can:
- Download the sample Excel file and follow the guidelines in it to prepare your data.
- Fill the Excel file with employee leave allocation details as per the sample.
- Click to upload your prepared Excel file.
- Enter Remarks (if required), then click Save.
Leave allocations will be applied in bulk according to your uploaded file.
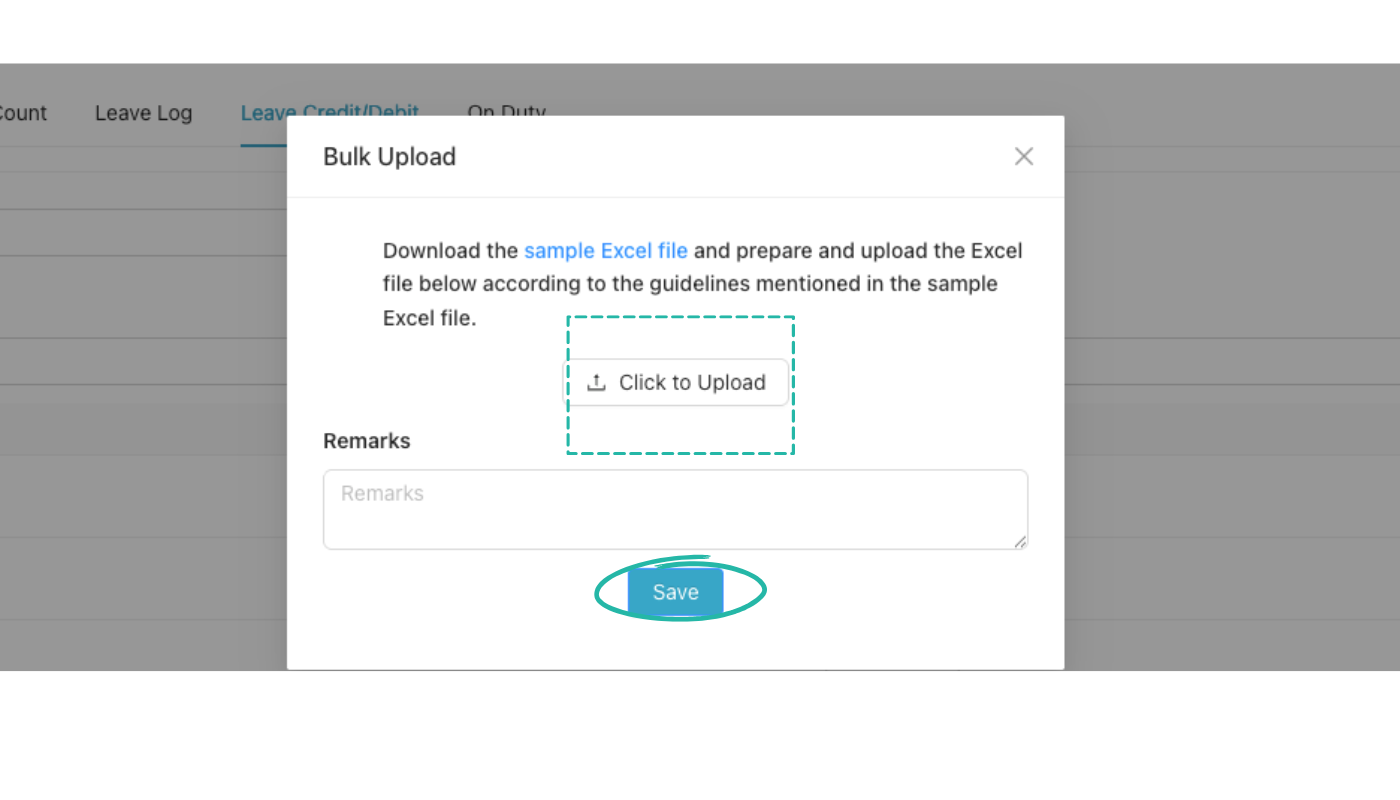
Step 4 — Bulk Upload: download sample Excel, prepare your file, click to upload, add remarks, then Save.
Video Tutorial
Watch this video for a step-by-step walkthrough of allocating leaves to employees in CA Cloud Desk—Part A (Leave Quota) and Part B (Bulk via Leave Credit/Debit). You can also use the View PDF Guide button in the left sidebar to open or download the full guide.