Add Tasks in CA Cloud Desk
Create new tasks, assign them to team members, and set priorities and deadlines. Use the + icon for Quick Task or open the full Create Task form to enter all details.
Path
How to add a task
Log in to CA Cloud Desk and select Task from the left navigation. On the Task Dashboard, click the + icon and choose Quick Task Add for a fast entry, or Create Task for the full form. Fill in the required details and click Save or Create Task to assign the task.
Getting Started
Log in and open the Task module.
Step 1
- Log in to CA Cloud Desk
- From the left navigation menu, select Task
- Click on Tasks
Step 2
- Click the + icon on the Task Dashboard
- Select Quick Task Add for a fast entry, or
- Select Create Task for the full form
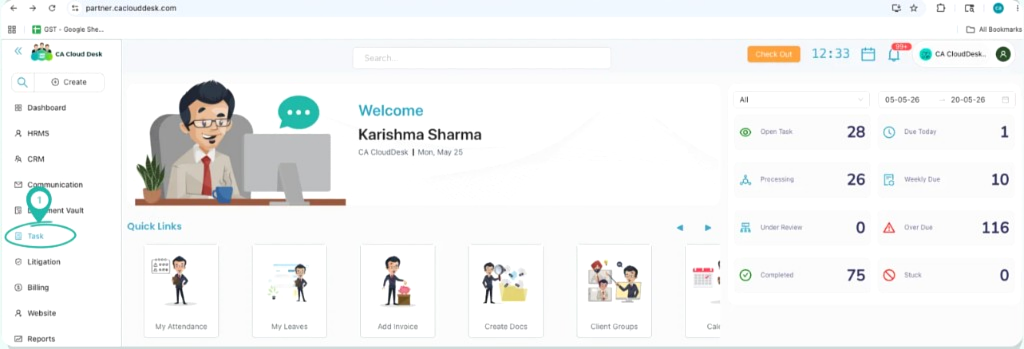
Log in to CA Cloud Desk. From the left navigation menu, select Task to open the Task Dashboard.
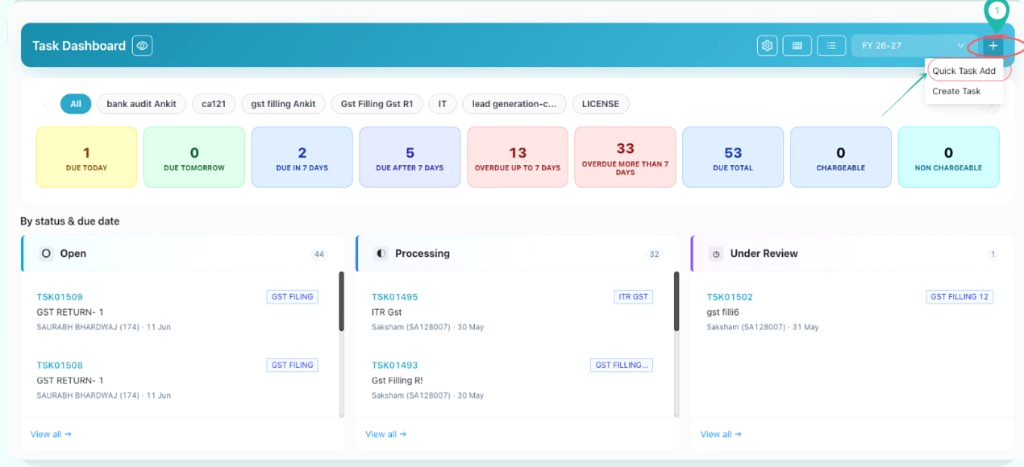
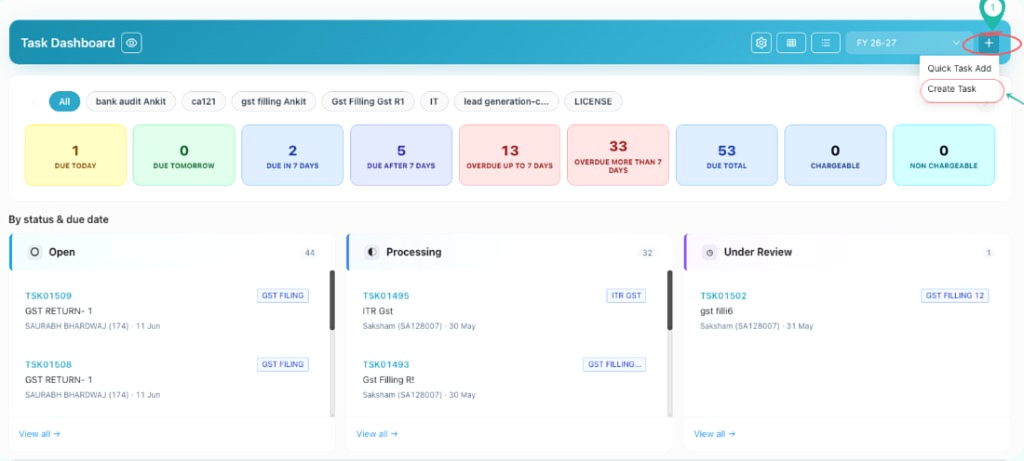
On the Task Dashboard, click the + (Plus) icon in the top-right corner. Choose Quick Task Add for a fast entry, or Create Task to open the full task form.
Quick Task
Add a task quickly using the Quick Task window.
In the Quick Task Add window, fill in the required details — Service, Task name, Customer, Assignee, and Reviewer. Use the + button next to Customer to add a new customer if needed.
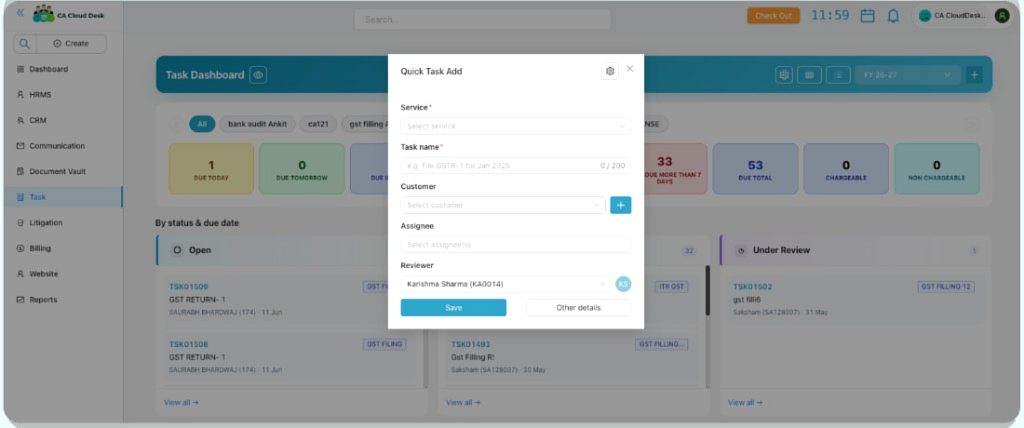
After entering the quick task details, click Save to create the task. Click Other details to open the full Create Task form with additional fields.
Create Task
Enter full task details in the Create Task form.
Fill in all required task information — Service and Sub-Service, Task Title, dates, Assignee, Reviewer, Consultant, Client(s), Followers, Priority, Branch, Task Occurrence, workflow Stages, and Task Status. Add optional Details, Subtasks, and Attachments if needed. Once all details are entered, click Create task to save and assign the task.
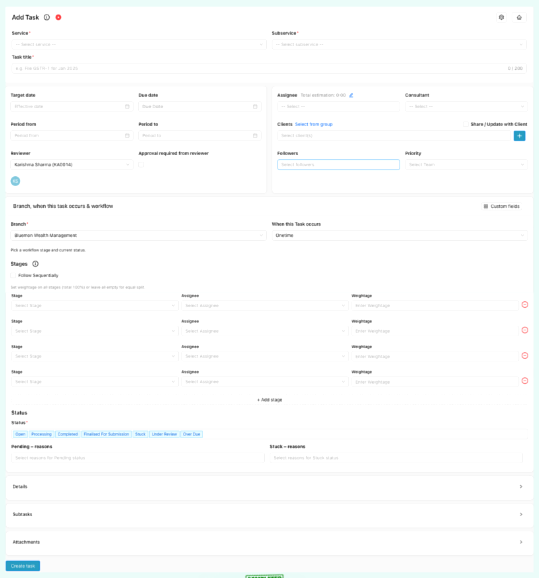
Task created successfully
The task will be successfully created and assigned to the selected team members, enabling progress tracking, workflow management, and status updates within CA Cloud Desk.