Task Setup in CA Cloud Desk
Configure task module settings, default values, and practice-wide task preferences. Set up Master Services and Sub-Services with workflow stages, billing settings, and notification preferences.
Path
How to set up tasks
Log in to CA Cloud Desk, select Task from the left navigation, then open Settings and choose Master Services. Add or select a Master Service, configure Sub-Services with workflow and billing settings, and click Save Changes.
Getting Started
Log in, open the Task module, then access Master Services from Settings.
Step 1
- Log in to CA Cloud Desk
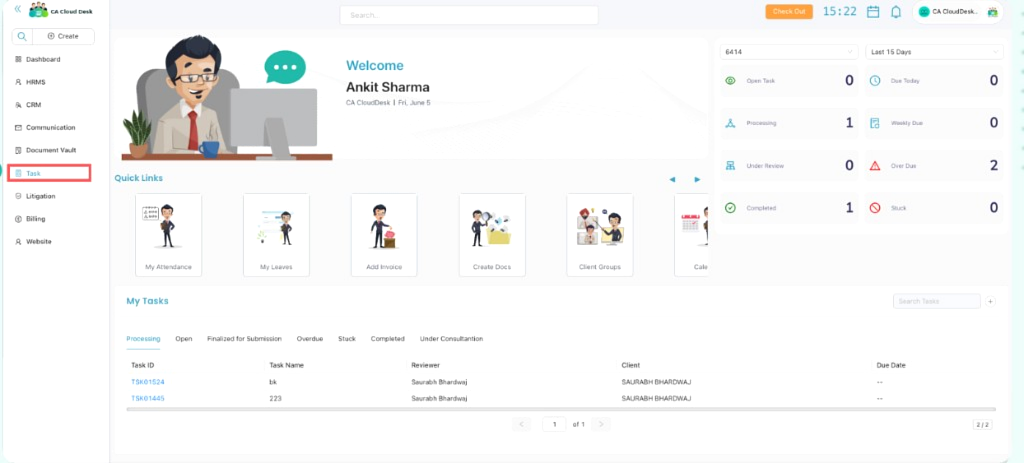
- From the left navigation menu, select Task
Step 2
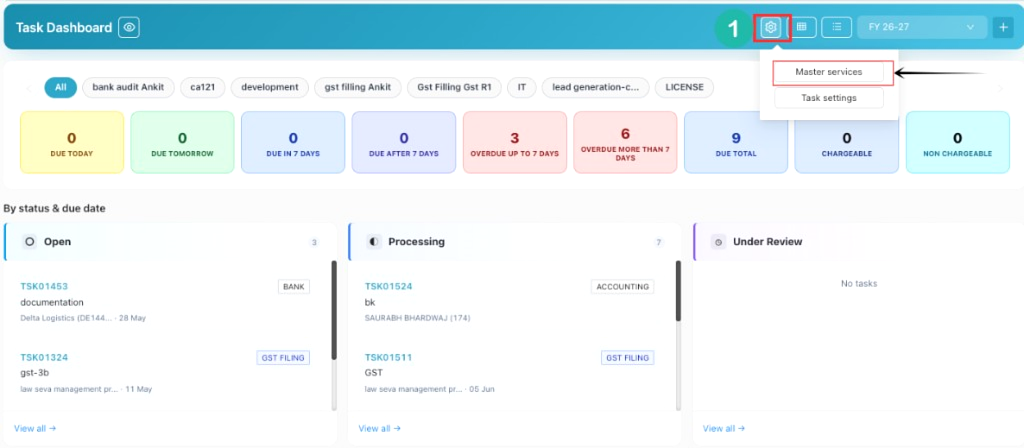
- Click the Settings (gear) icon on the Task Dashboard
- Select Master Services from the dropdown menu
Log in to CA Cloud Desk. From the left navigation menu, select Task to begin the setup process.
On the Task Dashboard, click the Settings icon, then select Master Services from the menu.
Master Service & Sub-Service
Add or select a Master Service, then configure Sub-Service details and save.
Step 3
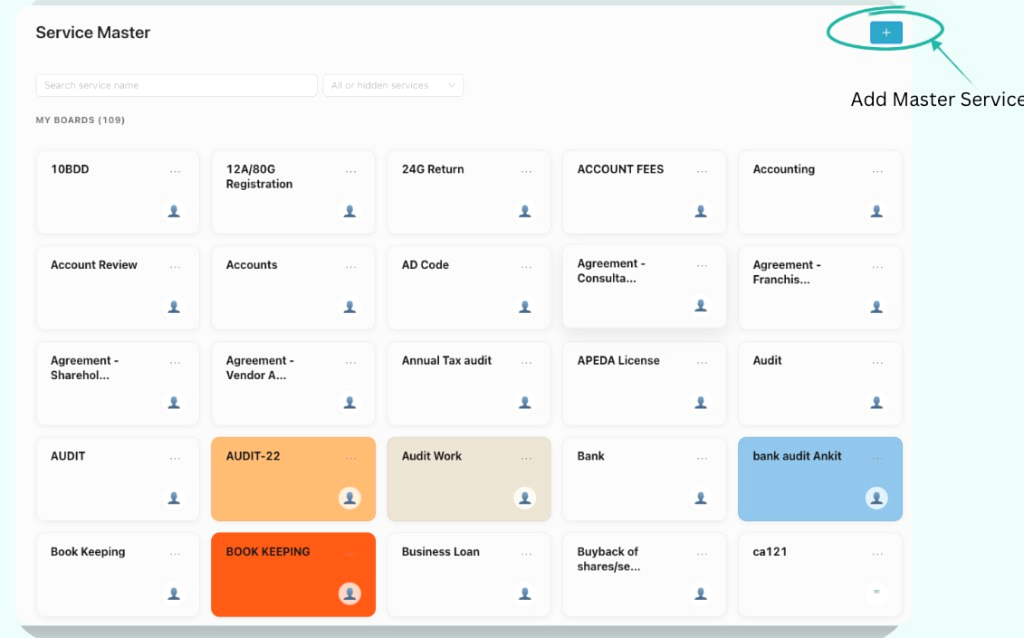
- Select an existing Master Service from the list, or click Add Master Service to create a new one
- Choose a suggested board template, or Create services from scratch
Step 4
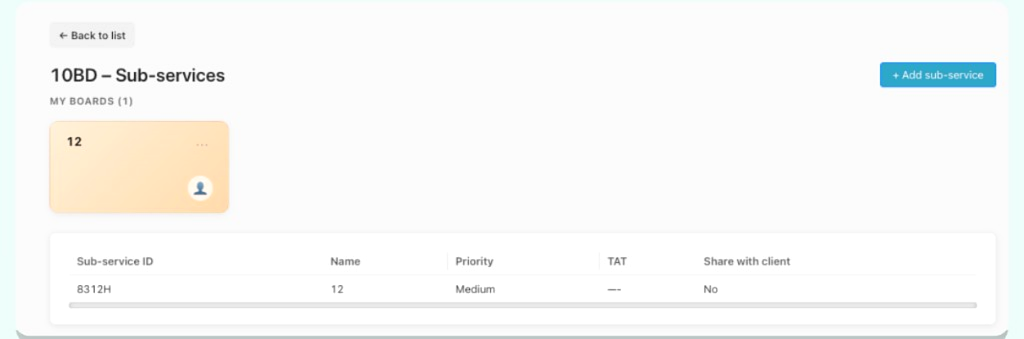
- Click Add Sub-Service (+) to create a new sub-service entry
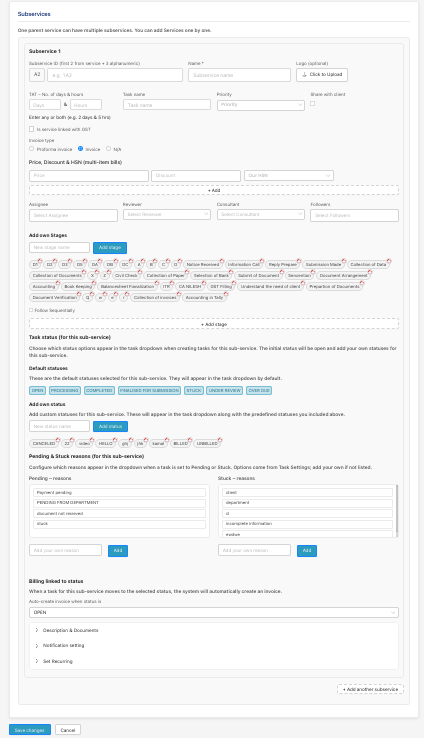
- Fill in the required details such as name, priority, and TAT
Select an existing Master Service from the Service Master list, or click Add Master Service to create a new one.
Choose a Suggested board template (e.g. GST Filling, Audit, ITR), or click Create service from scratch to build a custom service.
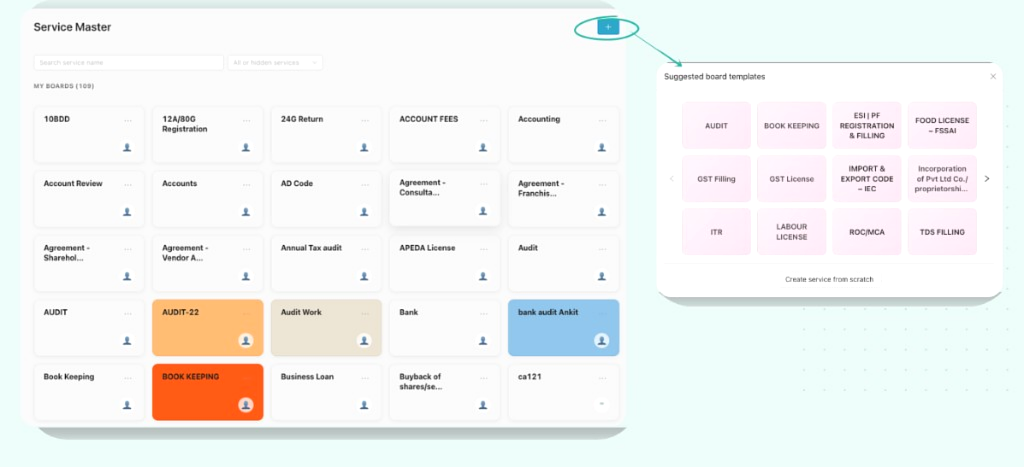
Click Add Sub-Service (+) to create a new sub-service entry. Fill in the required details such as name, priority, and TAT.
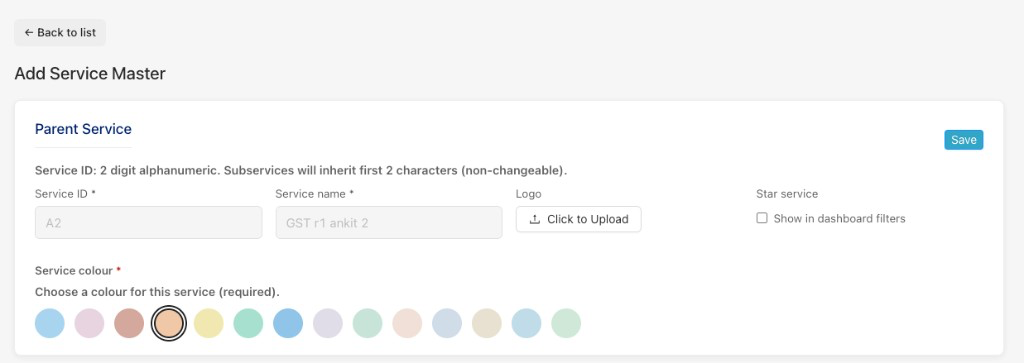
On the Add Service Master form, enter Parent Service details (when creating a new Master Service), then complete Subservice fields — assignees, stages, and billing options.
Save Configuration
Save the service configuration to enable task creation.
Service configuration saved
Result: The Master Service and its Sub-Services will be successfully created and available for task creation, workflow management, billing, and tracking within CA Cloud Desk.