CA CloudDesk Logo
CA Cloud Desk

Task Billing in CA Cloud Desk

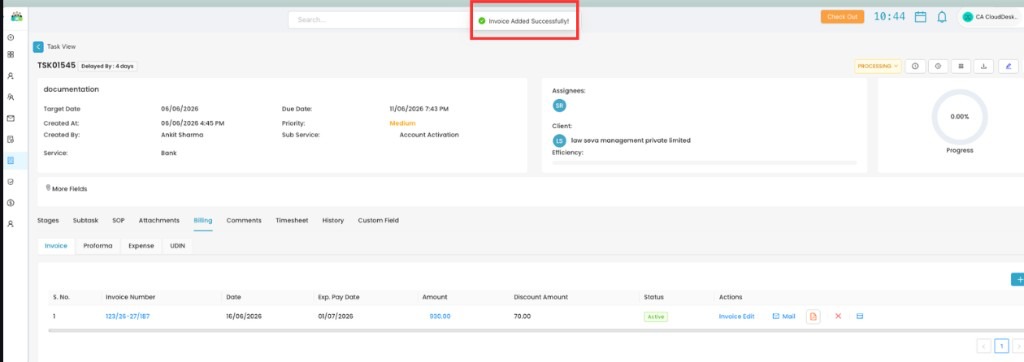
Bill tasks by adding billing details while creating a new task, or open an existing task and create an invoice from the Billing tab. After billing is complete, you will see Invoice Added Successfully!

Path

DashboardTaskCreate Task / Open TaskBillingInvoice
Two ways to bill tasks

Method A — Billing while Creating Task: From the Dashboard, select Task → click the Plus icon (+) and choose Create Task → fill in the Billing section in the task creation form.

Method B — Billing After Creating Task: Select Task from the Dashboard → open any particular task → select the Billing option → fill in invoice details and click Add Invoice.

Method A — Billing while Creating Task

Add billing details directly in the task creation form when you create a new task.

Billing while creating — steps

  • Log in to CA Cloud Desk and select Task from the Dashboard
  • Click the Plus icon (+) and select Create Task
  • In the Add Task form, expand Billing and fill in billing details as needed
Step 1: Log in and select Task

Log in to CA Cloud Desk. From the CA Cloud Desk Dashboard, select the Task module.
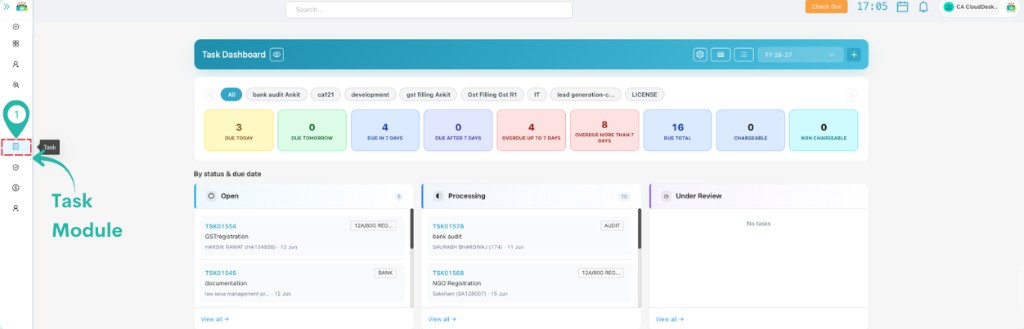
Task Dashboard with Task module annotated in the left navigation
Dashboard — select Task module (Method A, Step 1).
Step 2: Create New Task

Click on the Plus icon (+) and then select Create Task.
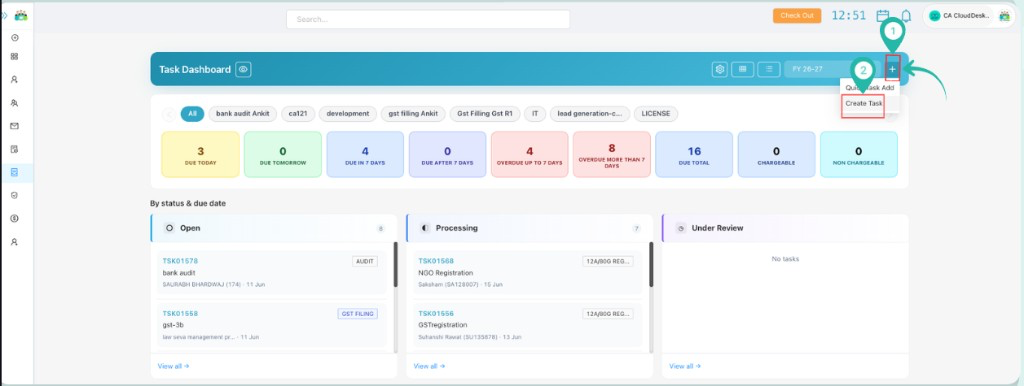
Task Dashboard with Plus icon and Create Task option highlighted
Task Dashboard — click + and select Create Task (Method A, Step 2).
Step 3: Add Task with Billing

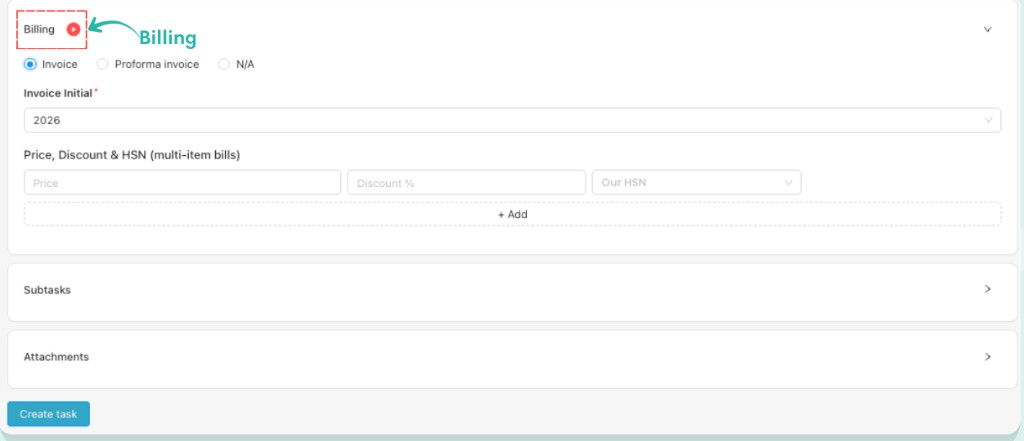
While creating a task, you can also do Billing directly from the task creation form. Fill in task details first, then expand Billing and enter invoice type, Invoice Initial, price, discount, and HSN details as needed.
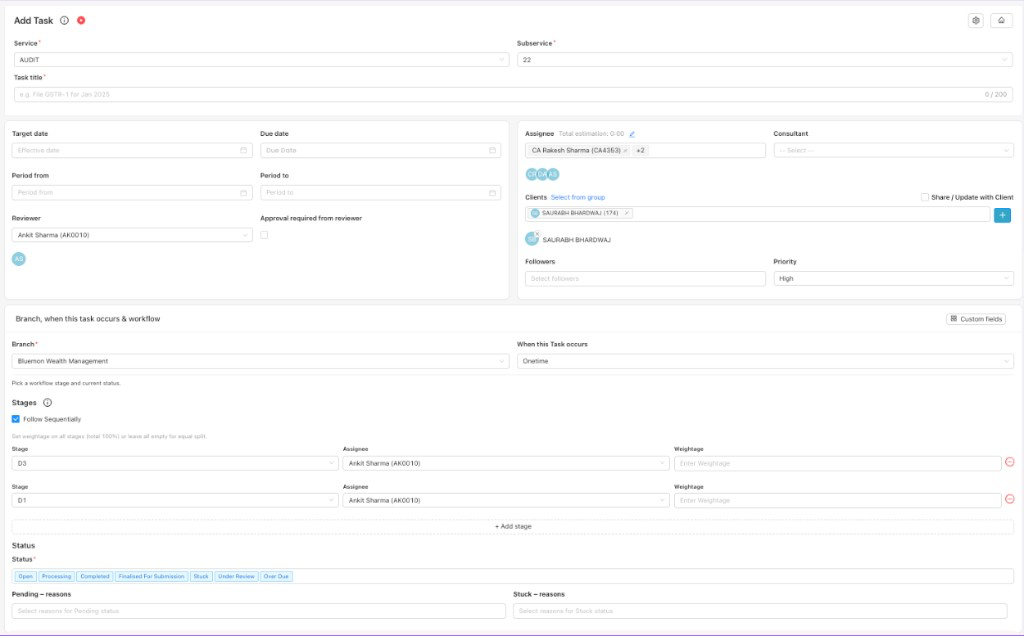
Add Task form with Service, dates, assignees, stages, and status fields
Add Task form — enter task details before billing (Method A, Step 3).
Billing section expanded with Invoice type, Invoice Initial, and price fields
Add Task form — expand Billing and fill in details (Method A, Step 3).

Method B — Billing After Creating Task

Create an invoice for a task that already exists by opening the task and using the Billing tab.

Billing after creating — steps

  • Select Task from the Dashboard, then open any particular task
  • Select the Billing option from the opened task
  • Fill in invoice details and click Add Invoice — you will see Invoice Added Successfully!
Step 1: Select Task Module

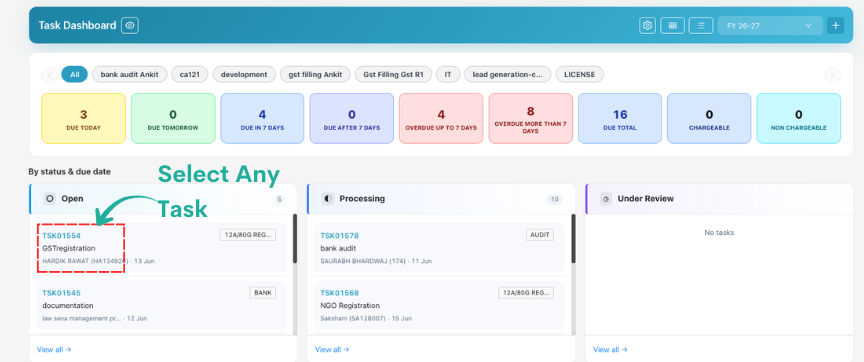
Select Task module from the CA Cloud Desk Dashboard, then select any particular Task.
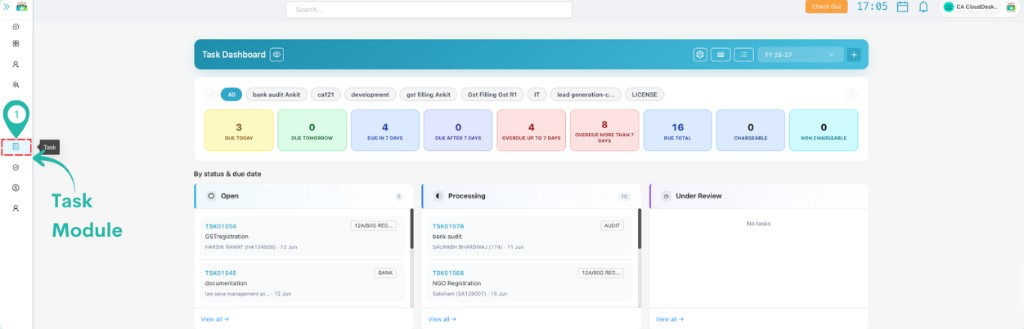
Task Dashboard with Task module annotated in the left navigation
Dashboard — select Task module (Method B, Step 1).
Task Dashboard with Select Any Task annotation on a task card
Task Dashboard — select any particular Task (Method B, Step 1).
Step 2: Select Billing

Select the Billing option from the particular opened task, then click the + icon to add a new invoice.
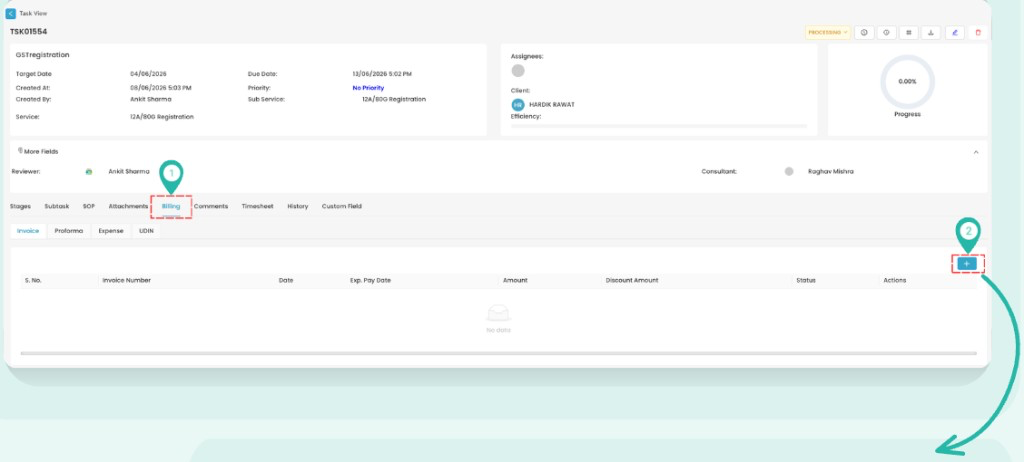
Opened task with Billing tab and plus button annotated
Opened task — select Billing tab, then click + (Method B, Step 2).
Step 3: Fill in Invoice Details

Fill in the following details of Invoice to do billing after the task — Branch, Invoice Date, Team, Exp. Pay Date, line items (Price, Task HSN, Discount, Description), and Invoice Initial. Click Add Invoice when done. After billing is complete, the popup Invoice Added Successfully! will appear.
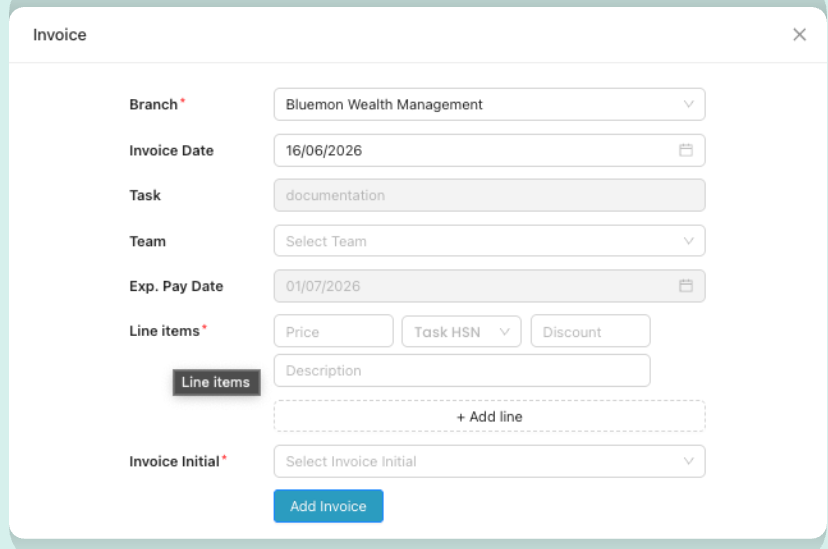
Invoice form with Branch, dates, line items, and Add Invoice button
Invoice form — fill in details and click Add Invoice (Method B, Step 3).
Task view showing Invoice Added Successfully message and invoice list
Invoice Added Successfully! — billing saved (Method B, Step 3).
Invoice Added Successfully

Your invoice has been added to the task. You can view it under the Billing tab with invoice number, date, amount, and status.

Task Billing Guide PDF

Scroll to read each page below, or use Download PDF above.