Task Timesheet in CA Cloud Desk
Track time spent on tasks using the built-in timer. Open a task from the Task Dashboard, start the timer while you work, stop it when finished, add remarks, and save your timesheet entry.
Path
How time tracking works
From any opened task, locate the Start Timer option and click it to begin tracking time. Once the task is completed, click Stop Timer, add your Remarks, and click OK to save the timesheet entry.
Getting Started
Log in and open the task you want to track time on.
Step 1
- Log in to CA Cloud Desk
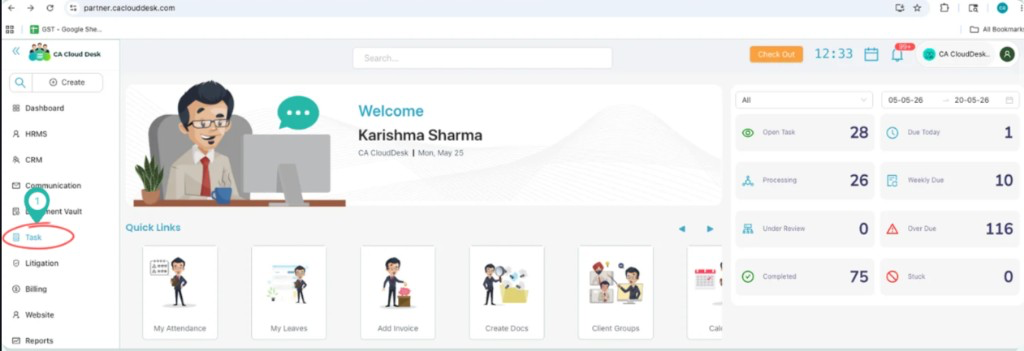
- From the CA Cloud Desk left navigation menu, select Task
Step 2
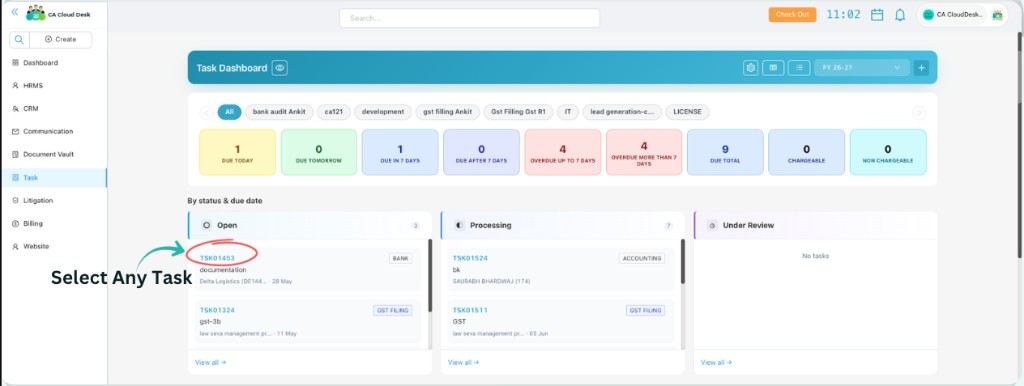
- From the Task Dashboard, open any particular Task
- Select any task you want to track time on
Log in to CA Cloud Desk. From the CA Cloud Desk left navigation menu, select Task.
From the Task Dashboard, open any particular Task.
Start Timer
Locate the timer option on the opened task and start tracking your work time.
From any particular opened task, locate the Start Timer option.
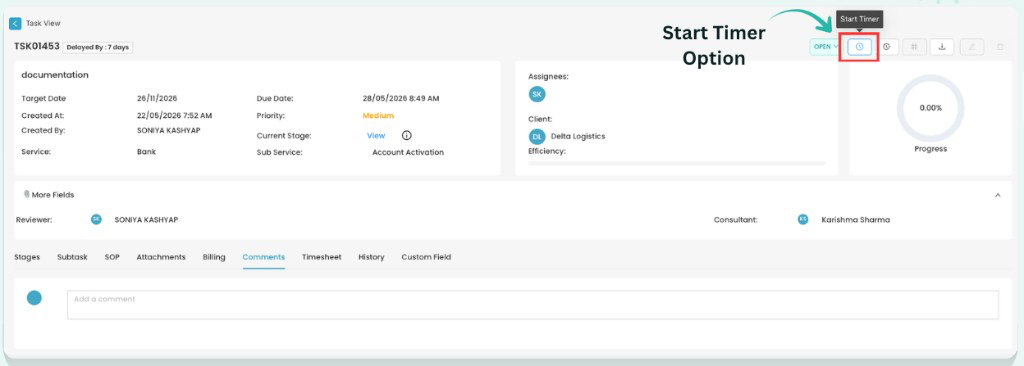
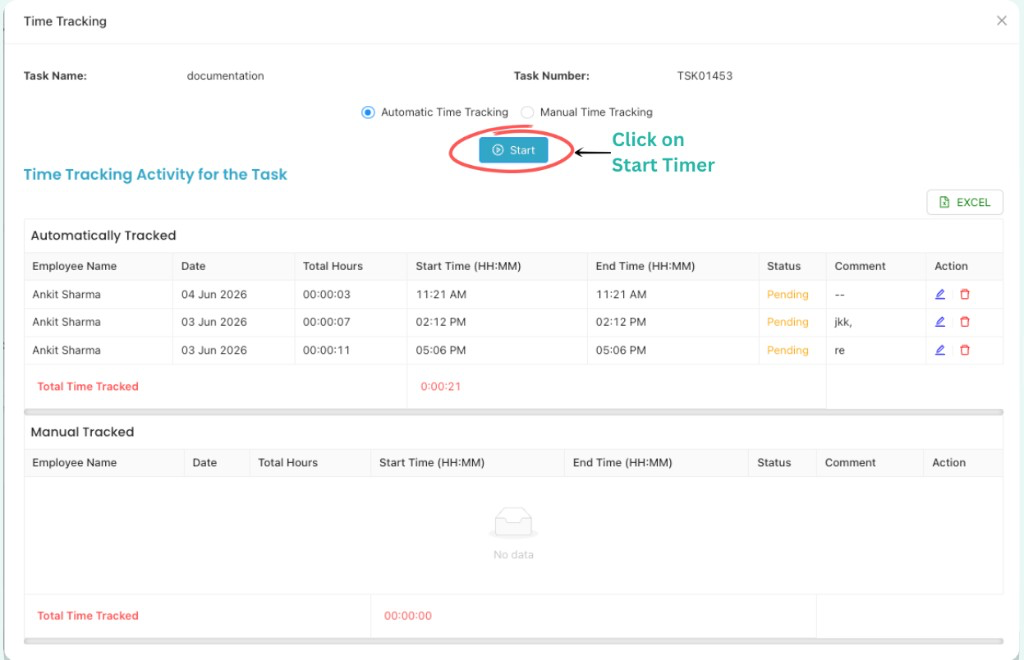
Click on Start Timer to begin tracking time for the task. In the Time Tracking window, choose Automatic or Manual tracking, then click Start.
Stop & Save
When your work is complete, stop the timer, add remarks, and save the timesheet entry.
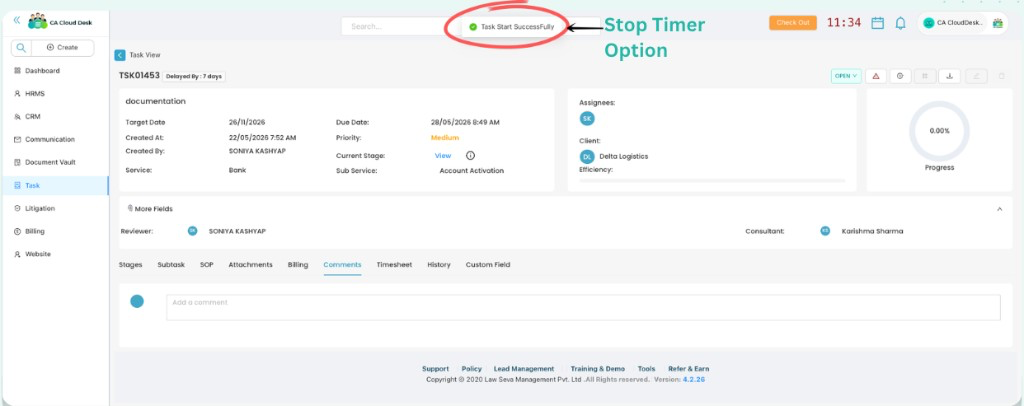
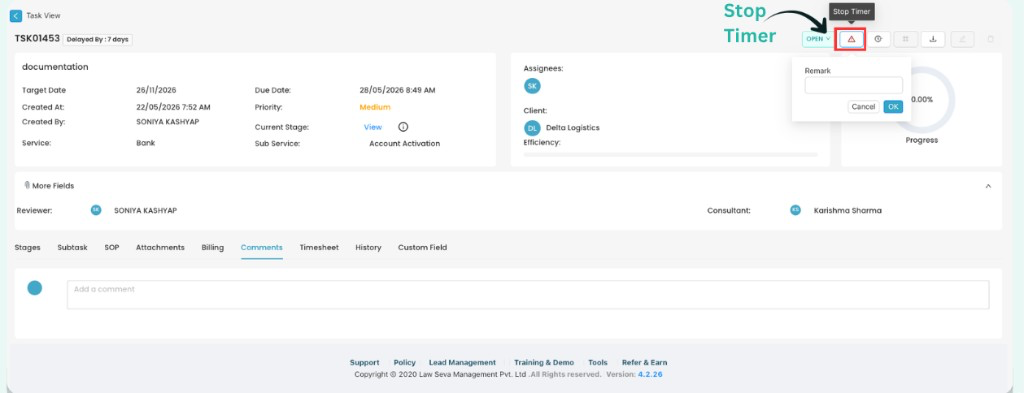
Once the task is completed, click on Stop Timer. After the timer starts successfully, the stop control appears on the task action bar.
After stopping the timer, add the Remarks in the popup and then click OK.
The timer has been stopped and the timesheet entry is saved with your Remarks.
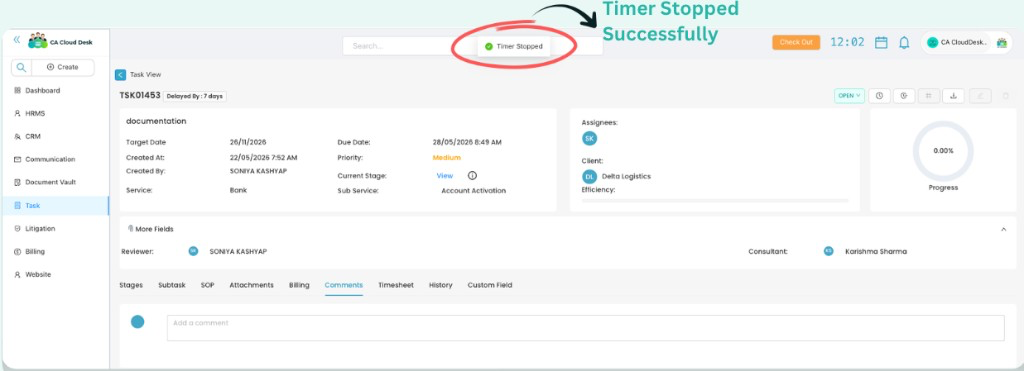
Timer Stopped Successfully
The timer has been stopped and the timesheet entry is saved with your remarks. Your tracked time is now recorded against the task.